
The Art of Folding Sliced Meat
Why It Elevates Your Presentation
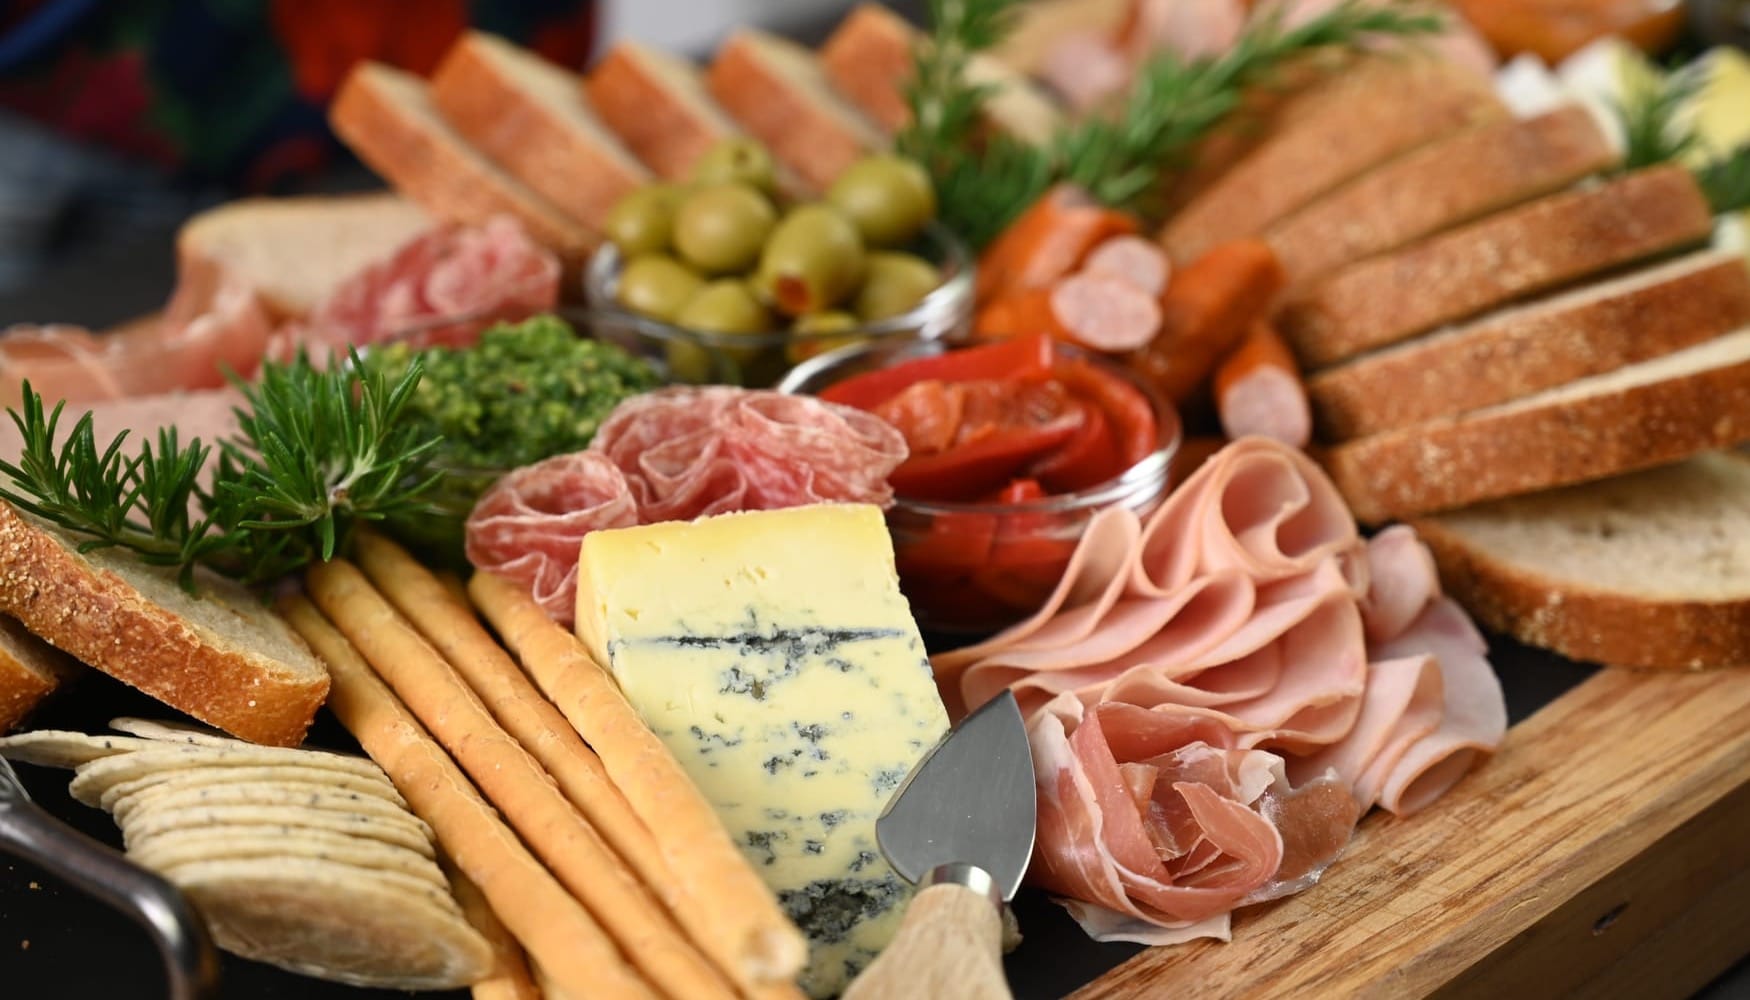
When it comes to creating a beautiful charcuterie board, antipasto platter, or anything featuring sliced meats, it’s not just about the quality of the meat. How it's presented is important too. Of course, using great meat matters, but even the most expensive cuts can look unappealing if presented poorly.
That’s where the art of folding meat comes in. It’s one of the simplest yet most effective ways to elevate your food presentation whether on platters, in filled sandwich rolls, decorative open Danish sandwiches, or canapés. It's a small detail, but one that completely transforms the look of your platter. Instead of laying slices flat, a fold, twist, or roll adds height, texture, and elegance, instantly turning everyday deli meats into something special.
In this guide, I’ll show you why decorative folding makes such a difference, with plenty of examples and step-by-step photos for some of the trickier techniques. From easy folds to show-stopping rosettes, you’ll learn how to make your meats the star of any platter and give your presentation that extra wow factor.
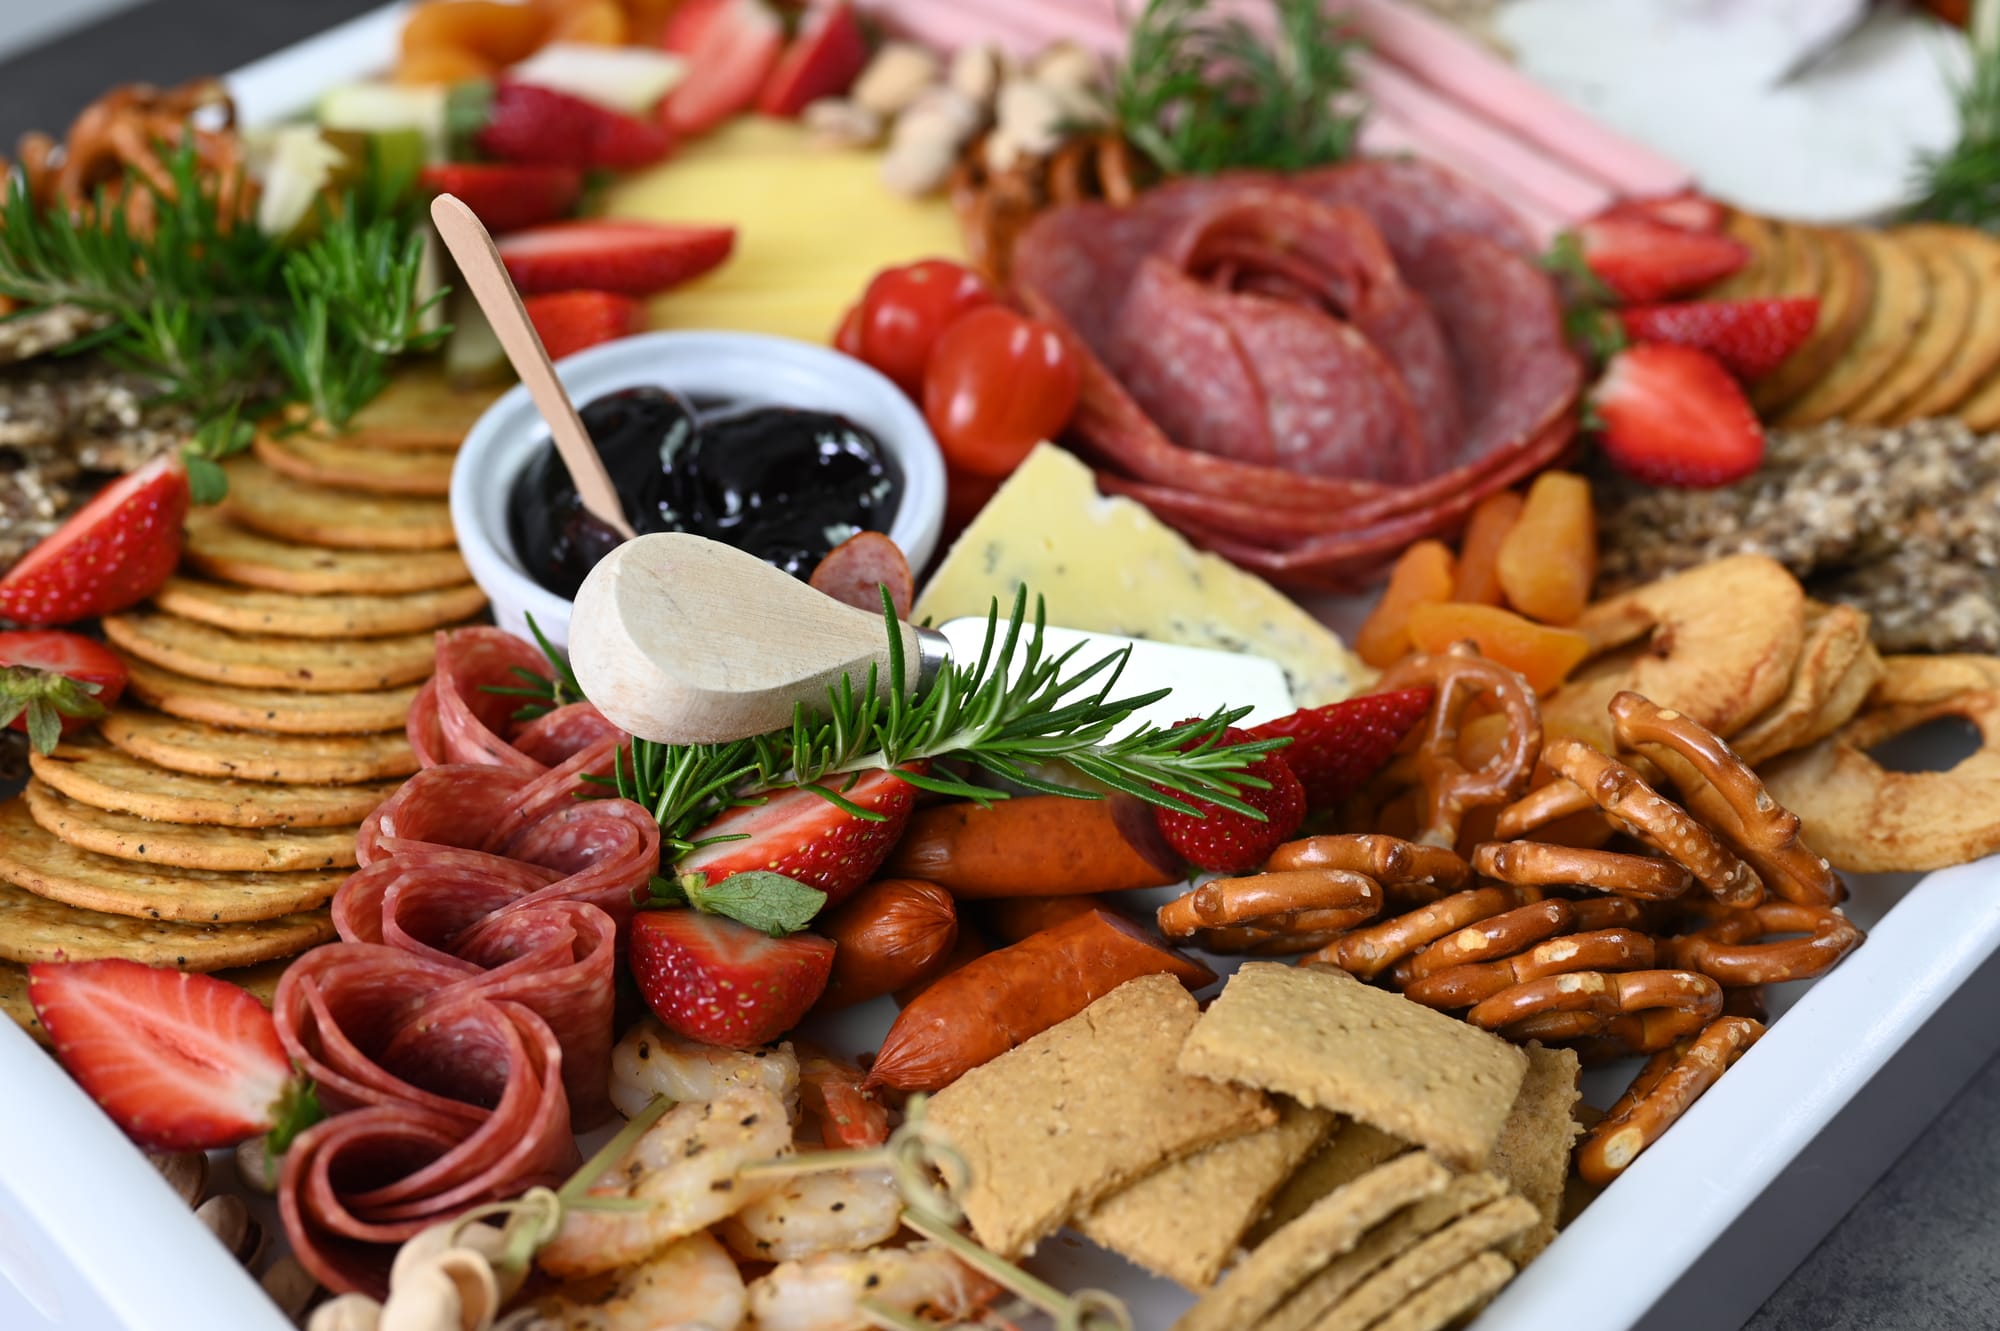
Meat folded for added visual appeal.
Article Contents:
- Why Folding Meat Matters
- Quick Wins: Practical Ways to Use Meat Folds for Entertaining
- Pro Tips for Picture-Perfect Meat Presentation
- Final Thoughts
Why Folding Meat Matters
When it comes to food presentation, small details make a big difference and folding meat is one of those subtle yet powerful tricks. Flat slices can look heavy and uninteresting, but with just a fold or twist, you add:
- Height and Dimension - Folds lift meat off the platter, creating layers that catch the eye instead of lying flat. It also makes the meat look abundant.
- Texture and Flow - Ruffles, rolls, and pleats create movement, breaking up uniform lines and making a platter look interesting and inviting.
- Balance and Contrast - Decorative folds pair beautifully with cheeses, fruits, and crackers, helping each element stand out while still feeling cohesive.
- Ease of Serving - Guests can take individual portions without disrupting the whole display.
- Professional Finish - Elevating presentation with folds makes even everyday deli meat look like it belongs on a catering-quality platter.
Think of folding as more than decoration - it’s a design technique that adds structure and visual appeal to your spread.
Quick Wins: Practical Ways to Use Meat Folds for Entertaining
You don’t need hours or expert-level skills to make a platter look incredible. Below are some easy, high-impact folds to try that work beautifully with sliced meats like salami, mortadella, ham, prosciutto etc
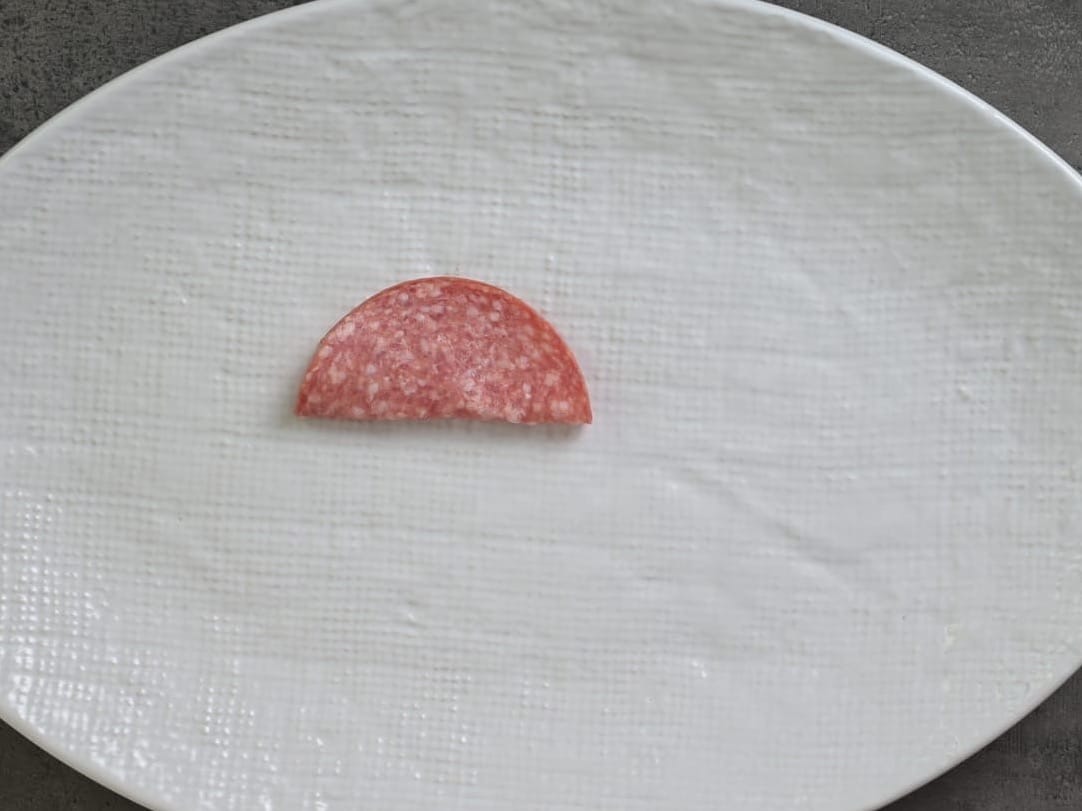
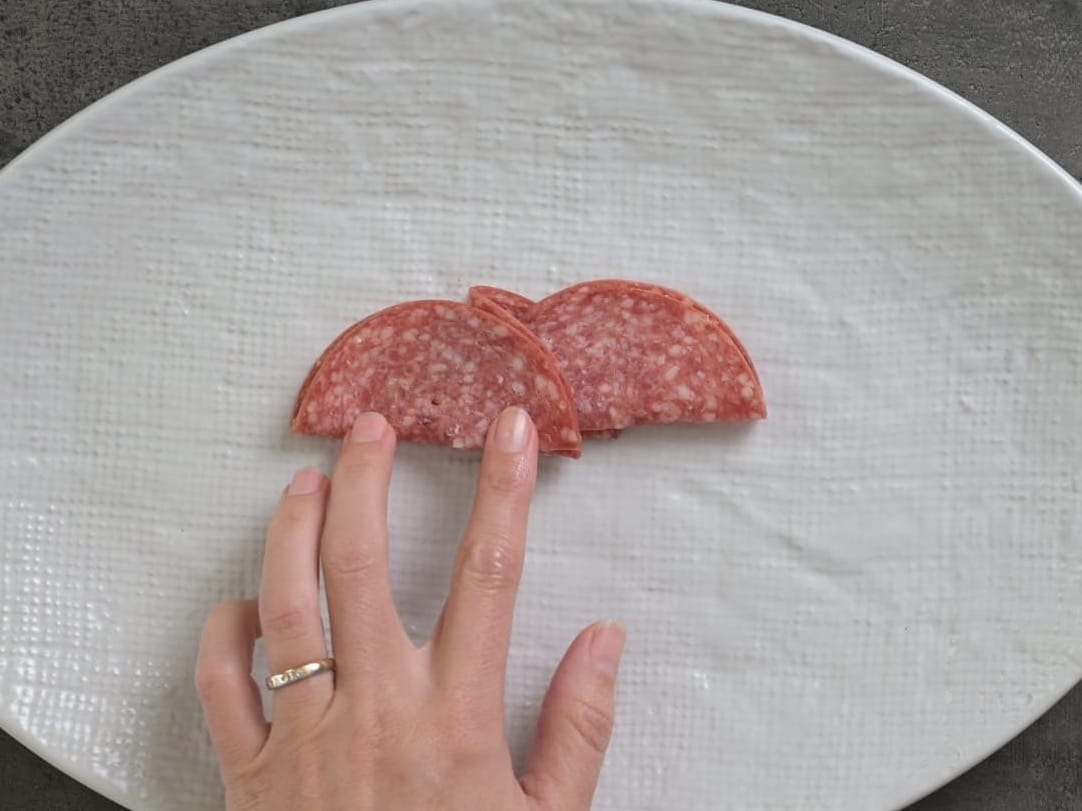
Simple Half-Moon Fold
- Fold slices in half, and create slightly overlapping layers.
- Keep the slices in a straight line, or fan out to fit in smaller gaps.
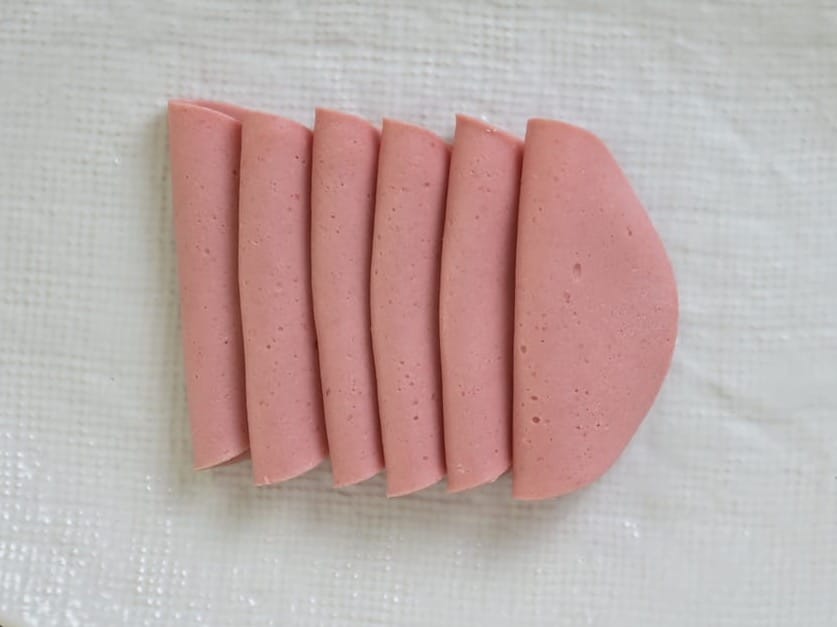
Simple half moon fold for sliced meat.
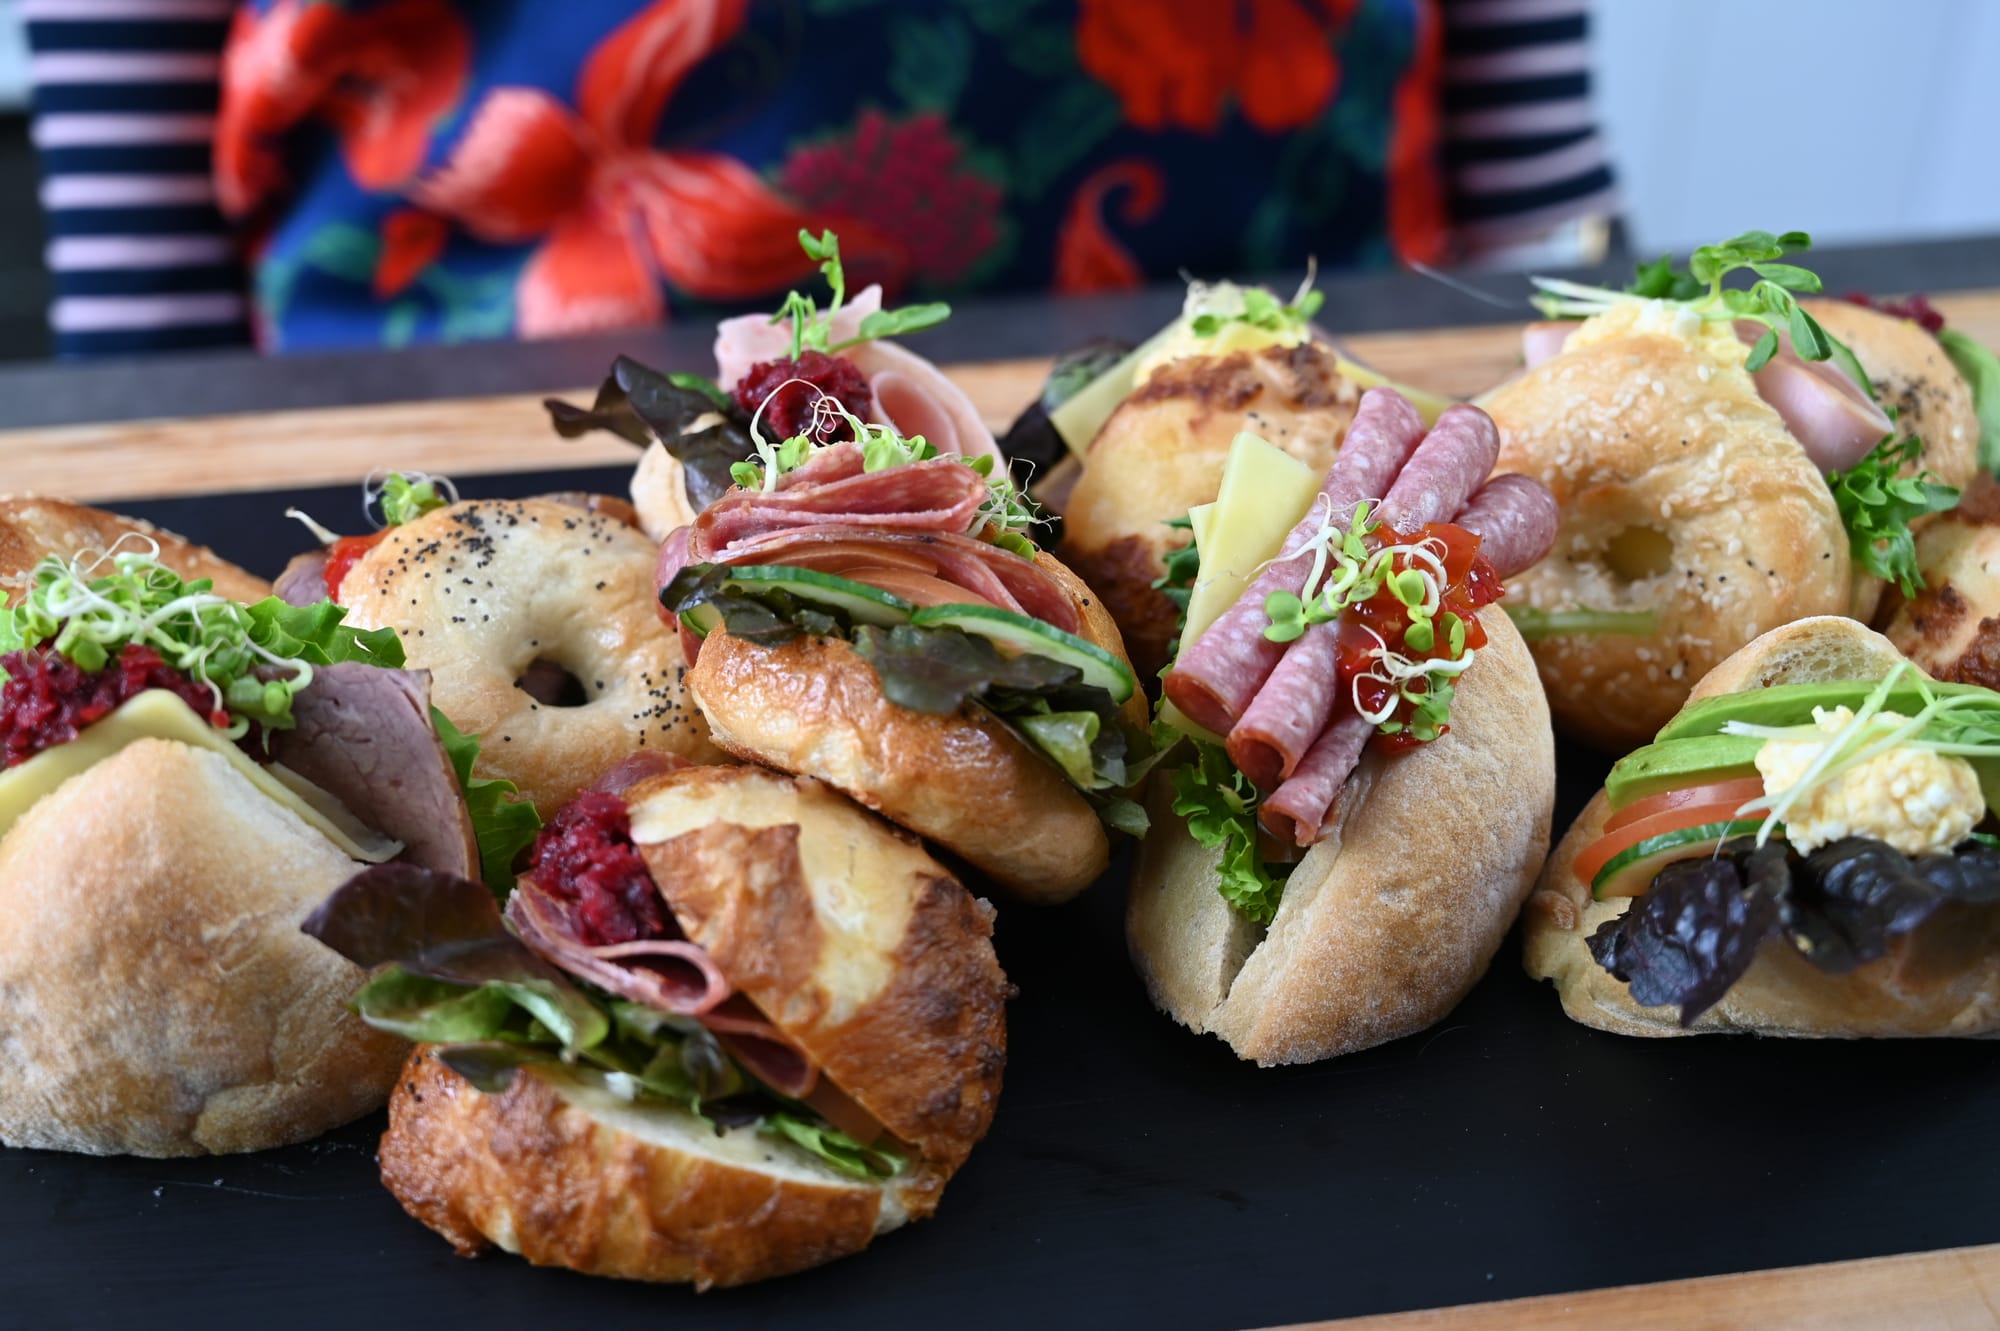
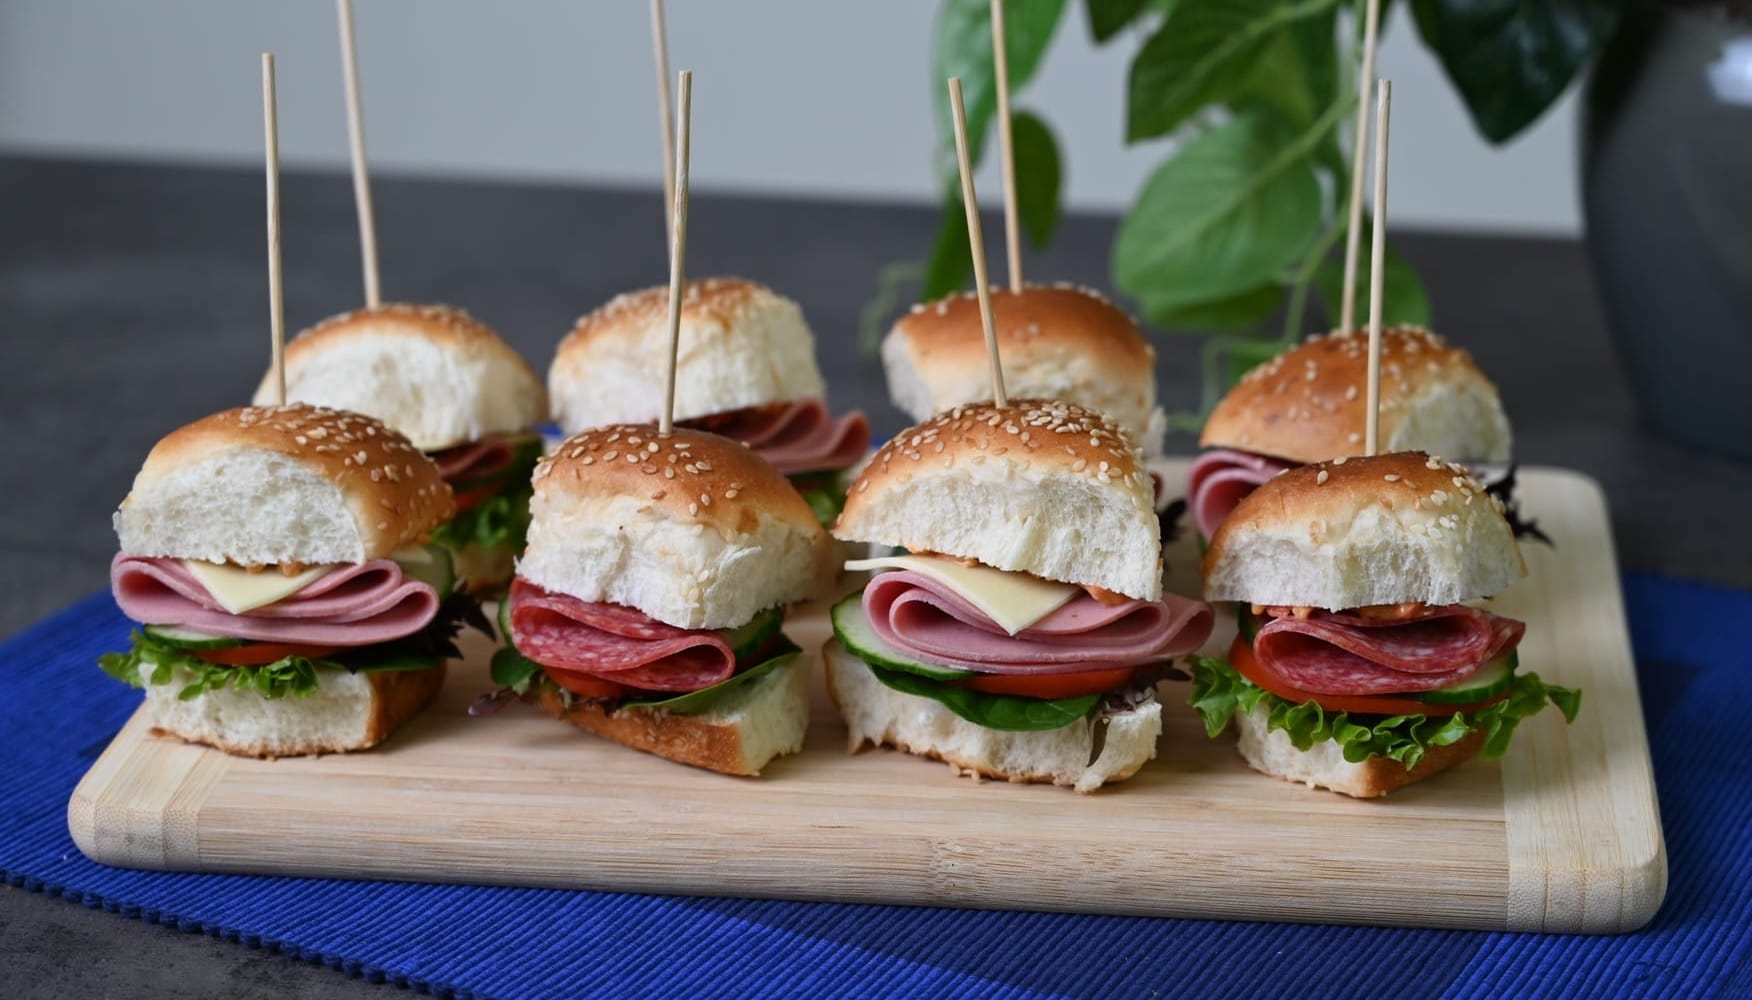
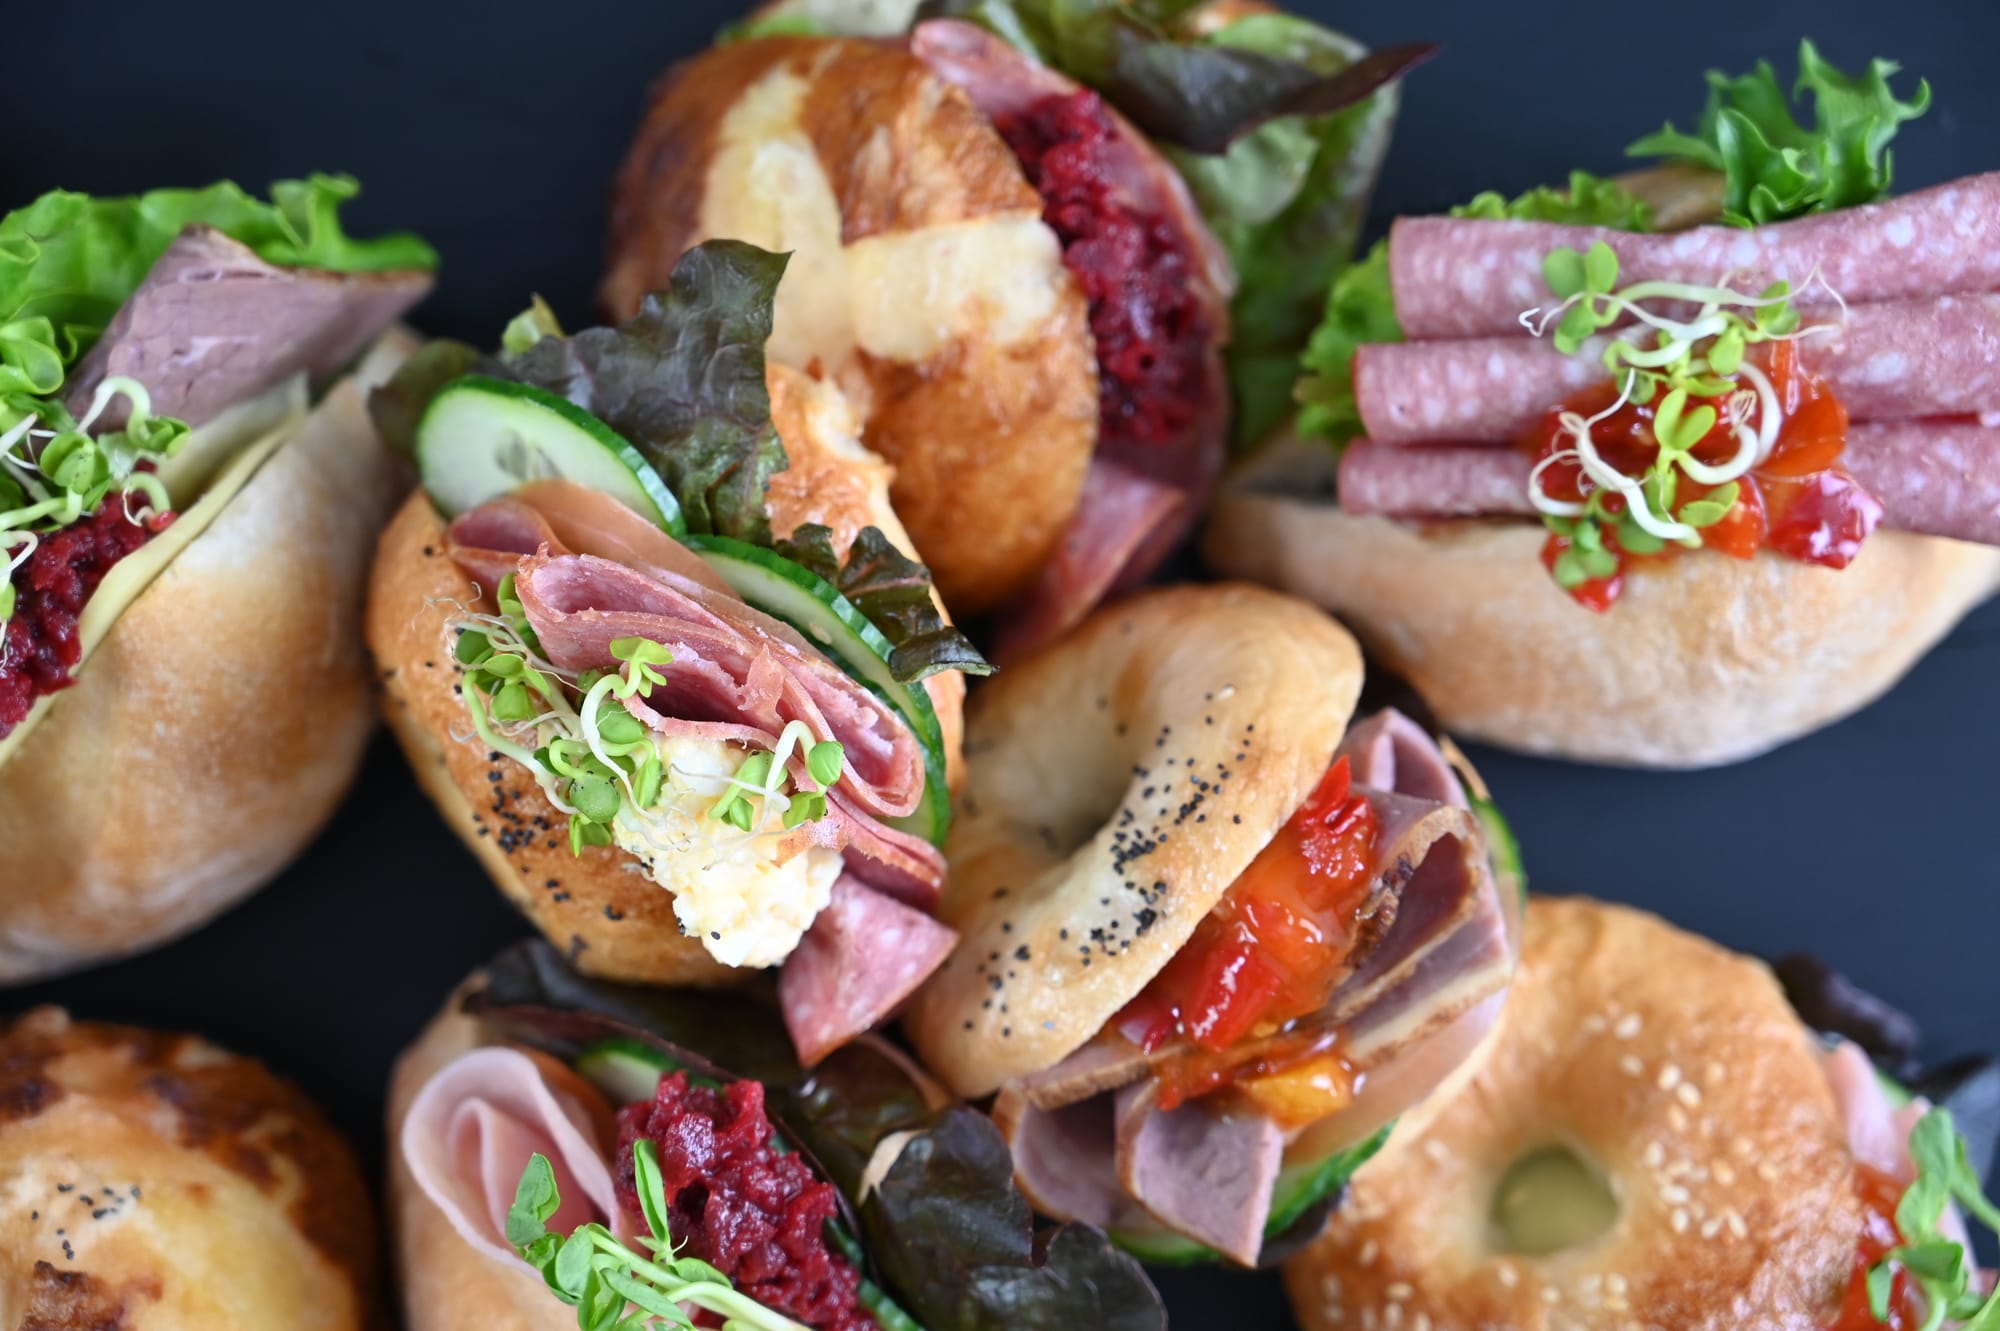
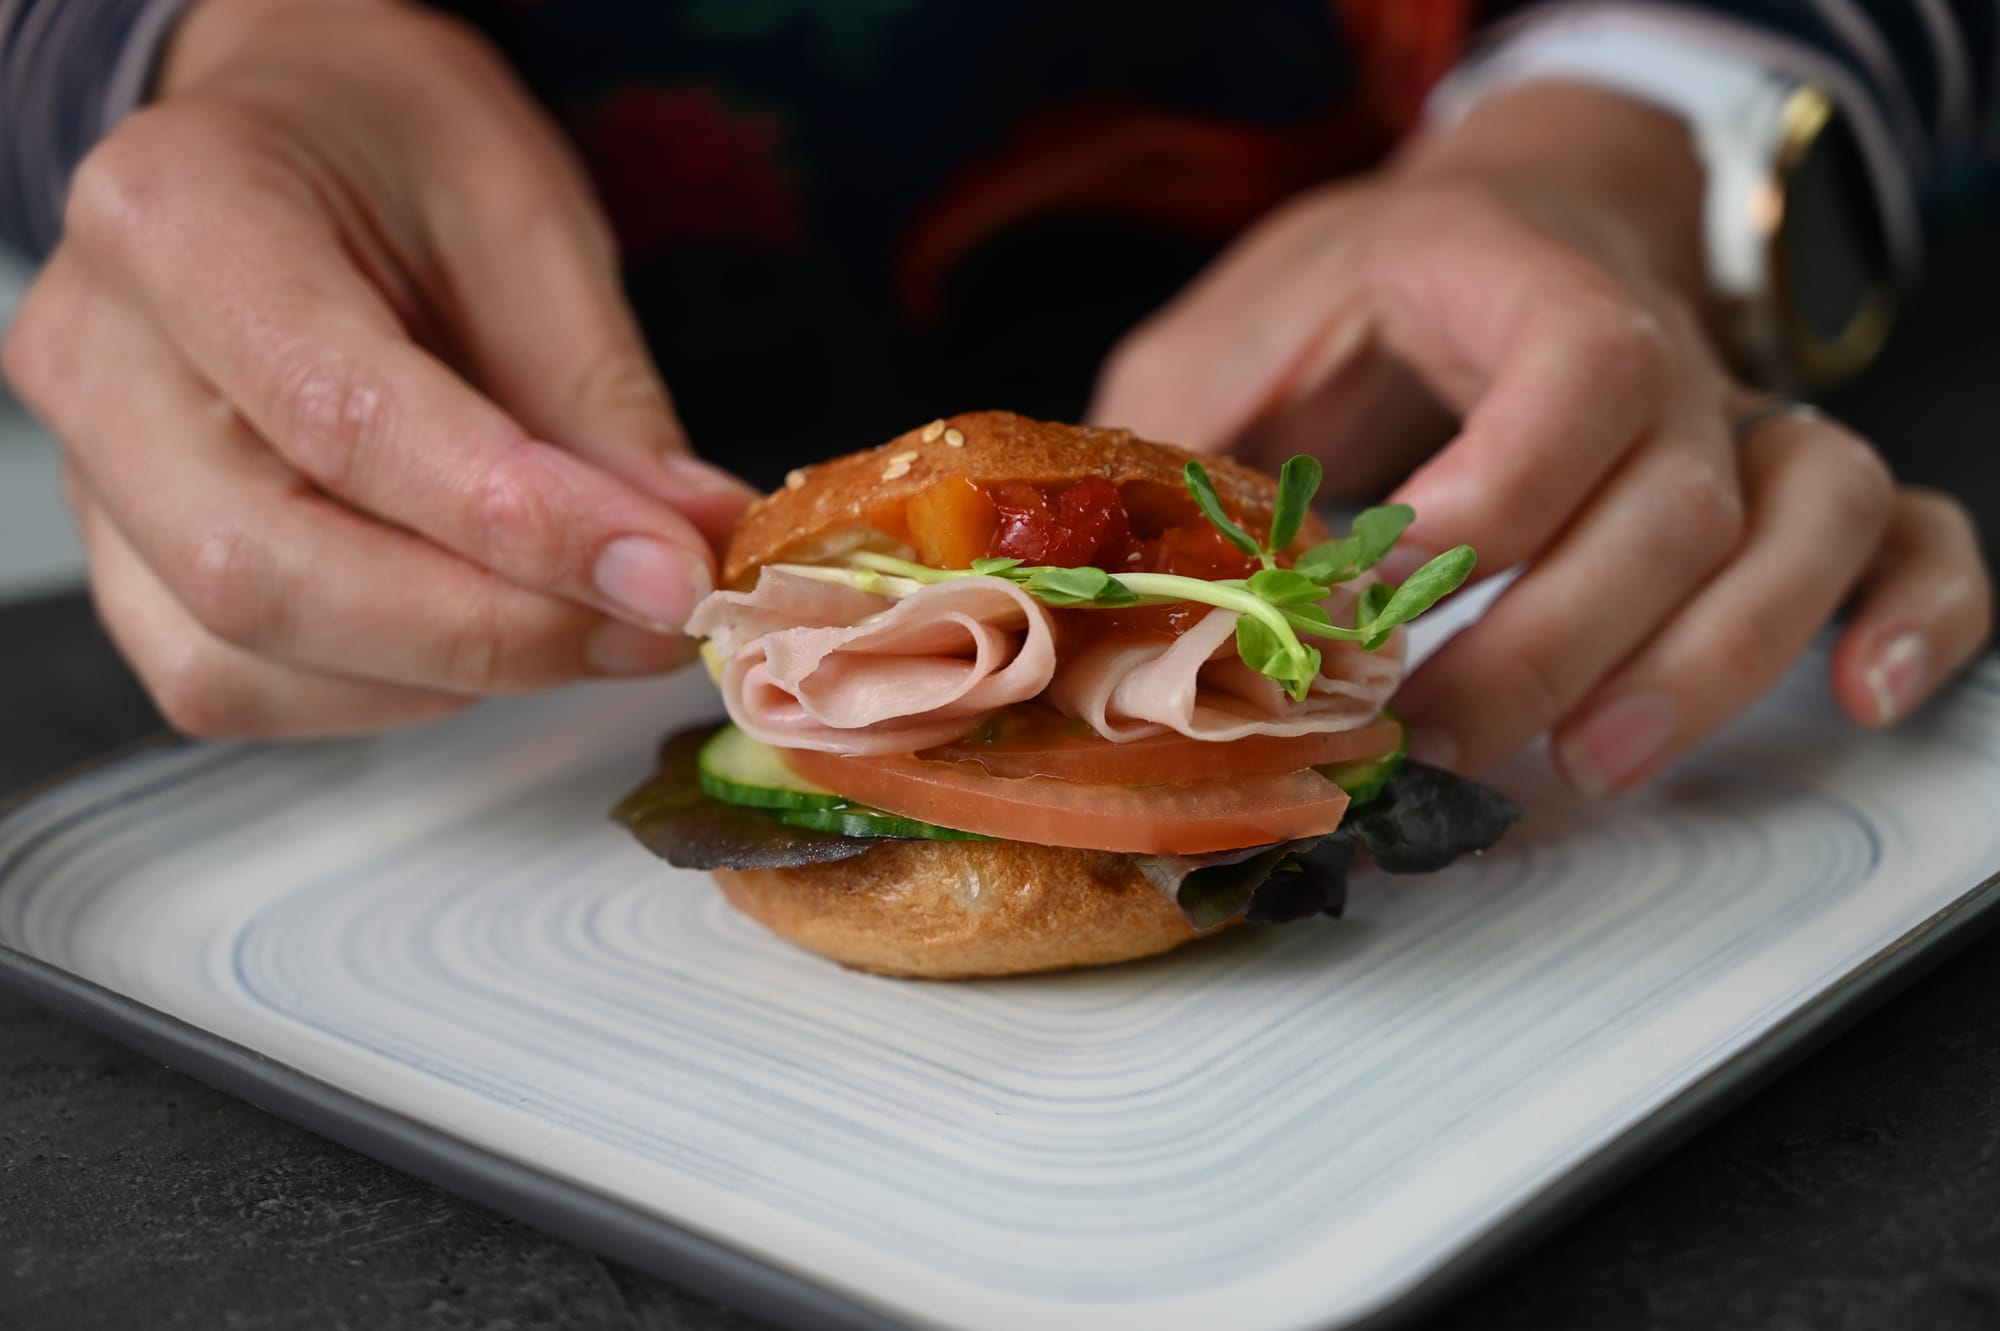
Here is the half moon fold technique used in a filled roll with sliced salami, and on a bagel board as a filling option.
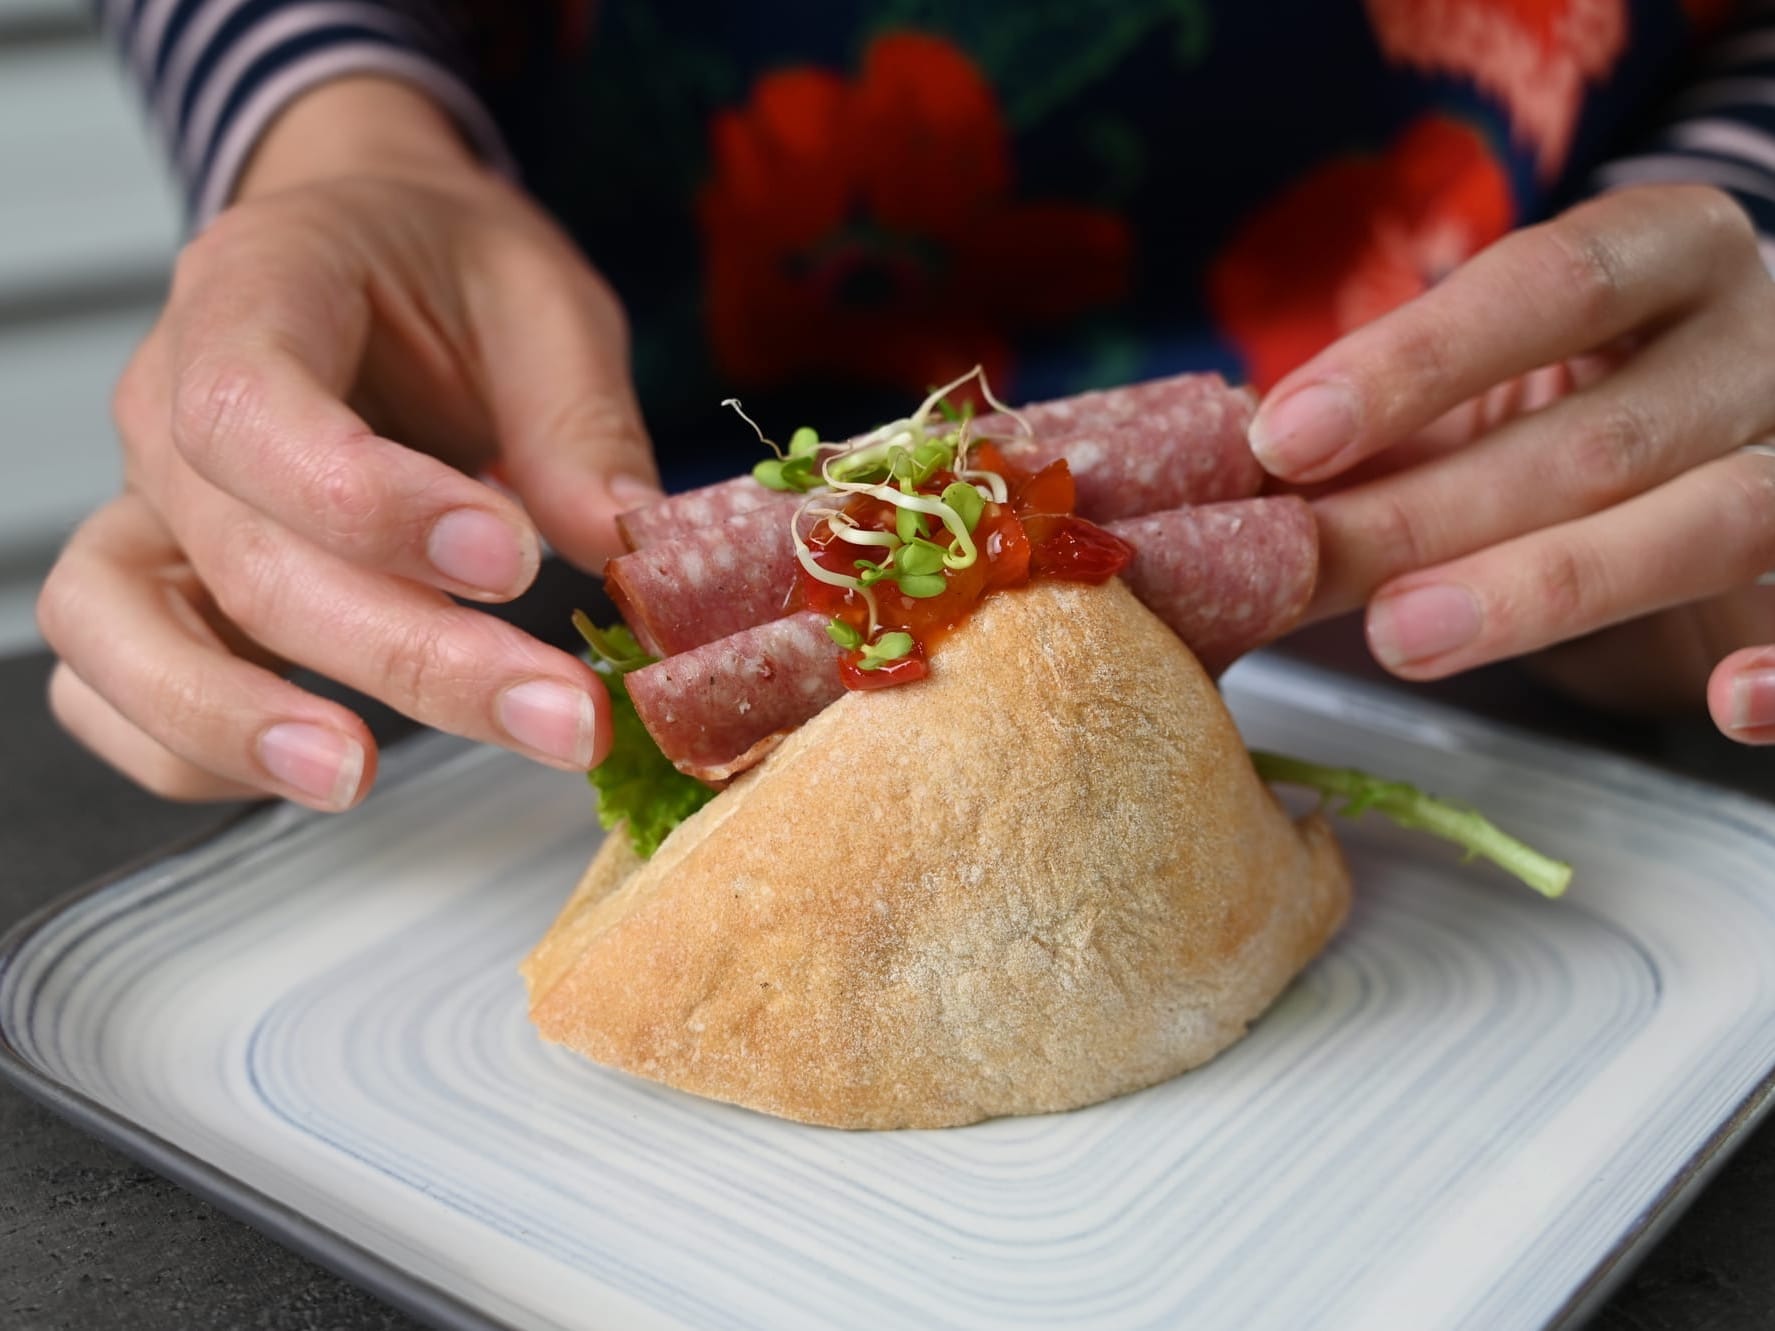
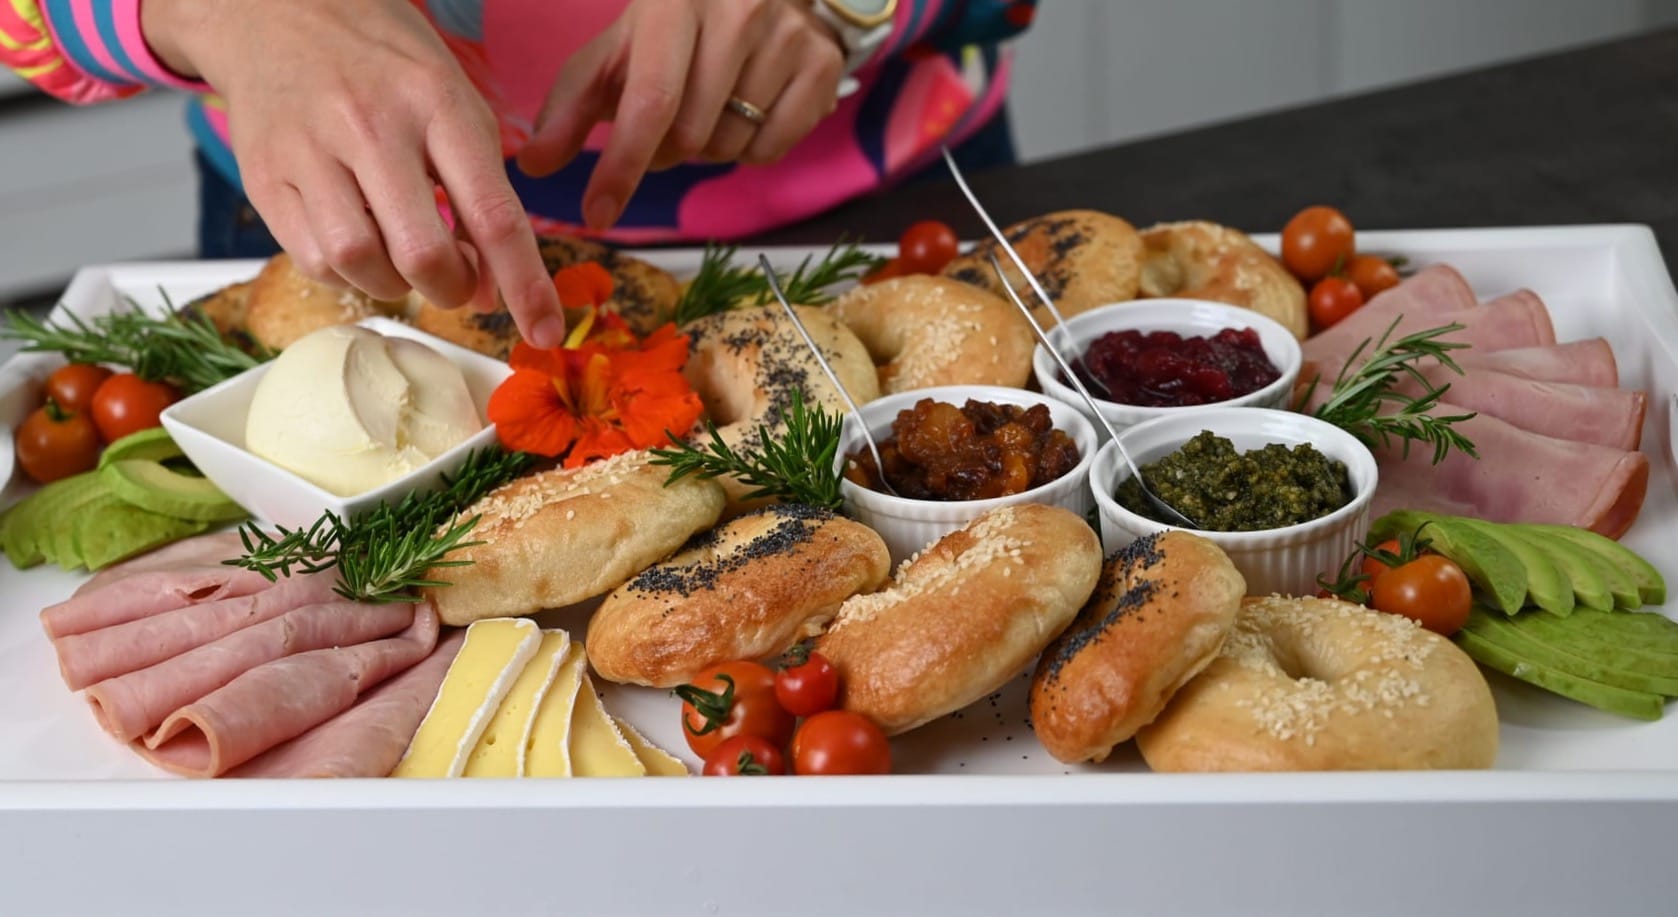
Simple half moon fold used in a filled roll and on a bagel board.
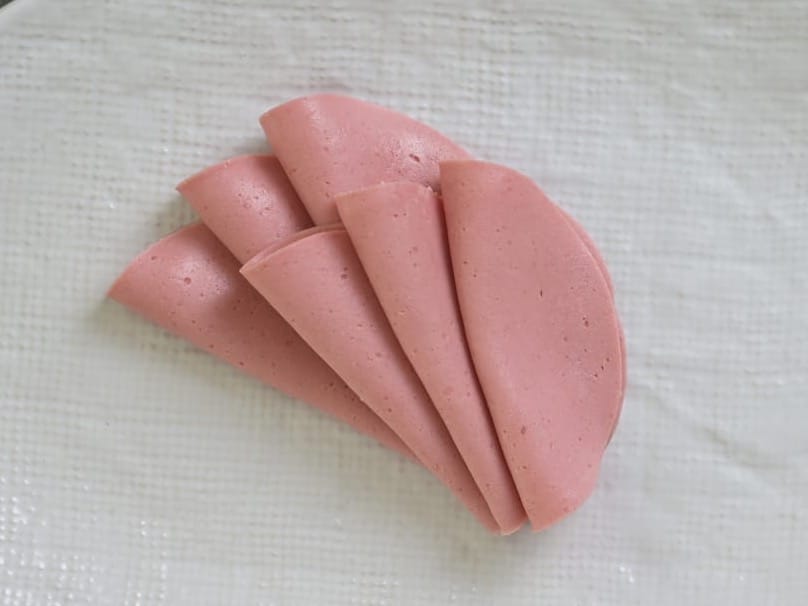
Quarter Fold
- Loosely fold thin, round slices of cold meat in half, and then loosely in half again.
- Add these to a platter in bundles of 2 or 3, or add in full rows. You can also fold meat like this to go on or in sandwiches to give it depth and visual appeal.

Quarter fold for sliced meat.
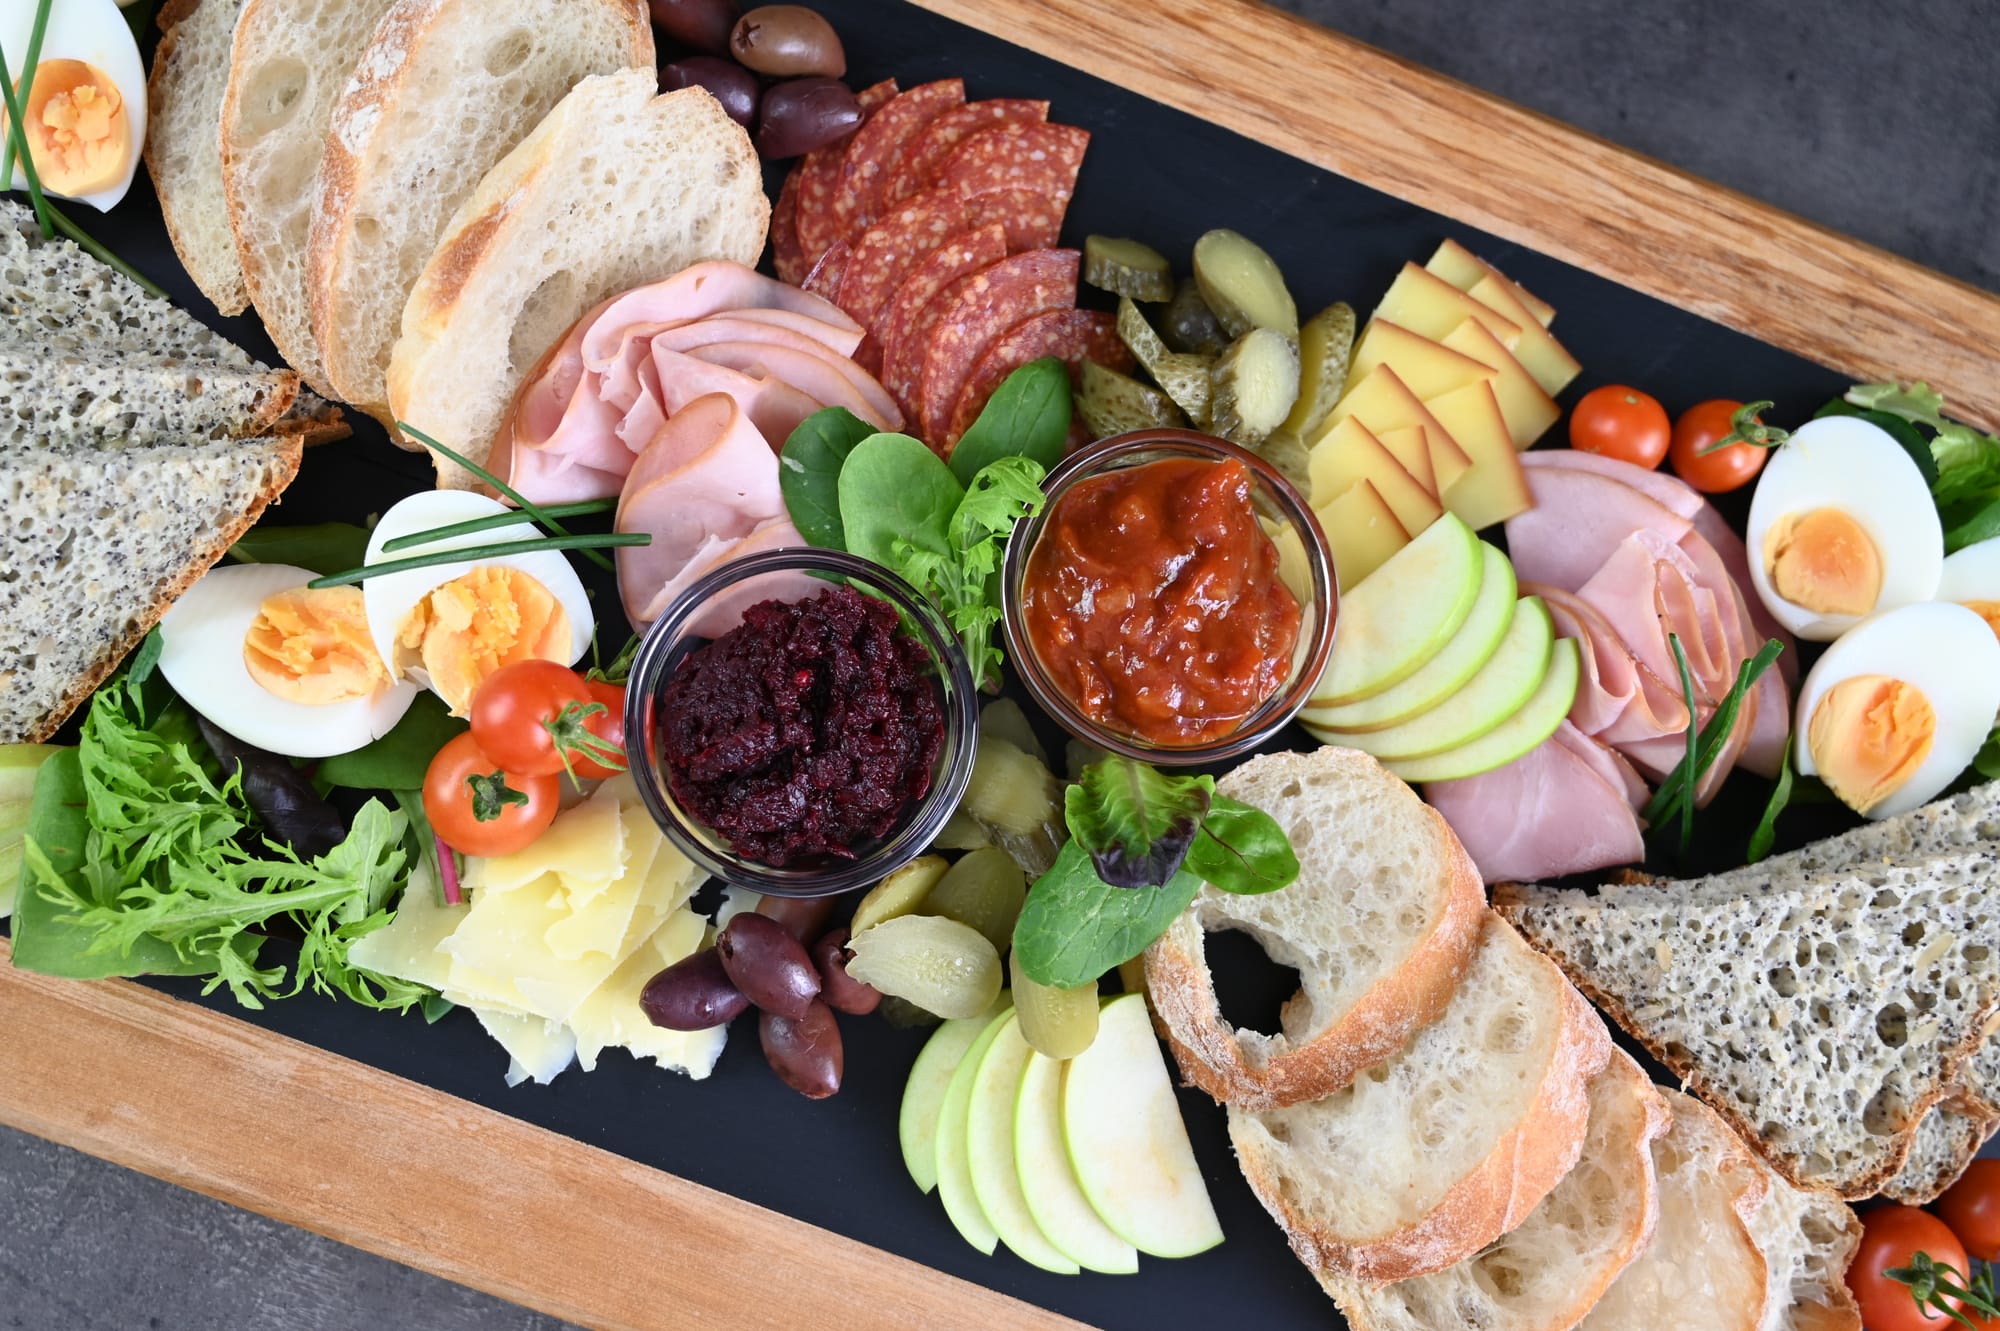
Here is the quarter fold technique used on platters and in filled rolls.
Quarter fold used on platters and in filled sandwich rolls.
The Rosette (Salami Flower)
A meat rosette, often made with sliced salami because it is a little thicker and holds its shape better, is the perfect central point for a platter. It looks great on a cheeseboard if you want to add some protein too.
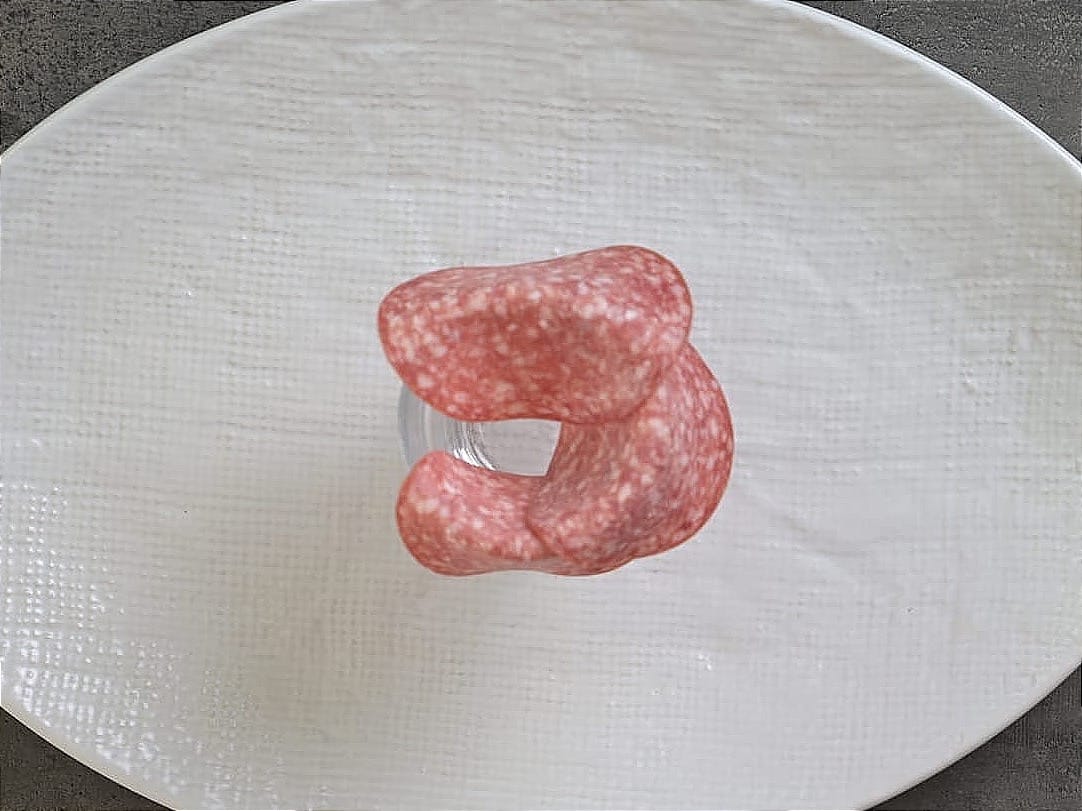
- You'll need a glass or wine glass to make the salami flower. A smaller glass will make a tighter rosette.
- Fold a slice of salami over the rim of the glass.
- Add another slice, overlapping from about halfway.
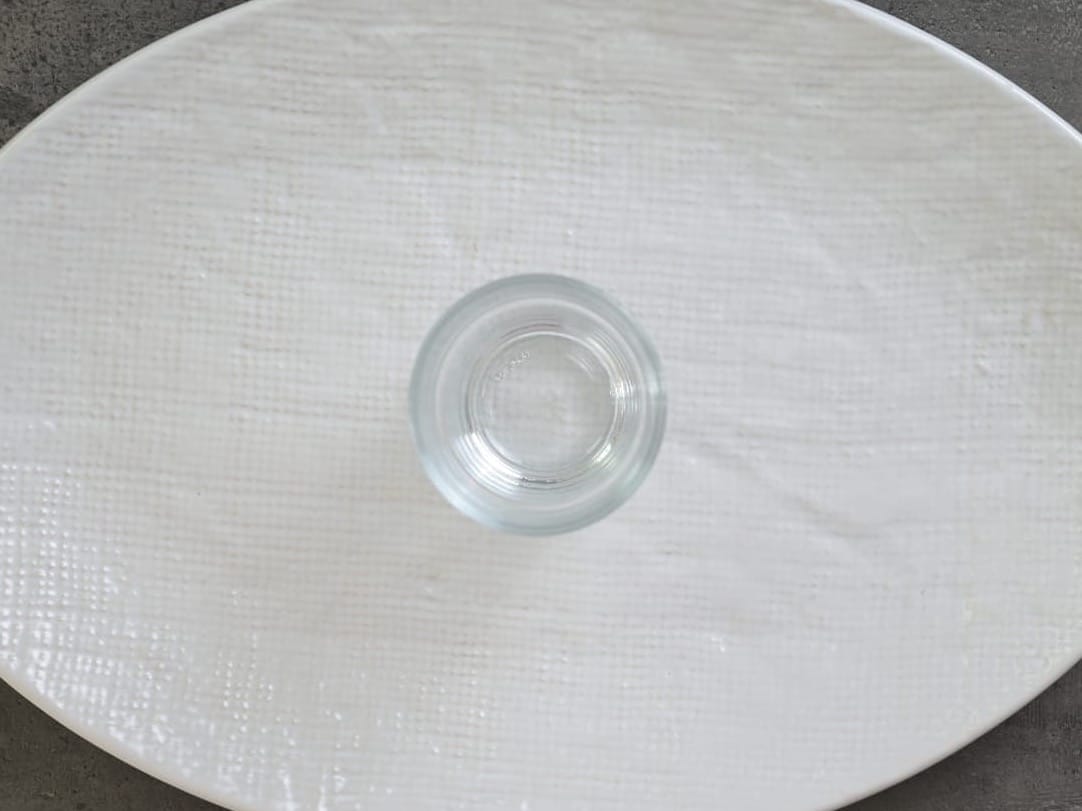
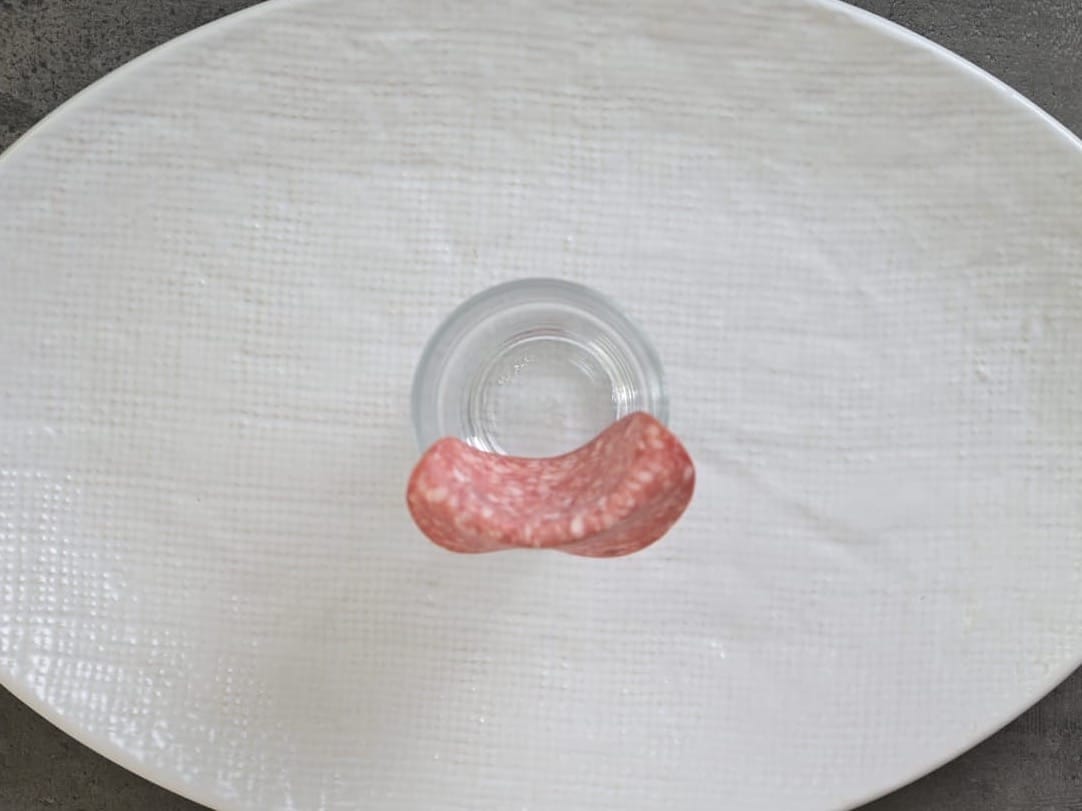

Step-by-step making a salami rose.
- Work your way around the glass several times, until the hole in the centre is closed and becomes too small to add any more slices.
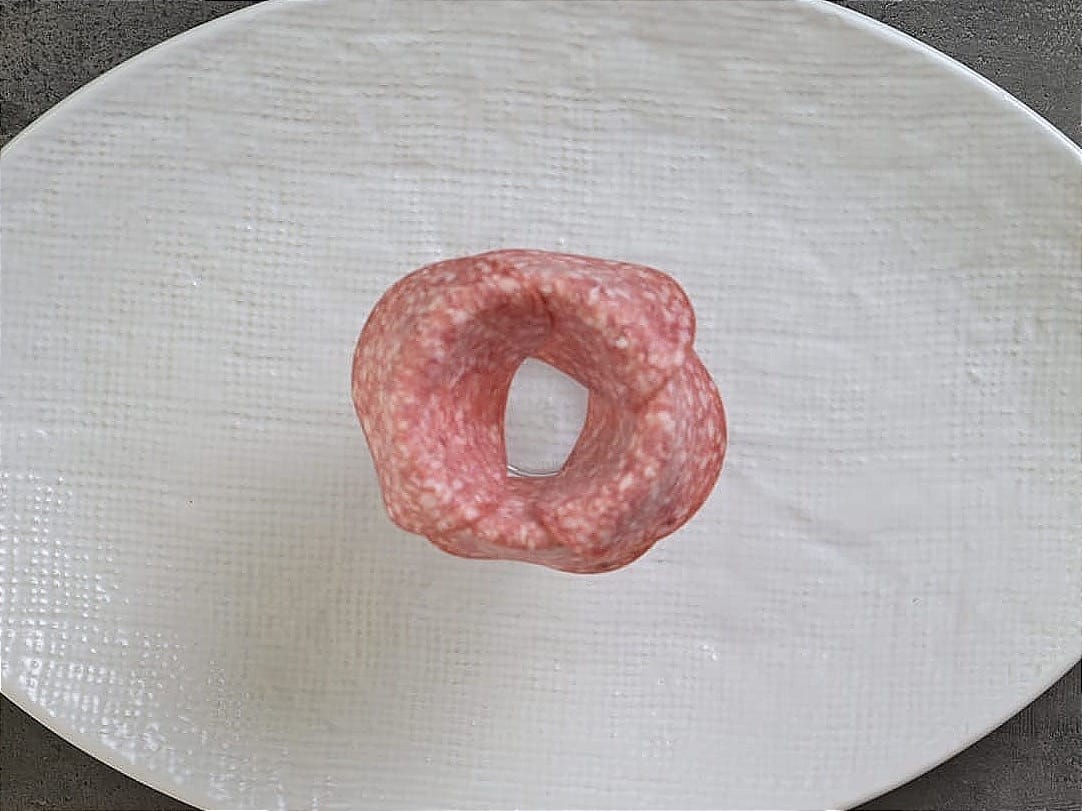

Step-by-step making a salami rose.
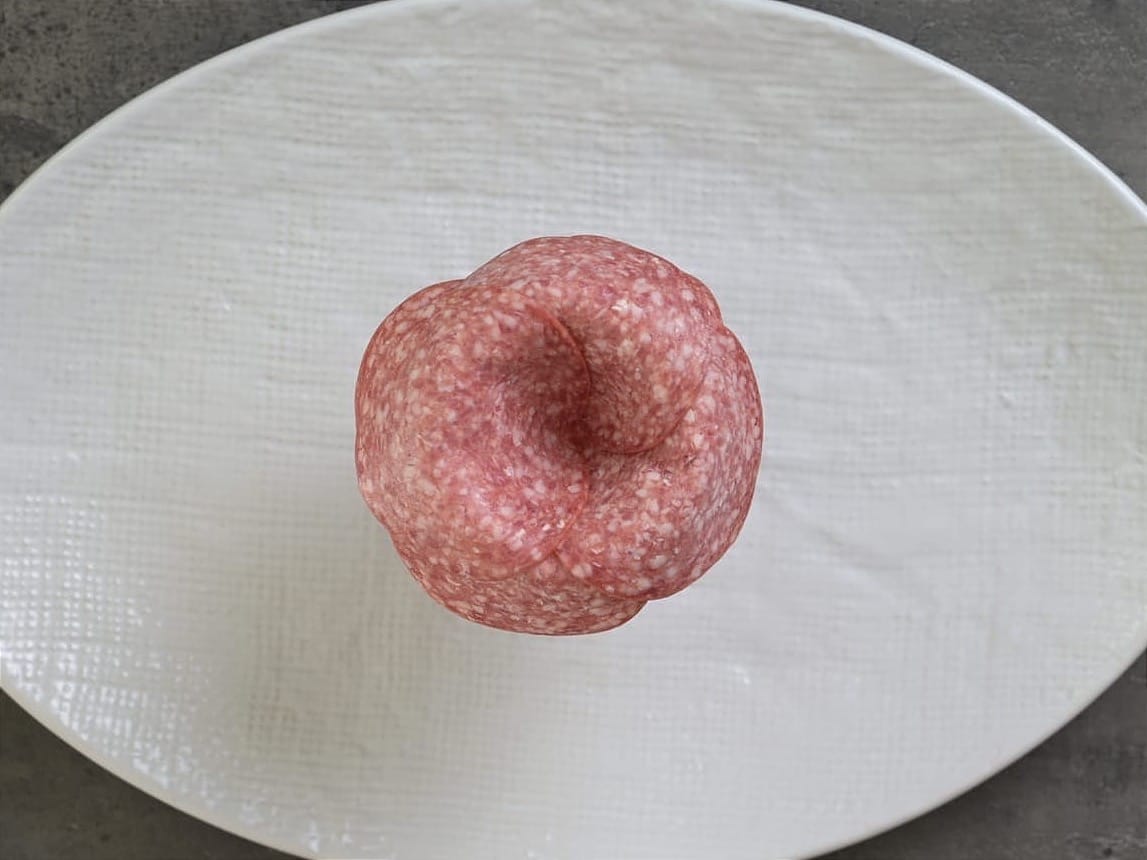
- Carefully lift up the glass and turn it over, positioning it where you want the rosette to go.

- Lift off the glass to reveal your beautiful salami rose.
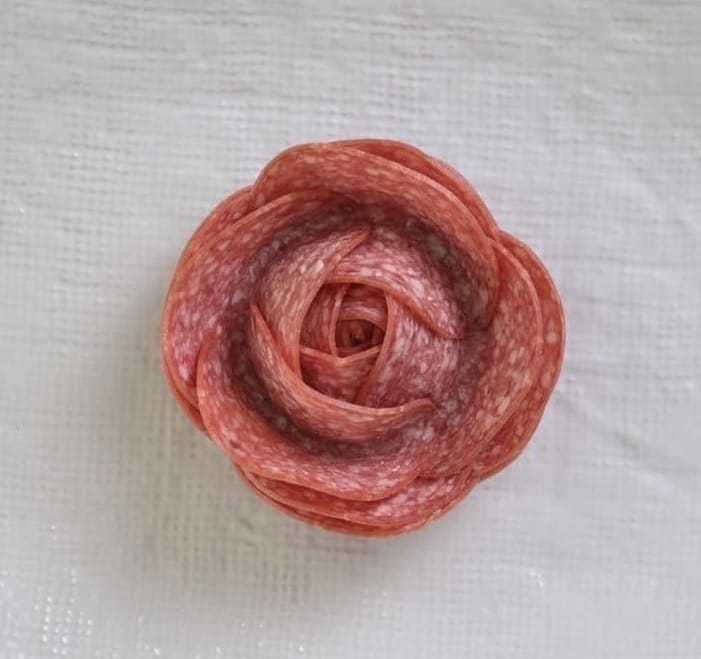
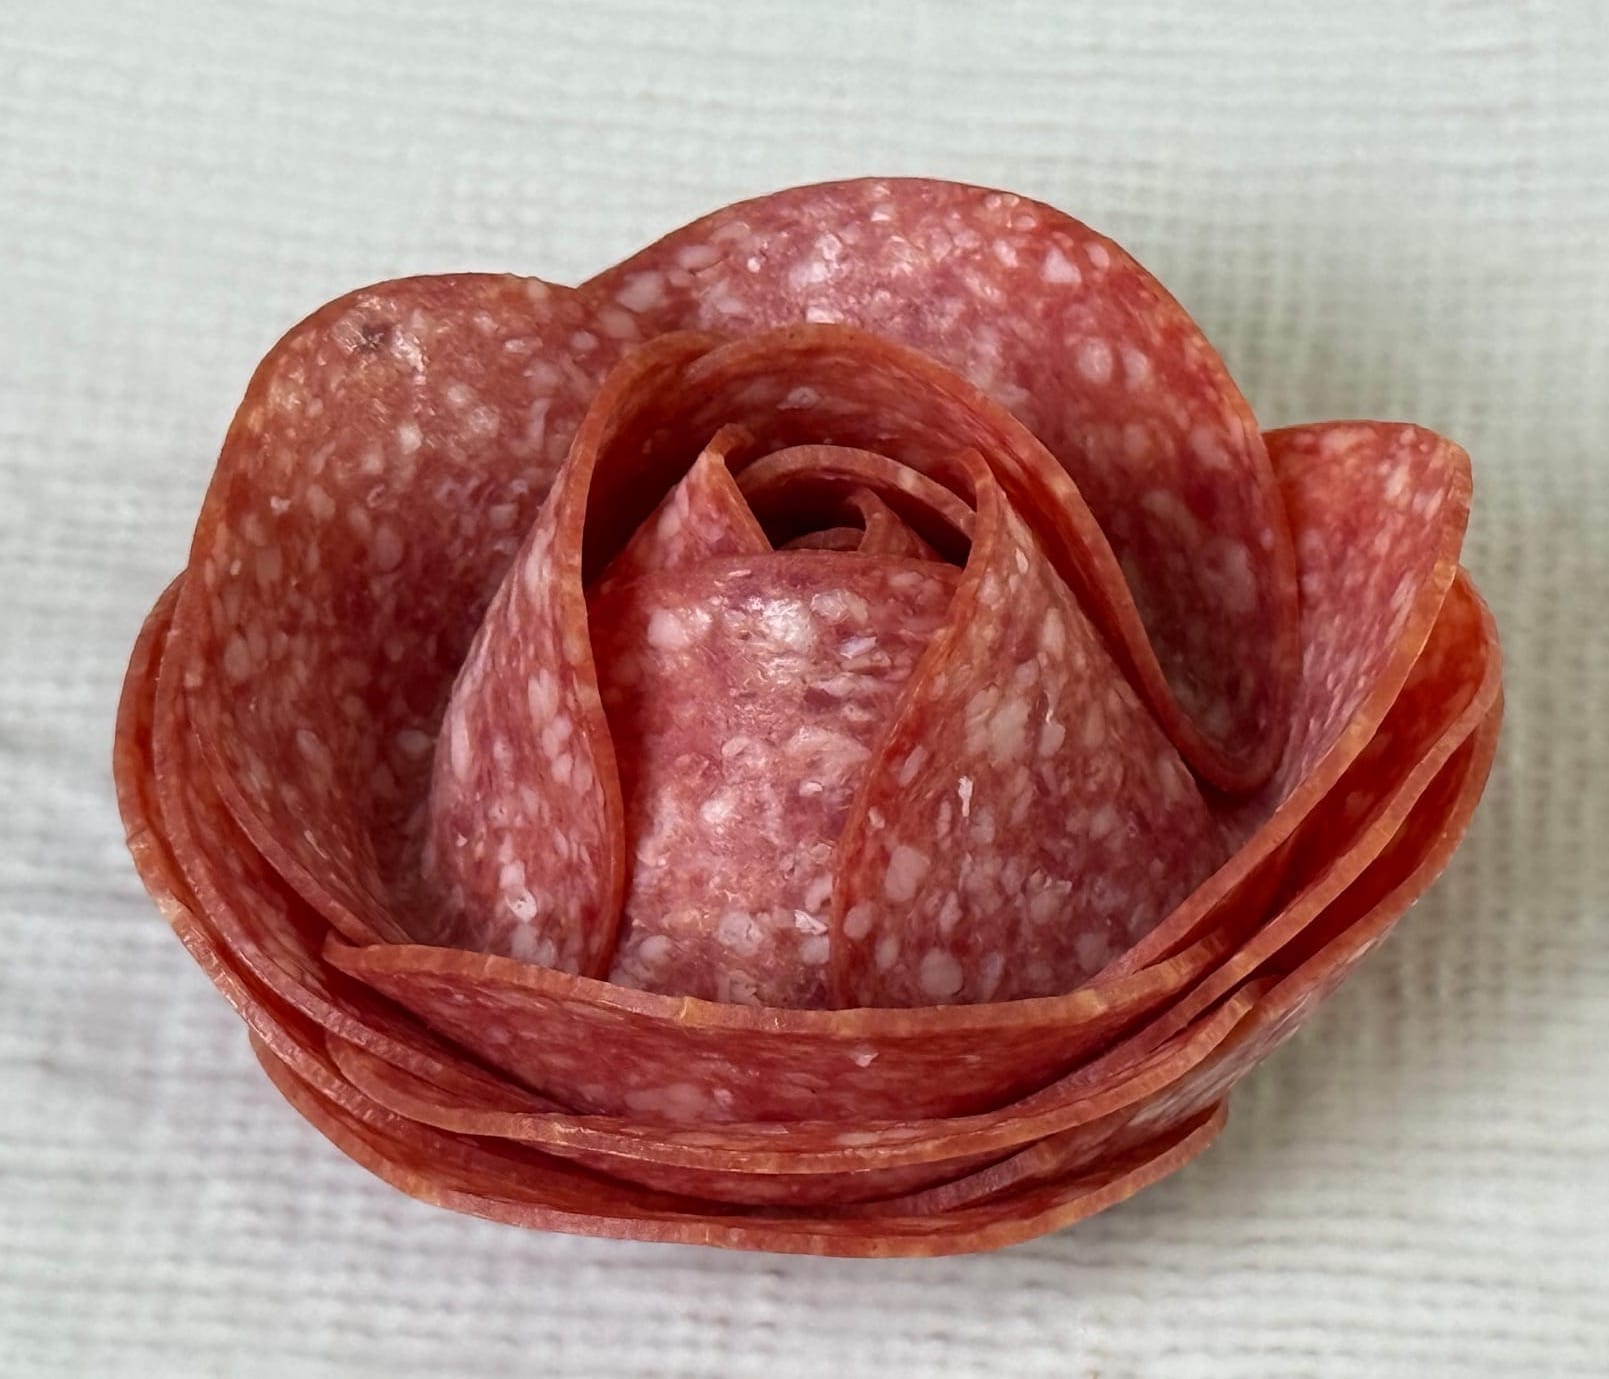
The finished rosette.
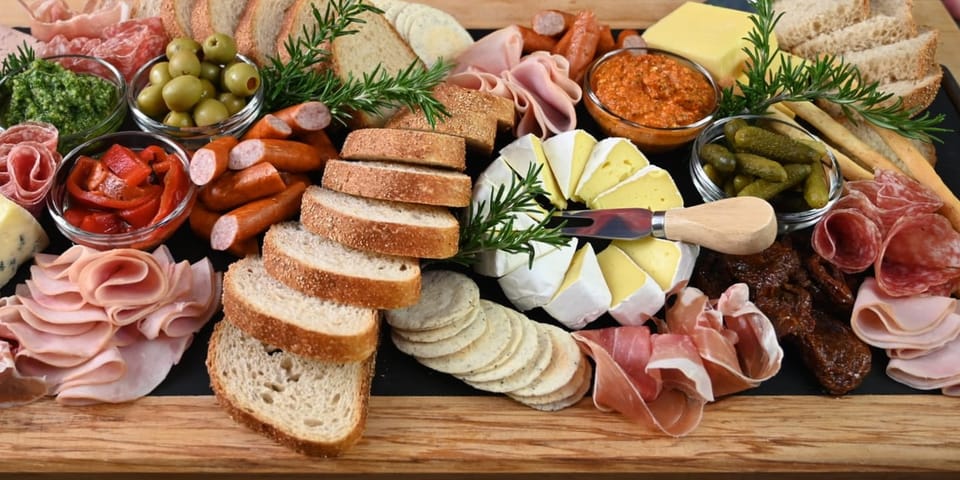
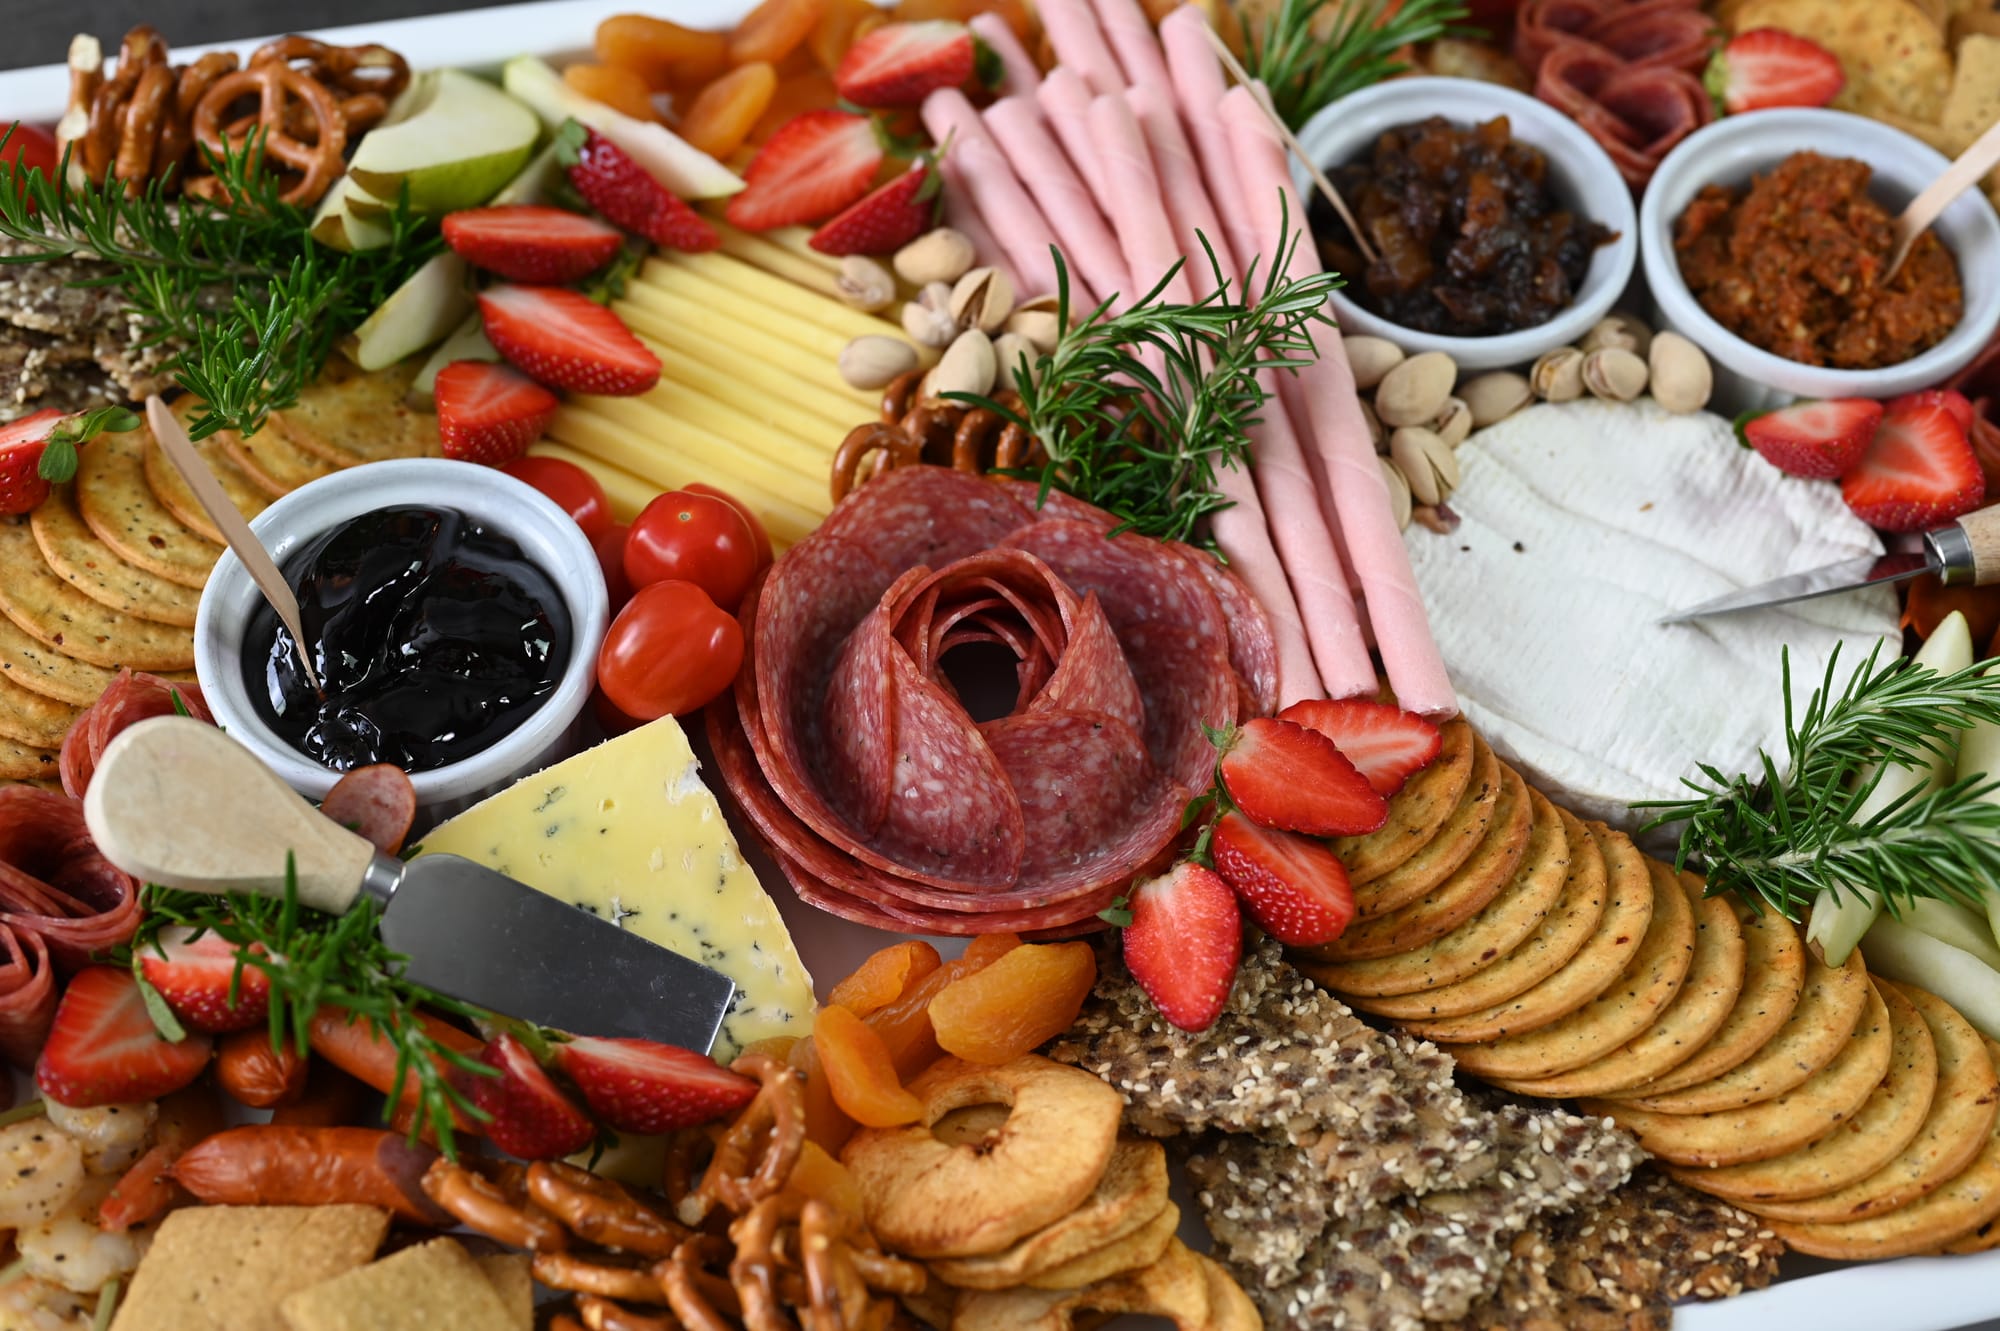
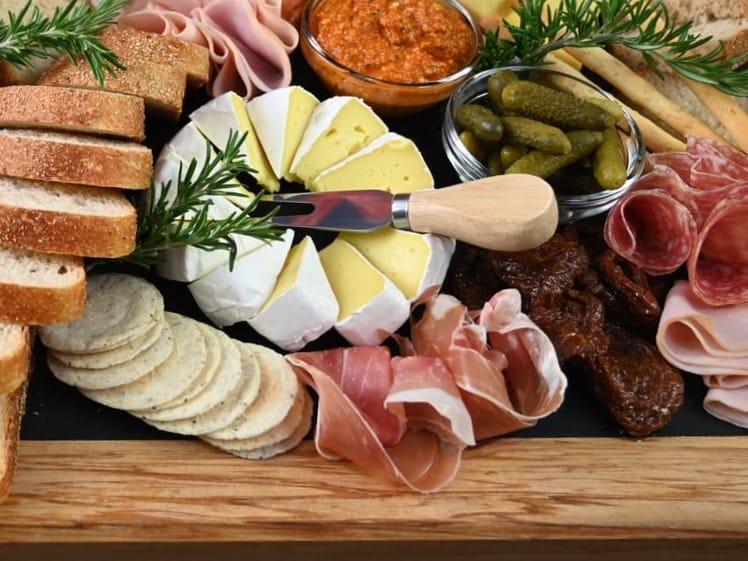
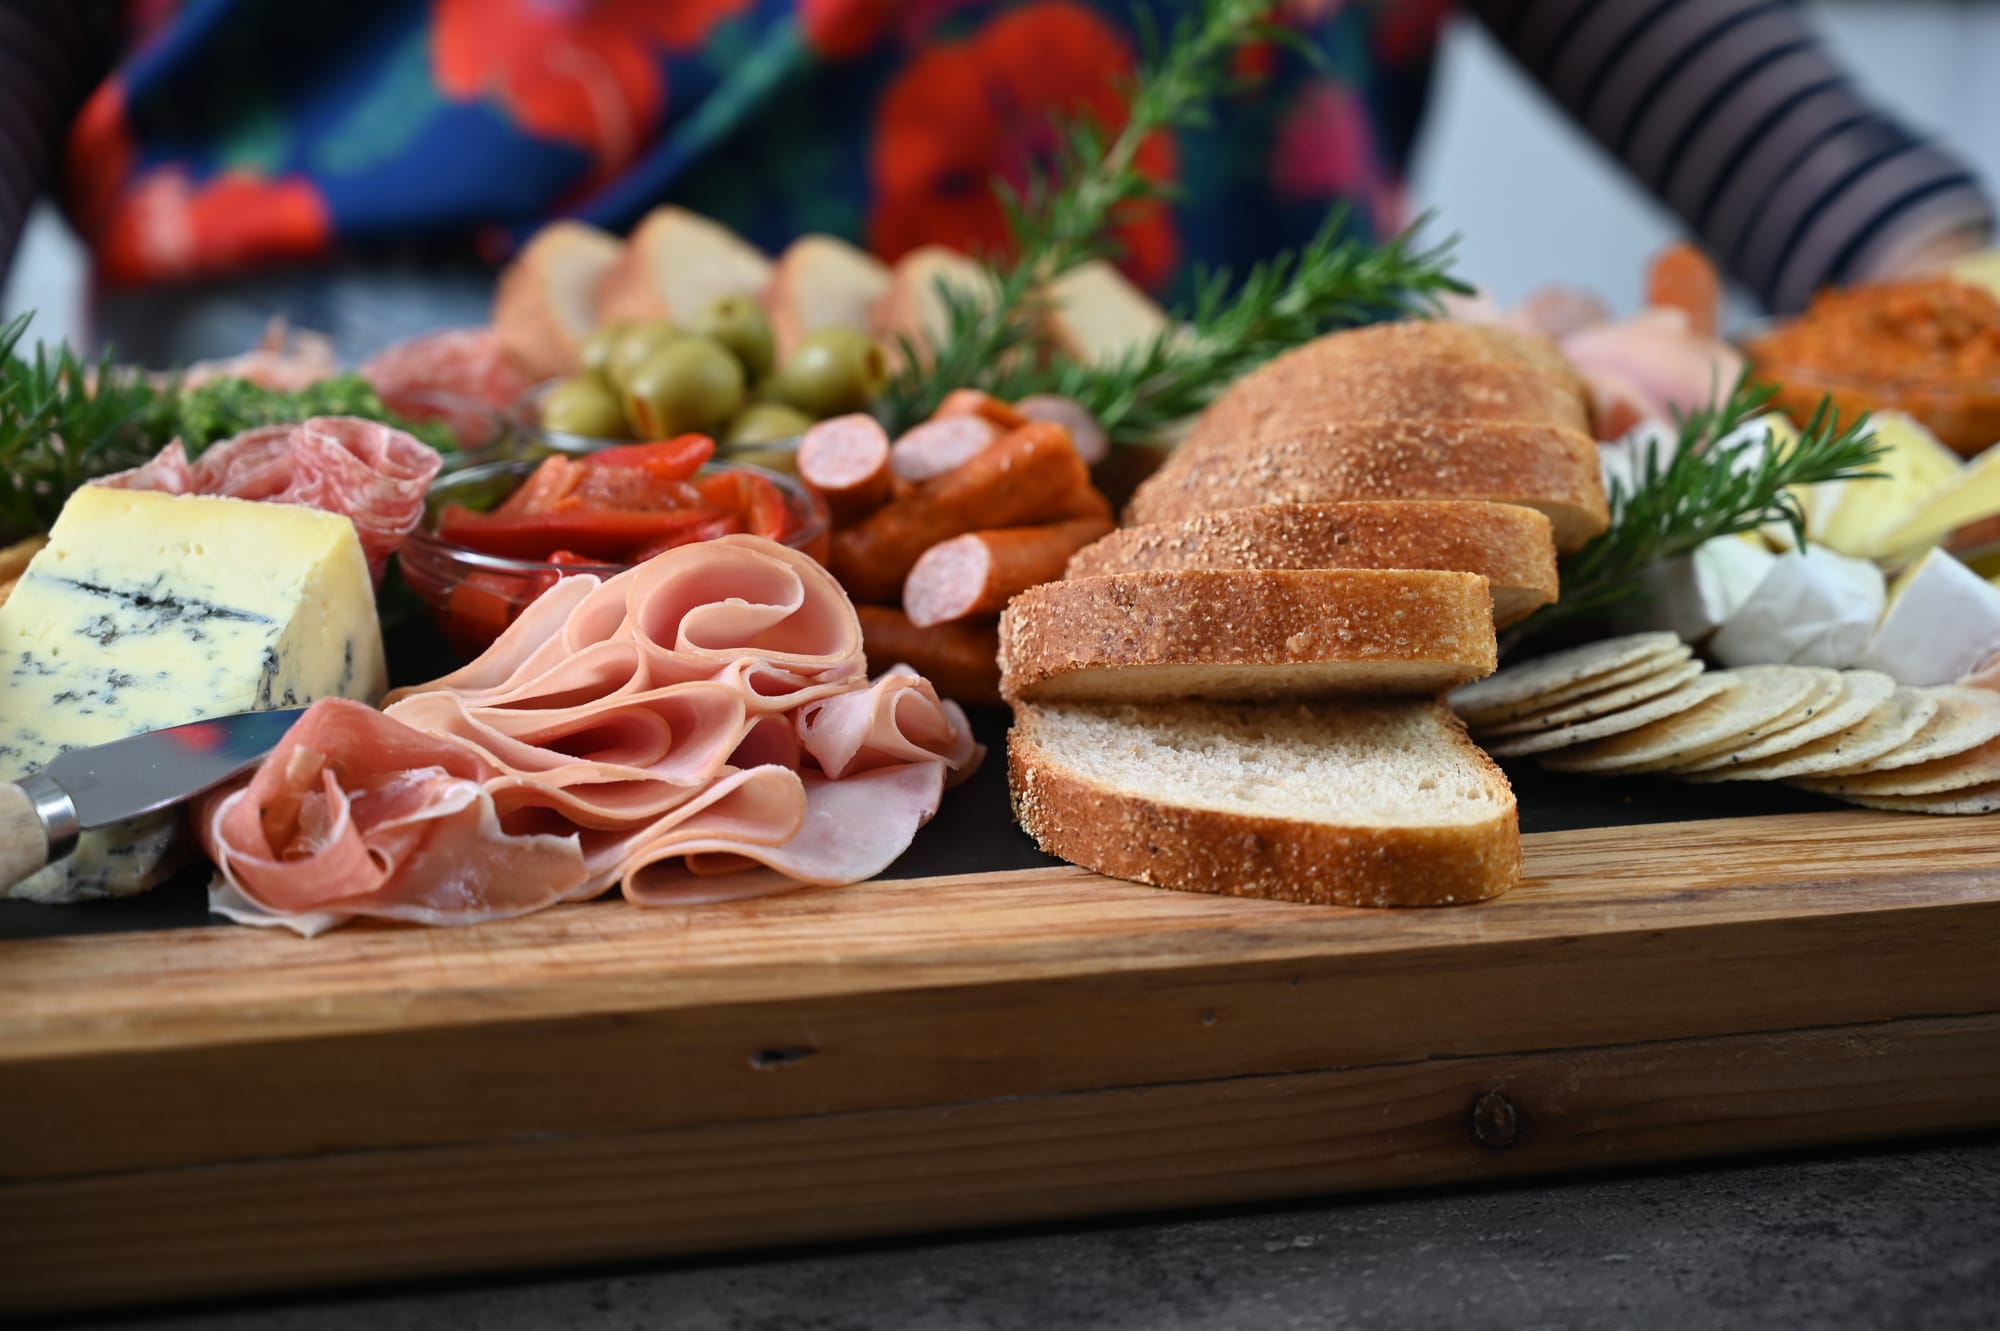
Here it is used as a focal point on a charcuterie platter.
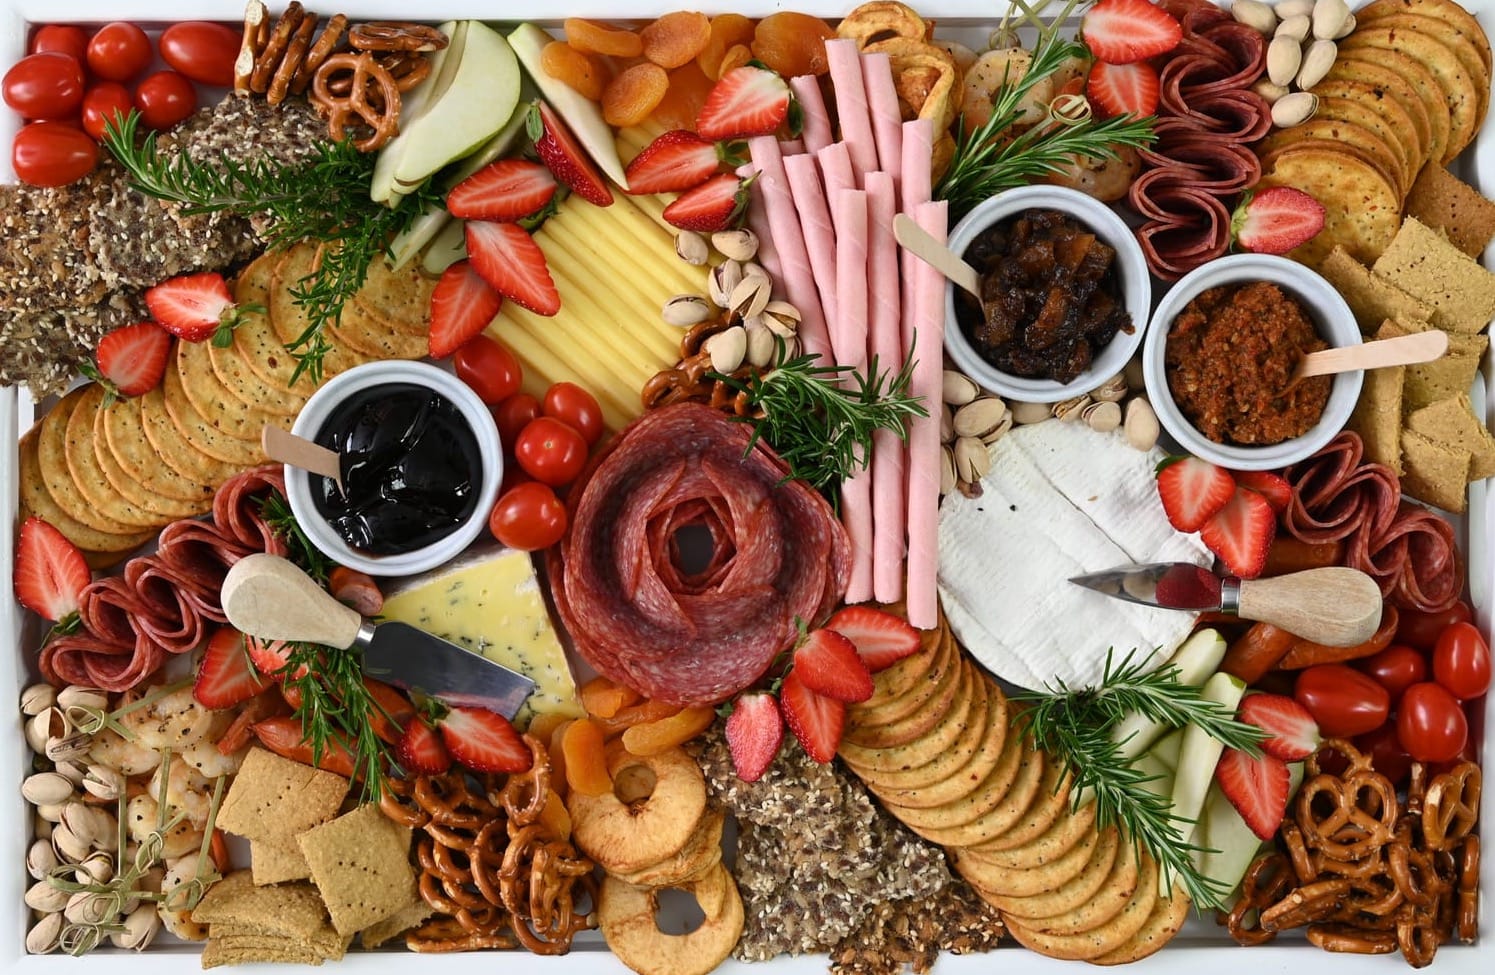

Salami rosette used a focal point on a platter.
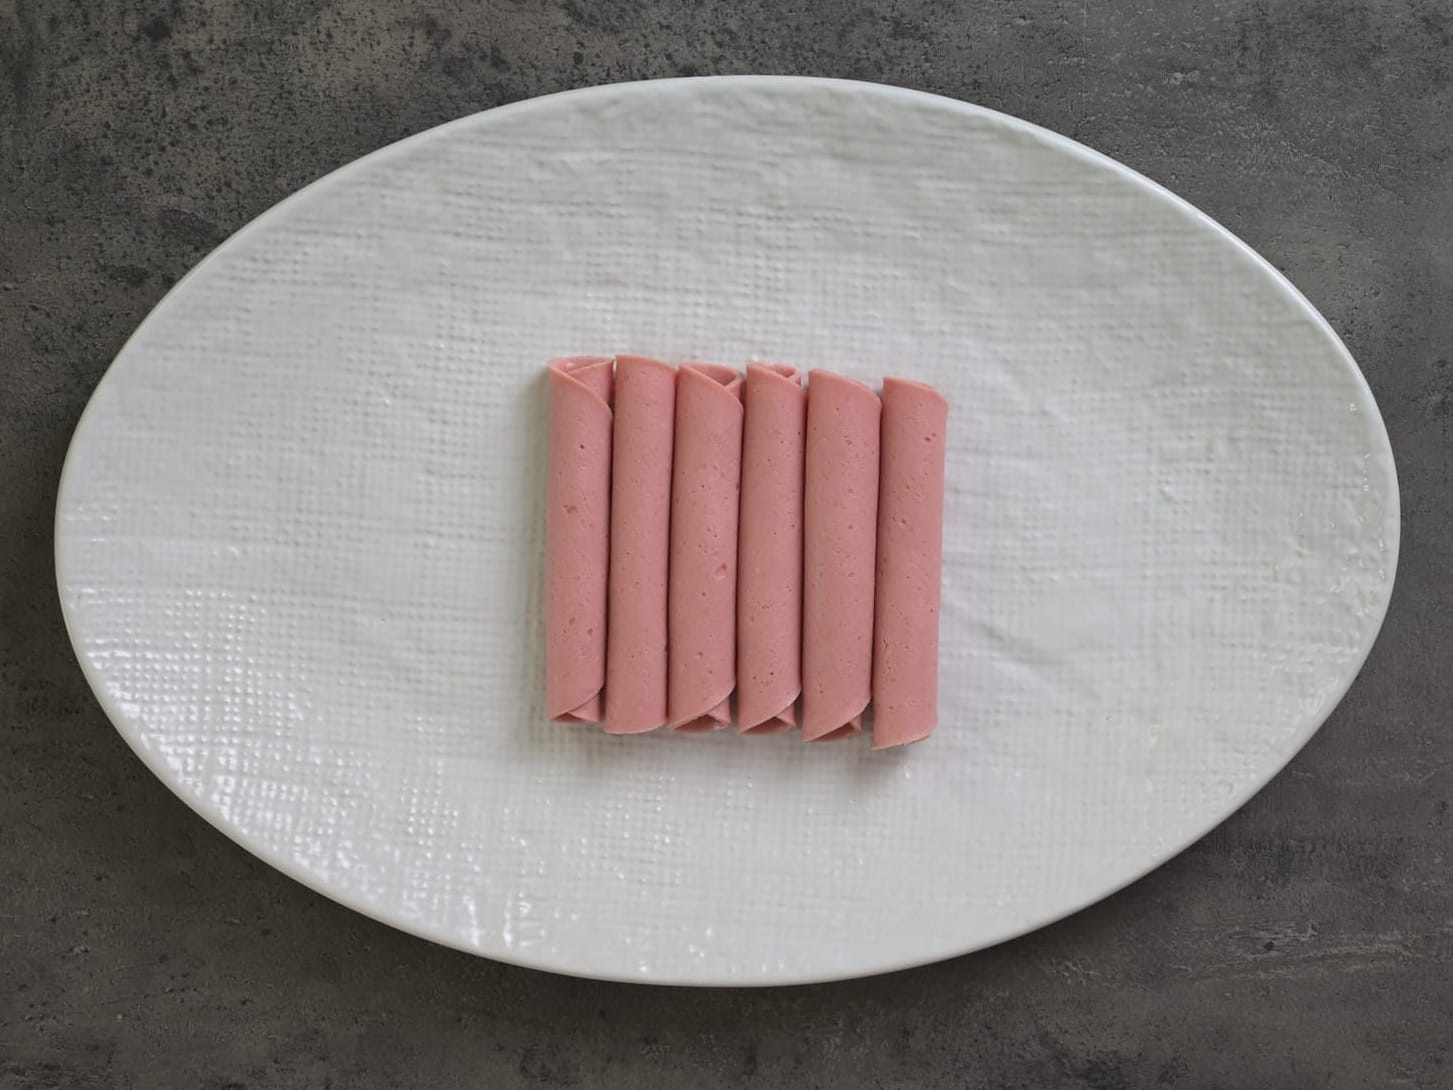
The Roll Fold
Simply rolling meat can enhance the presentation. It does compact the meat somewhat so if you are a bit short on meat, choose a different meat fold to make it look more abundant than it is.
- Take a slice of cold meat and roll it up.
- To stop it unrolling, either put the seam side down on the platter, or stack a few rolls tightly together. You can also pile these up into a pyramid like pile.
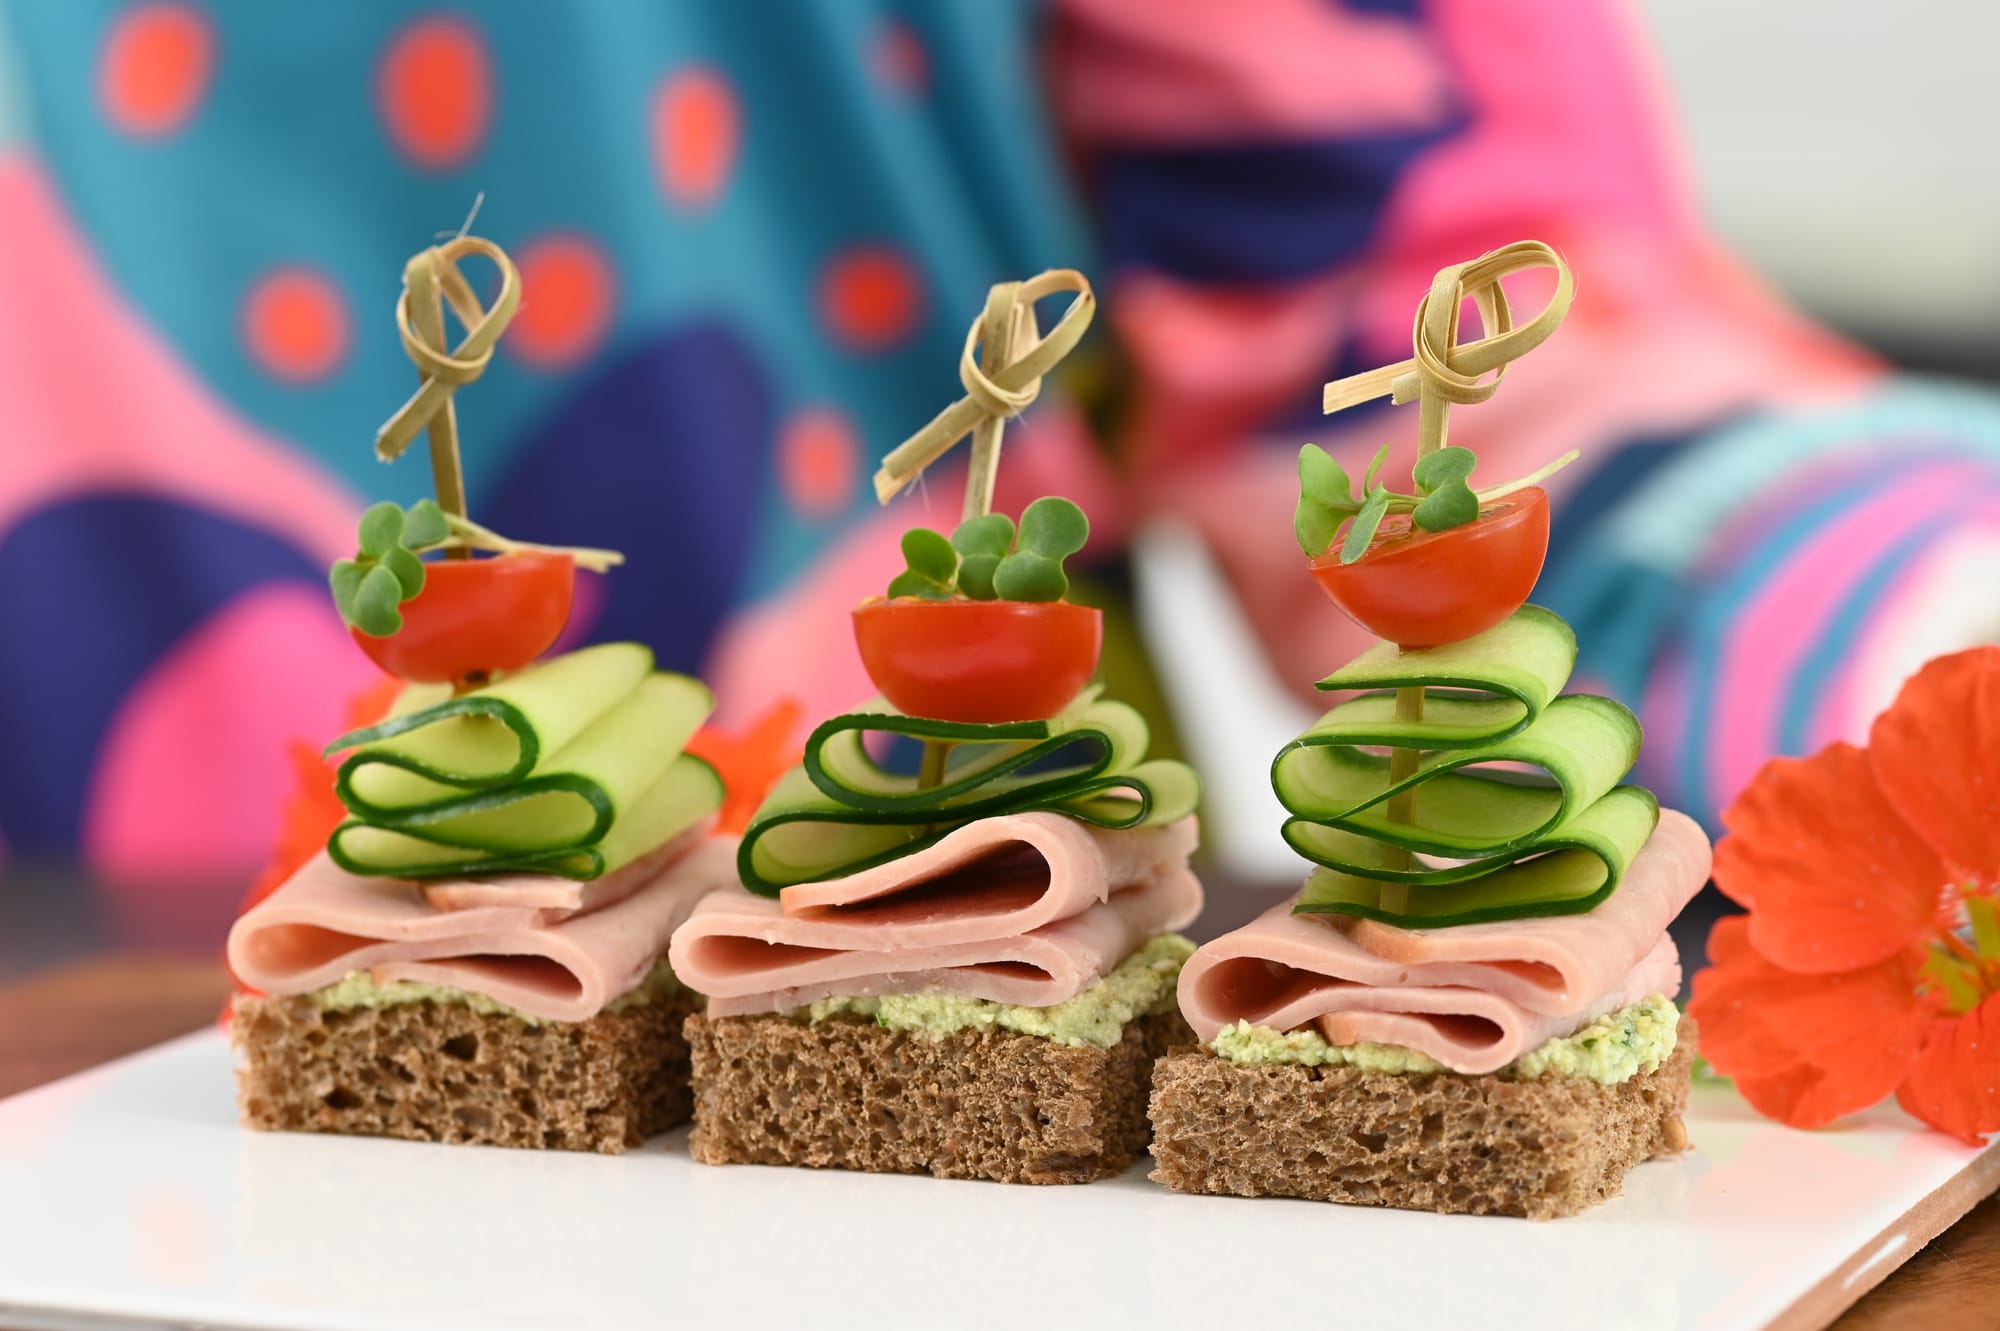
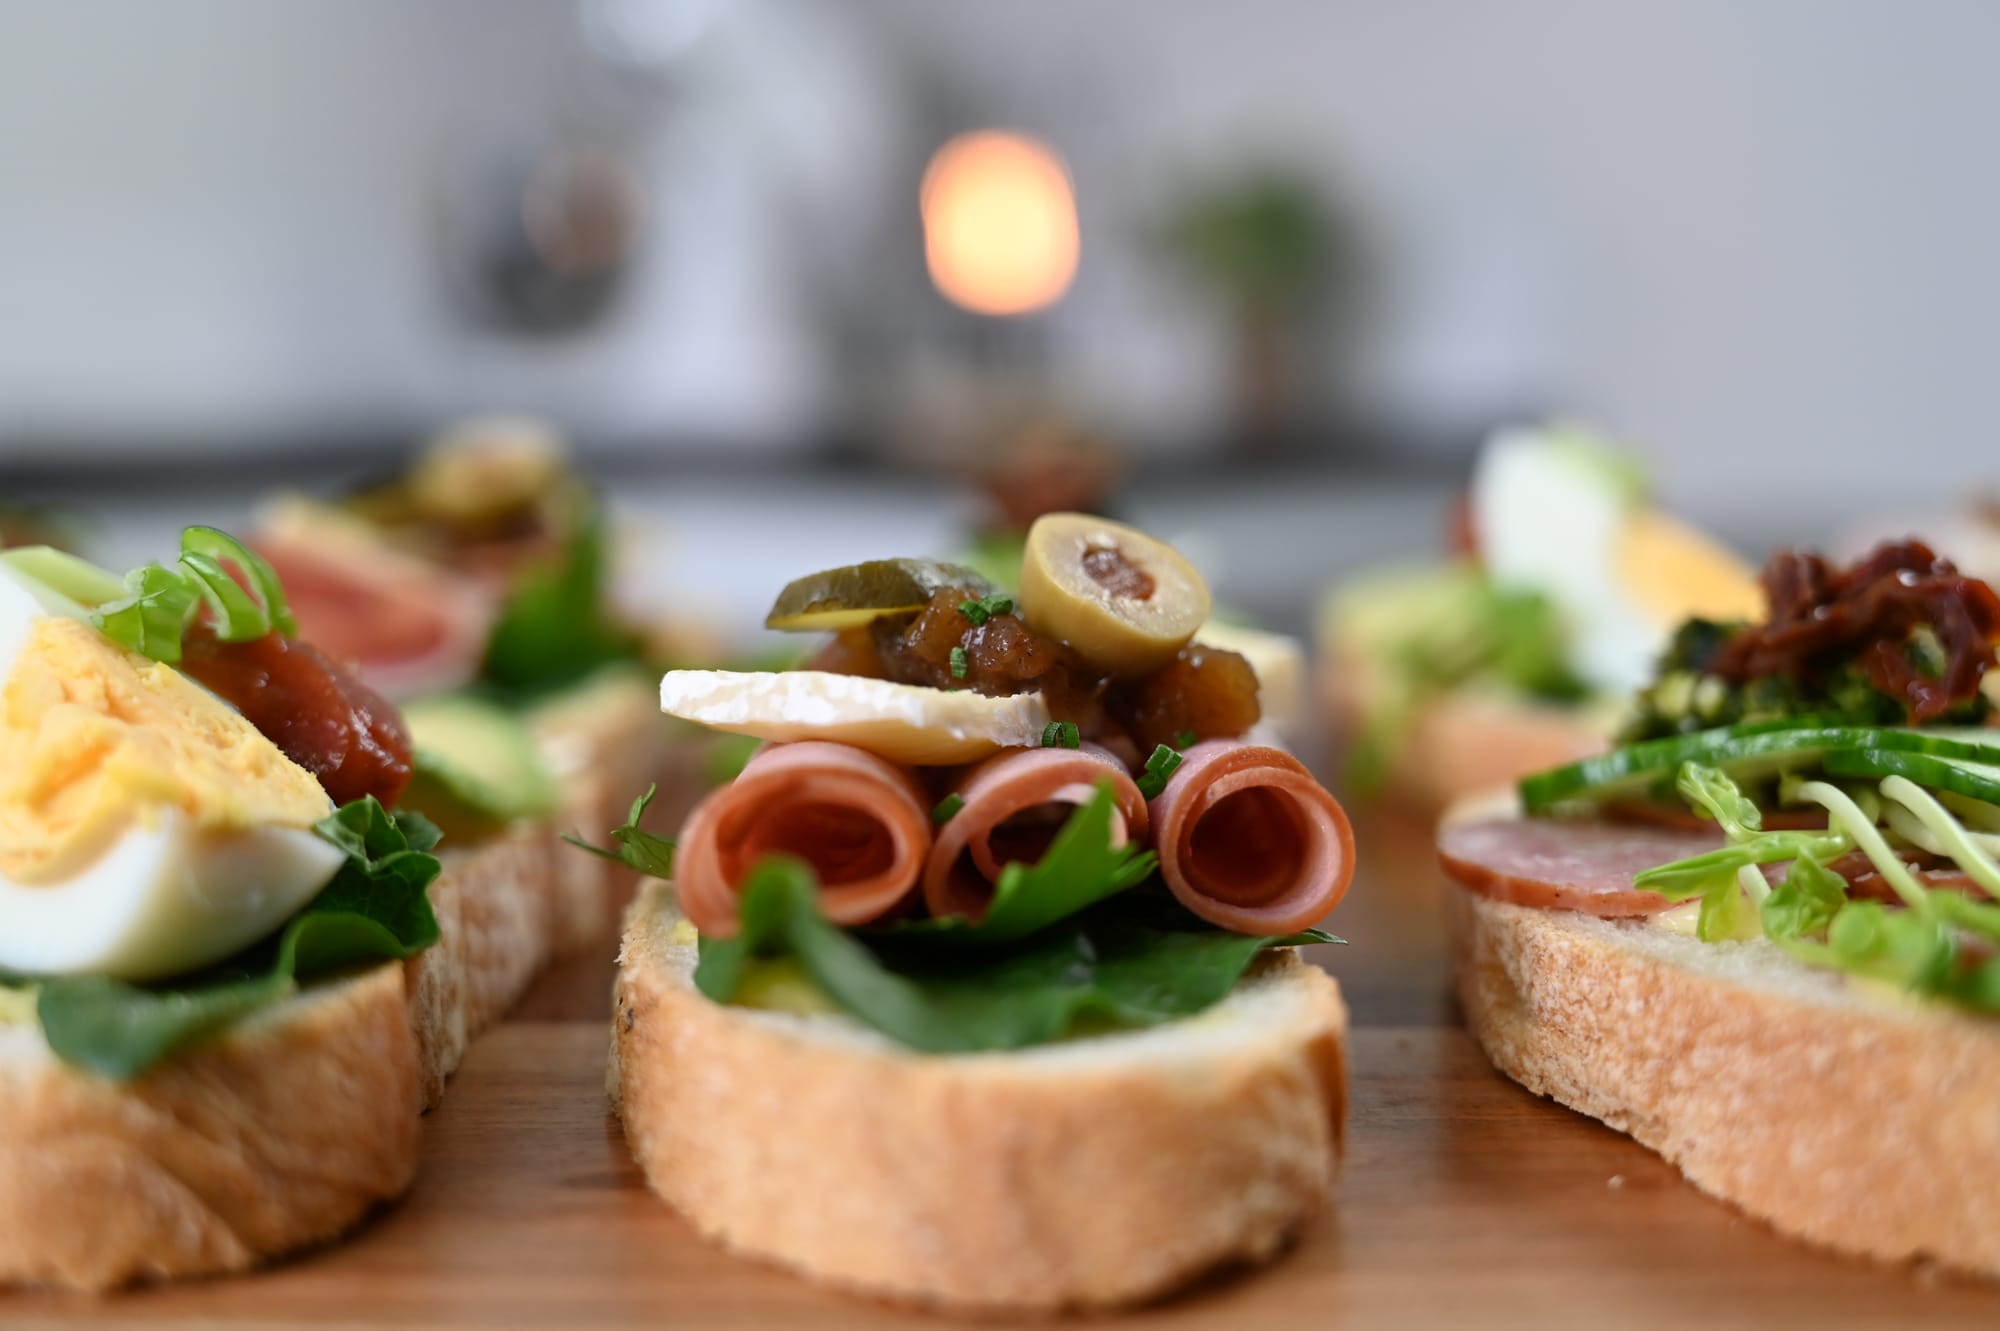
Here it is used on an open Danish style sandwich, and on a meat and seafood platter (see ham).
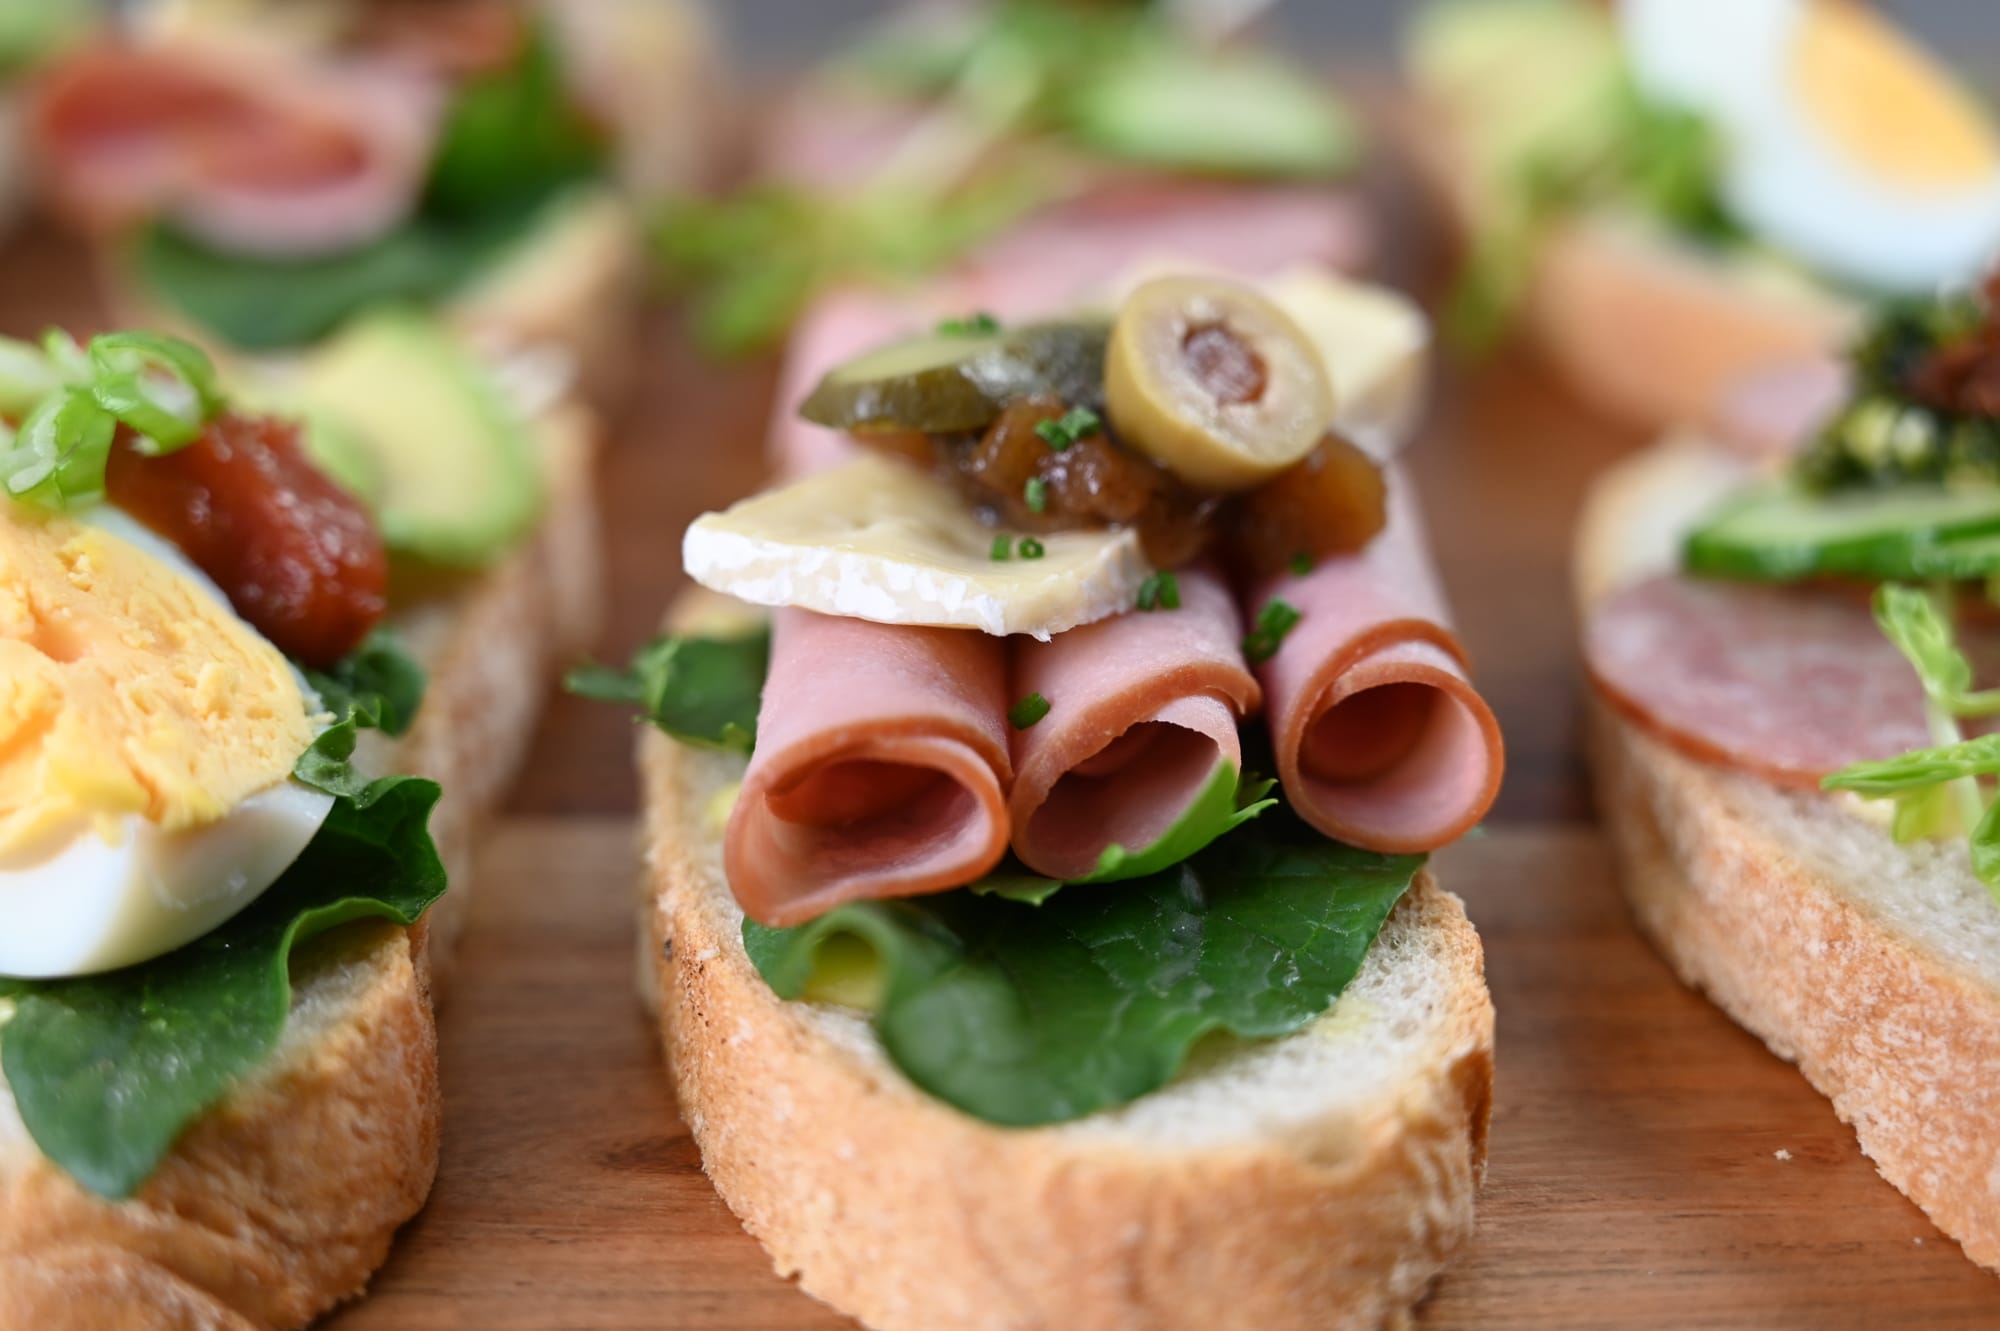
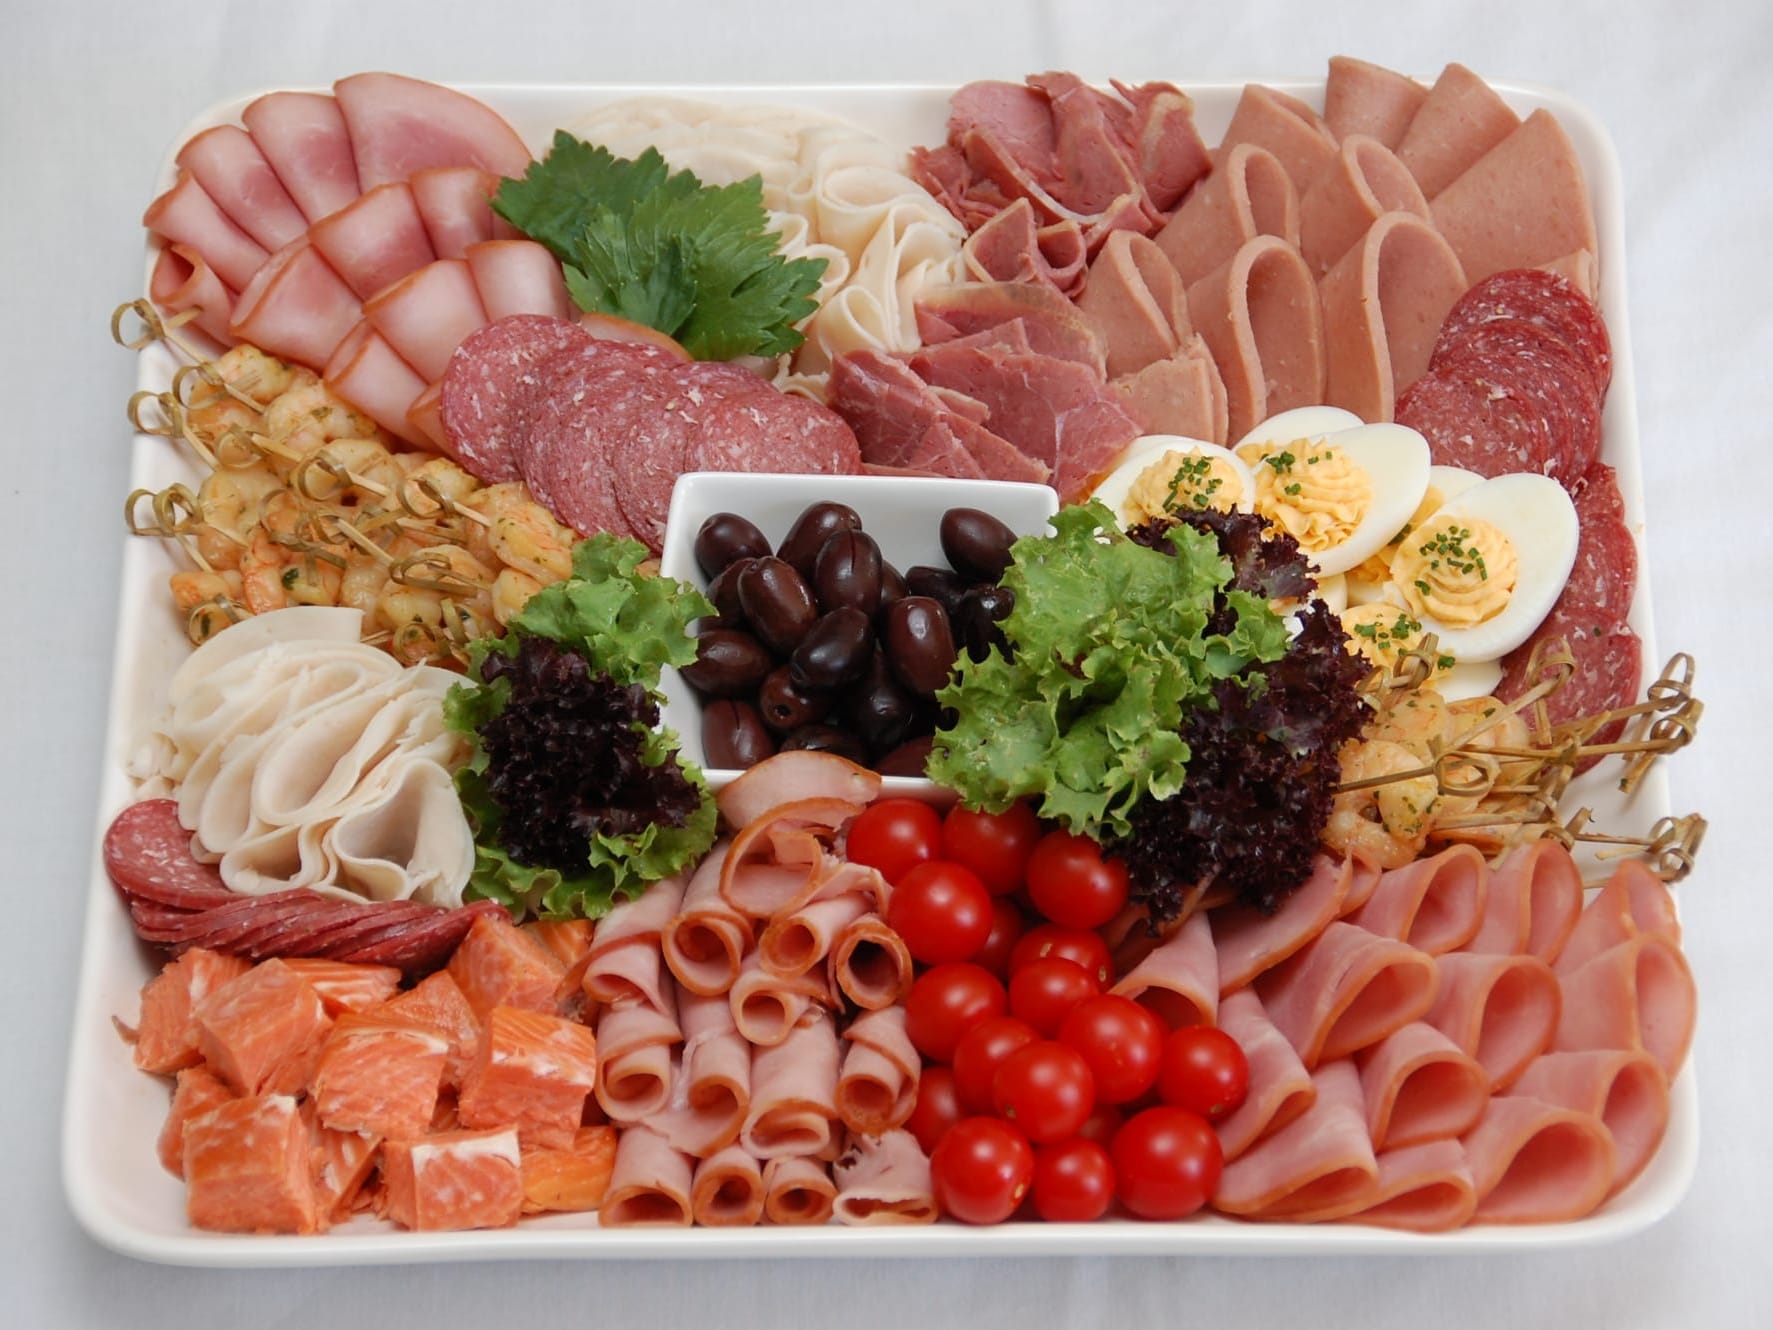
The rolled meat fold used on open Danish sandwiches and a meat and seafood platter.
The Roll Fold - A Variation
For smaller appetisers or canapés often a roll is too big. You can roll the meat and then cut it into smaller sections, or try this:
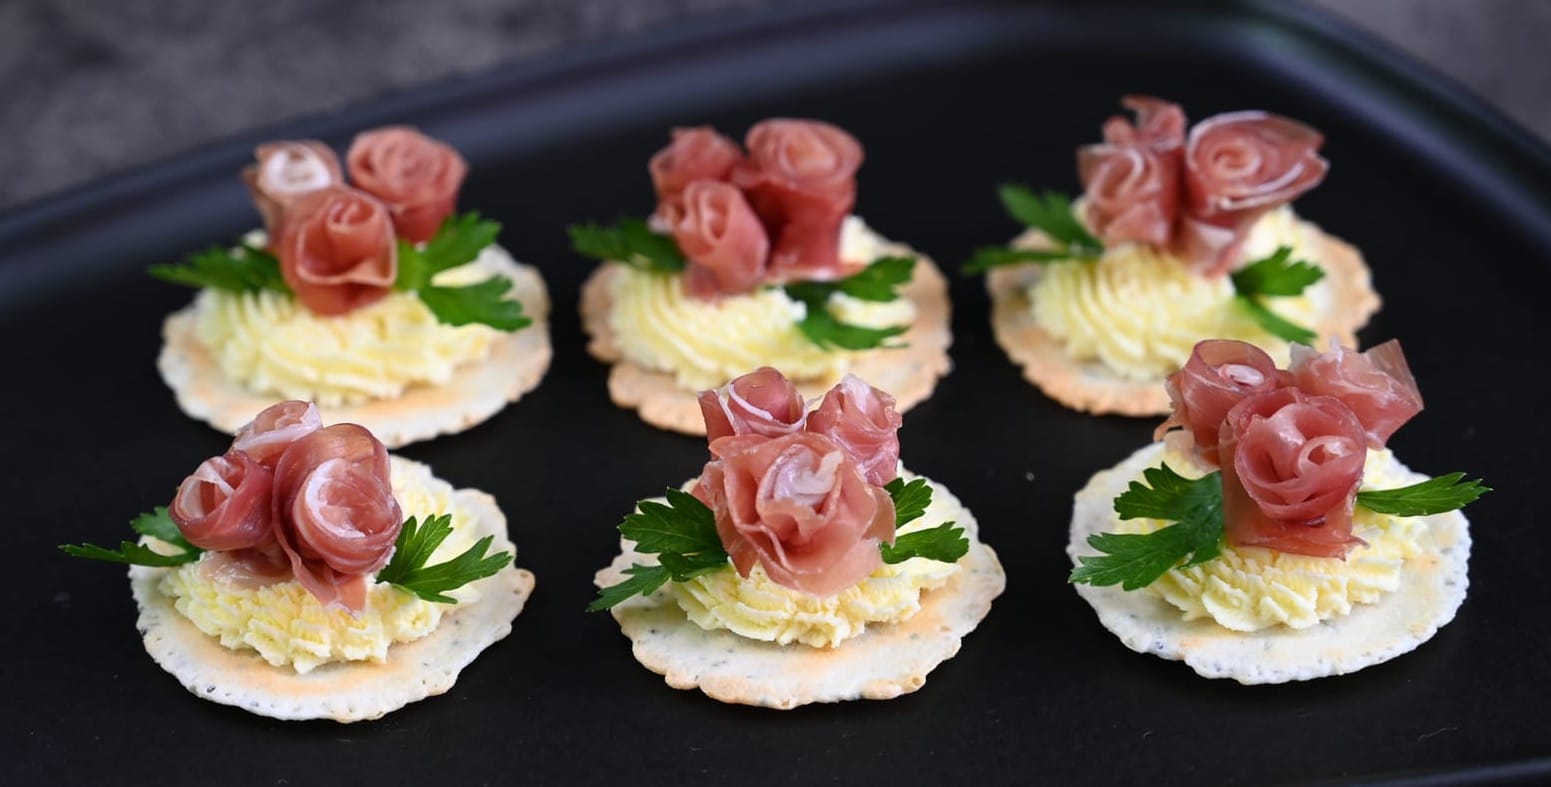
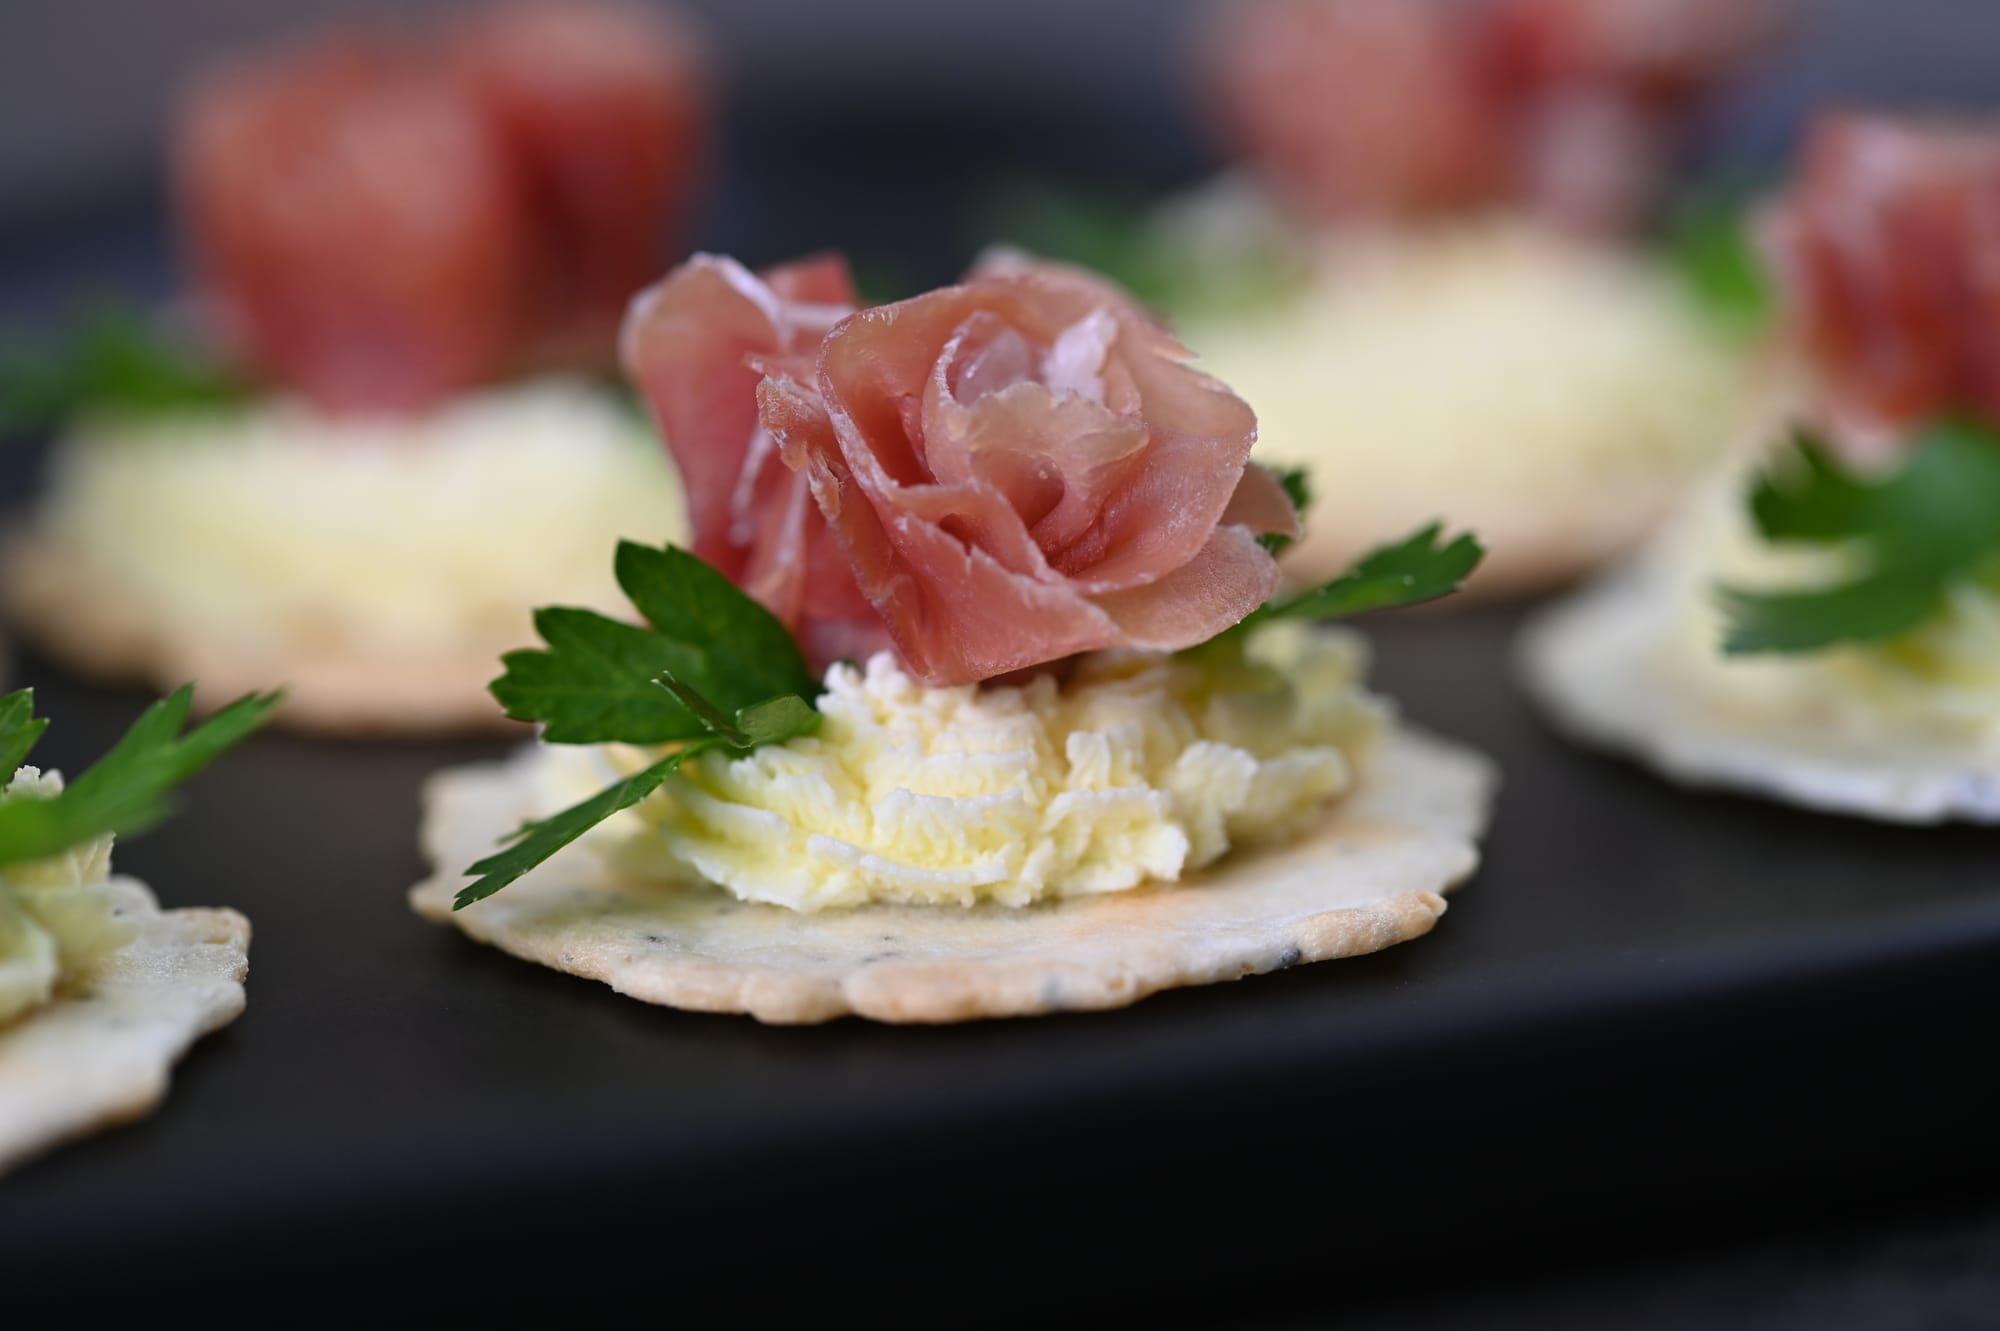
- Fold half a slice of meat (pastrami used here) in half and roll up from the short side. Here the edge is tucked over and stuck onto the cream cheese spread for added visual impact.

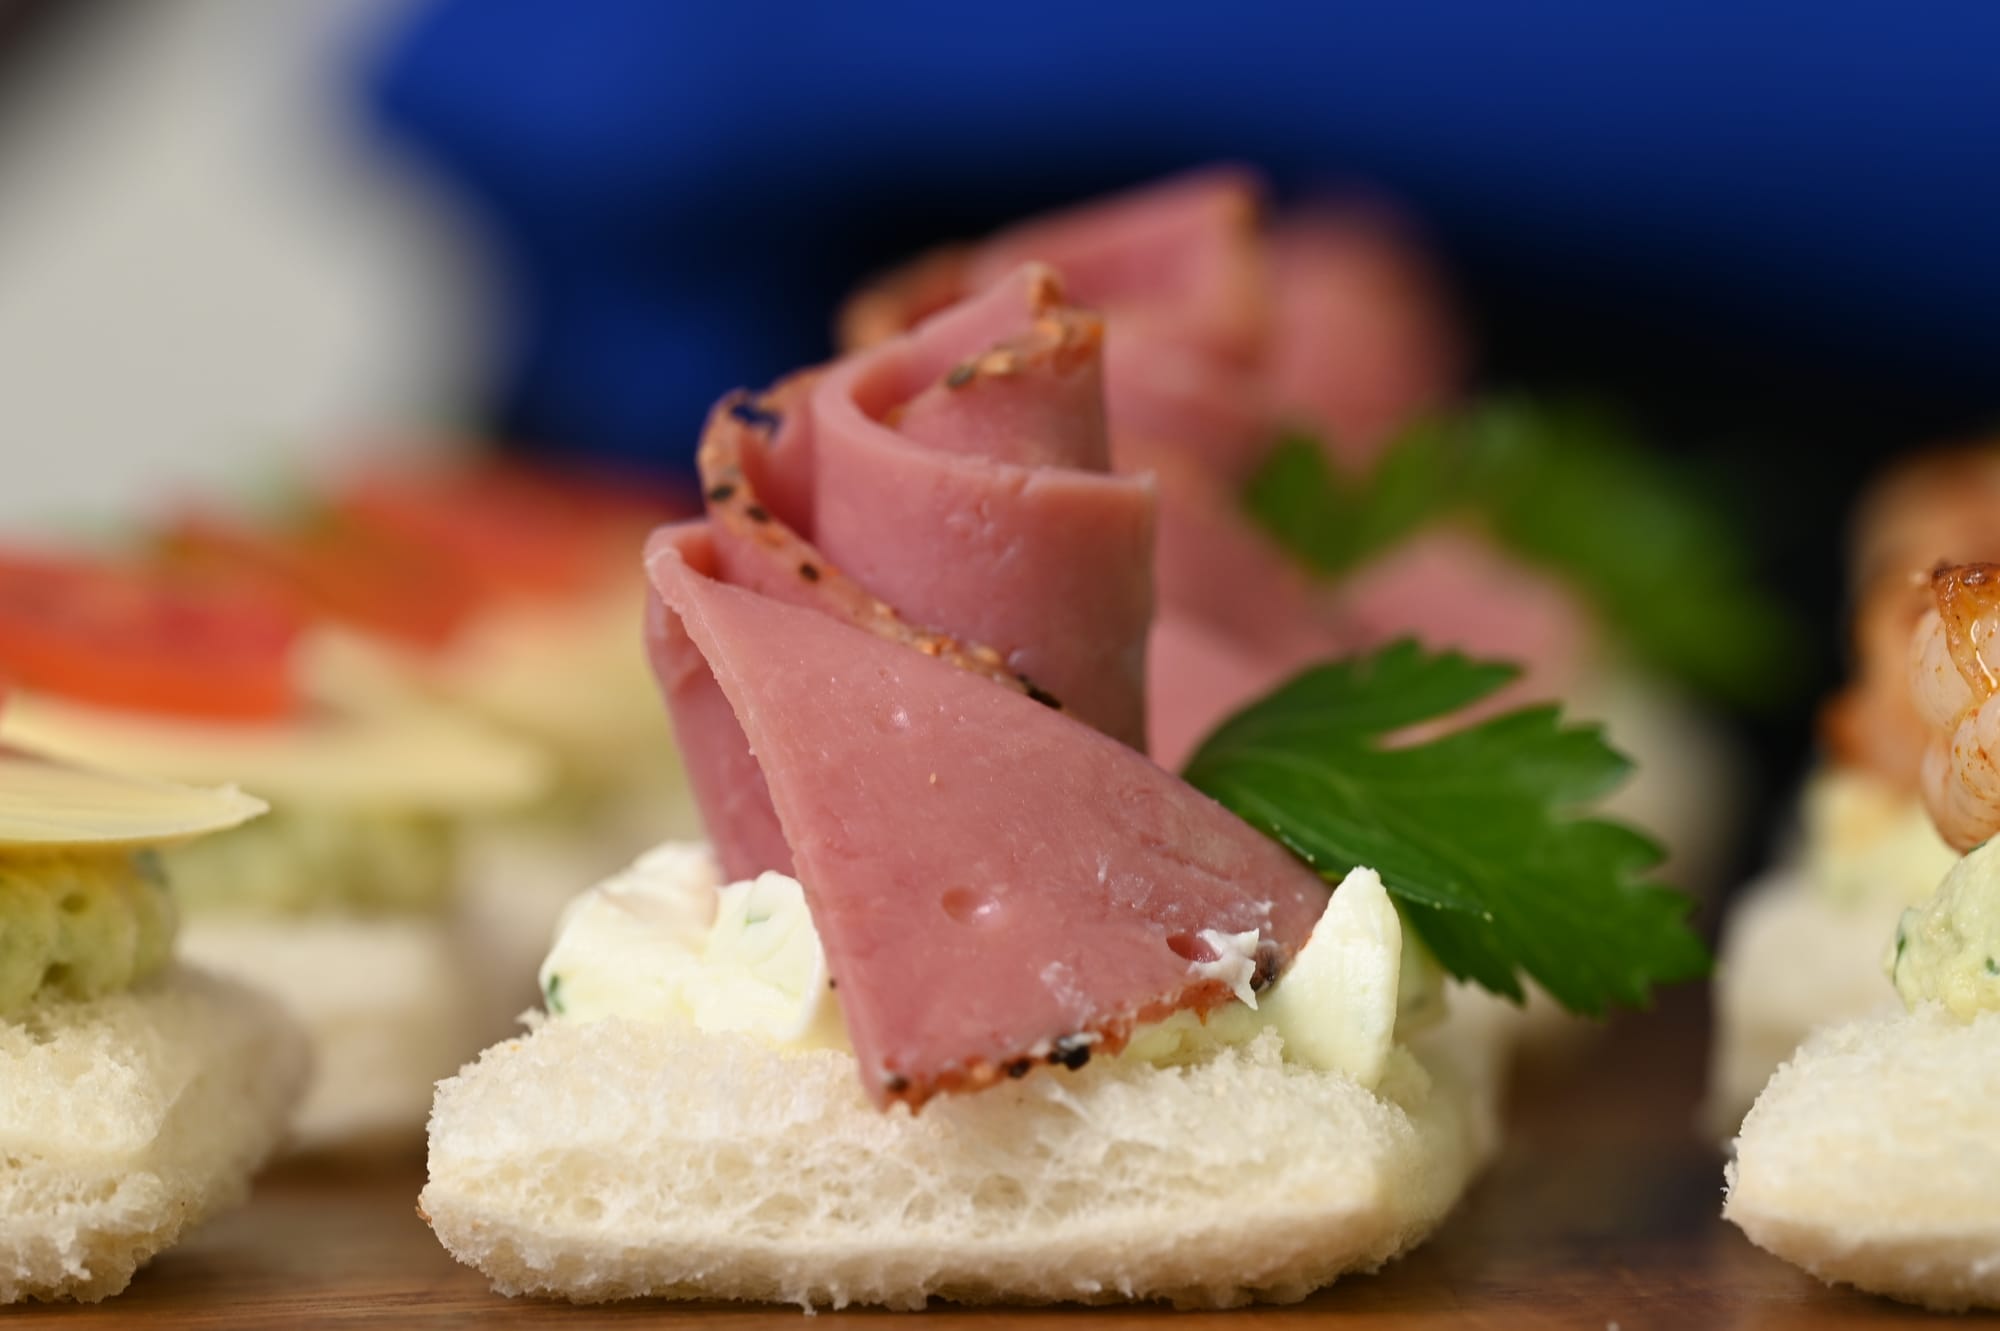
Using the roll fold variation on a pastrami rose appetiser.
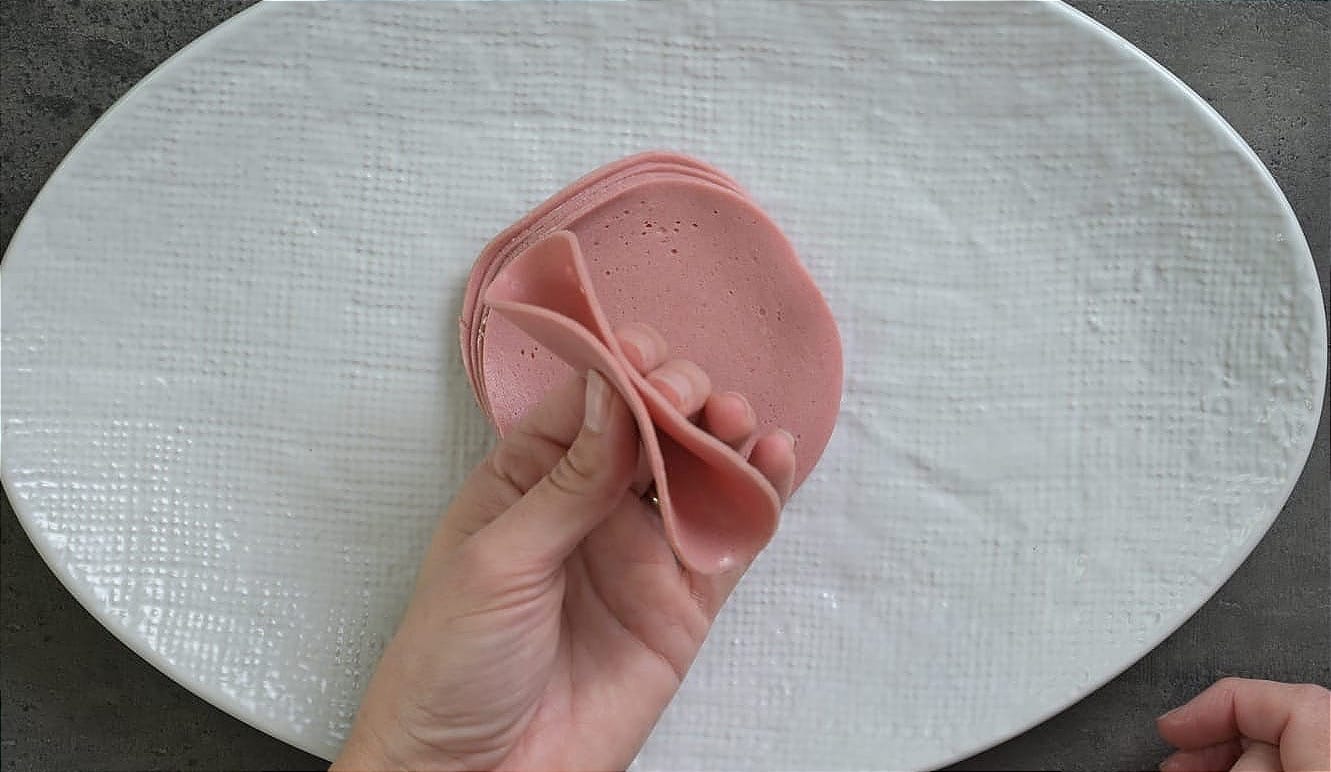
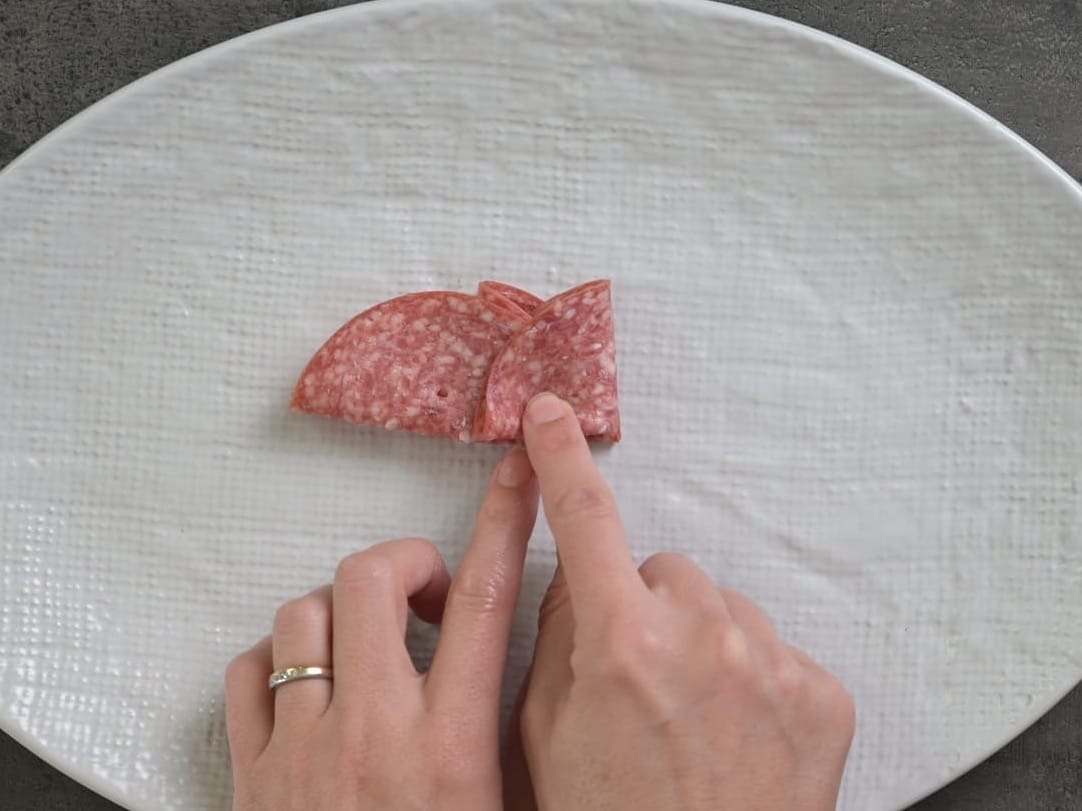
The Concertina Fold
- Fold a slice of meat in half.
- Fold another slice of salami in half and position it next to the other piece, overlapping from halfway.
- Fold the first slice in half again to overlap the second piece.


The concertina fold using salami.
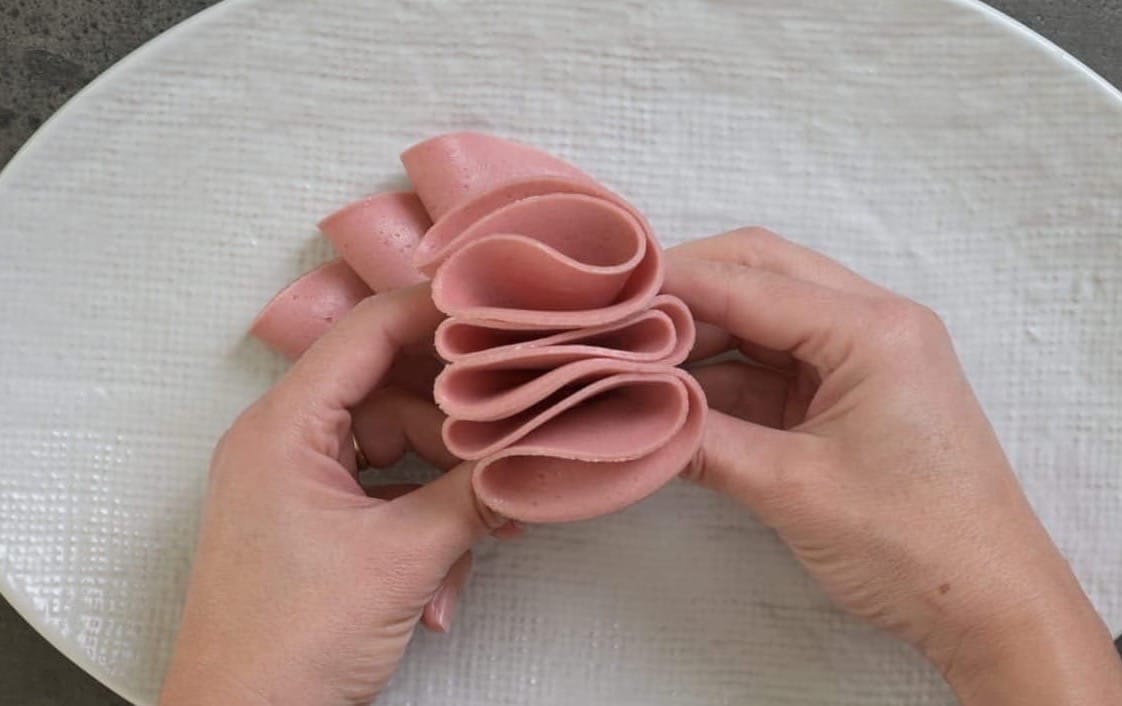
- Fold another slice of salami in half and place it on top in the same position as the first slice.
- Fold the second slice back over into the middle.
- Place another folded slice on top in the same position as the second slice.
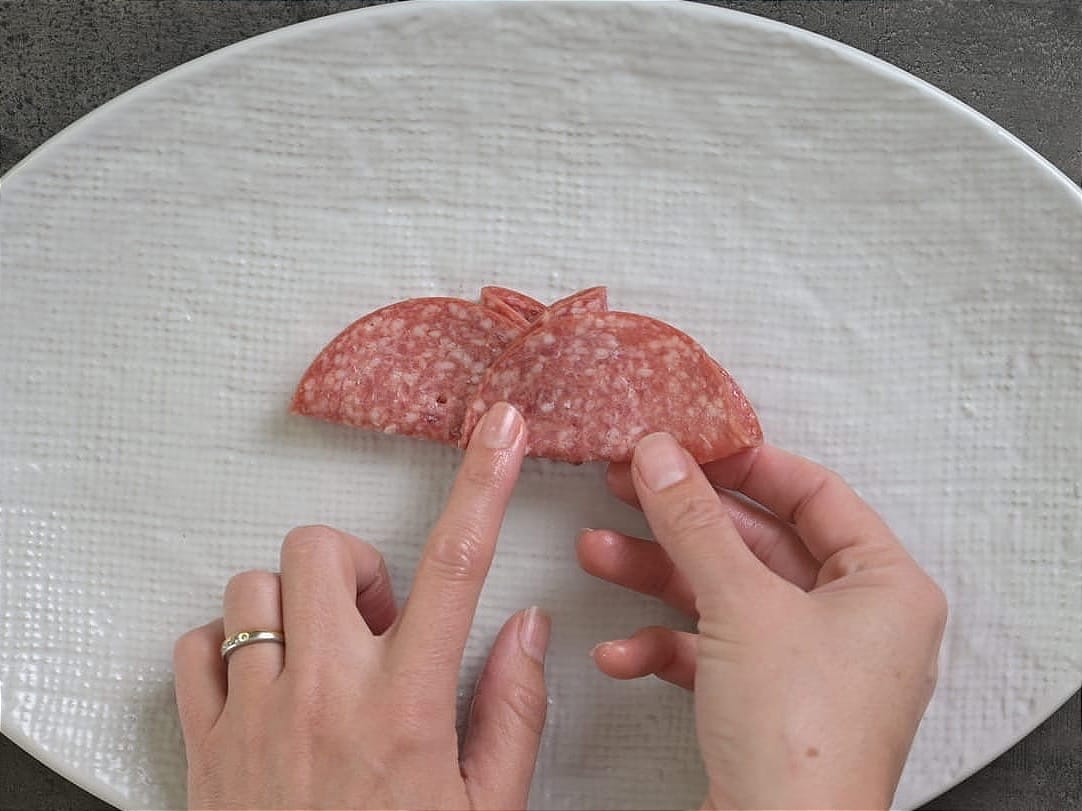
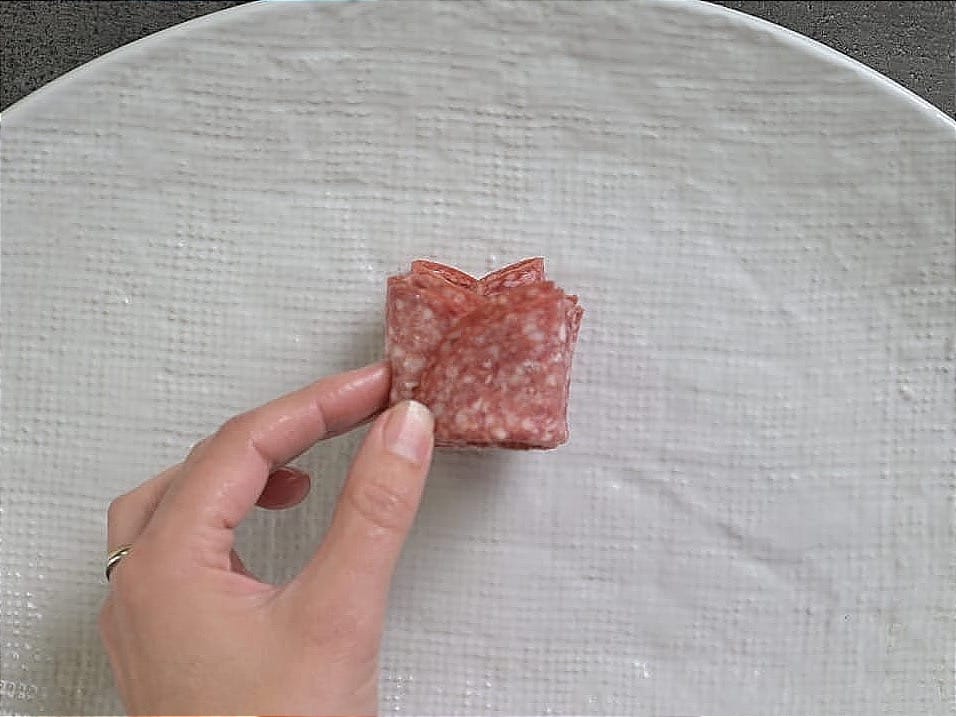
The concertina fold using salami.
- Continue adding folded slices and interleaving them until you have a little stack. You can make this as long as you need for your platter.
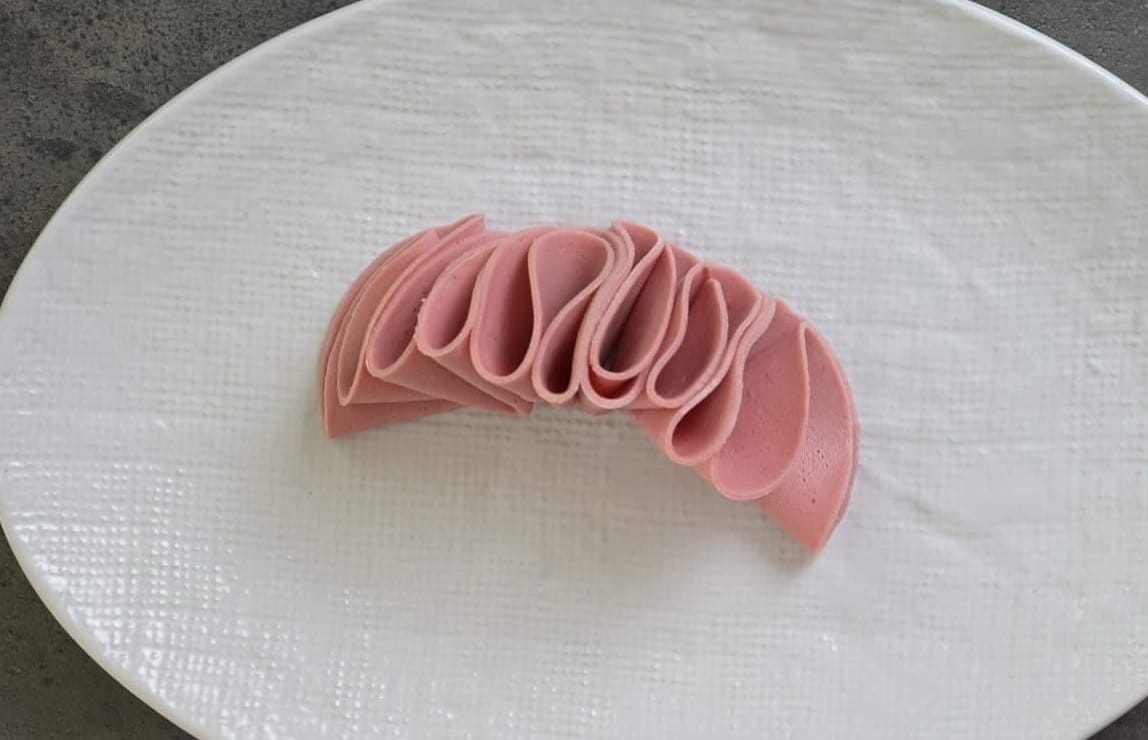
- Lie it down with the folded edges on the plate.
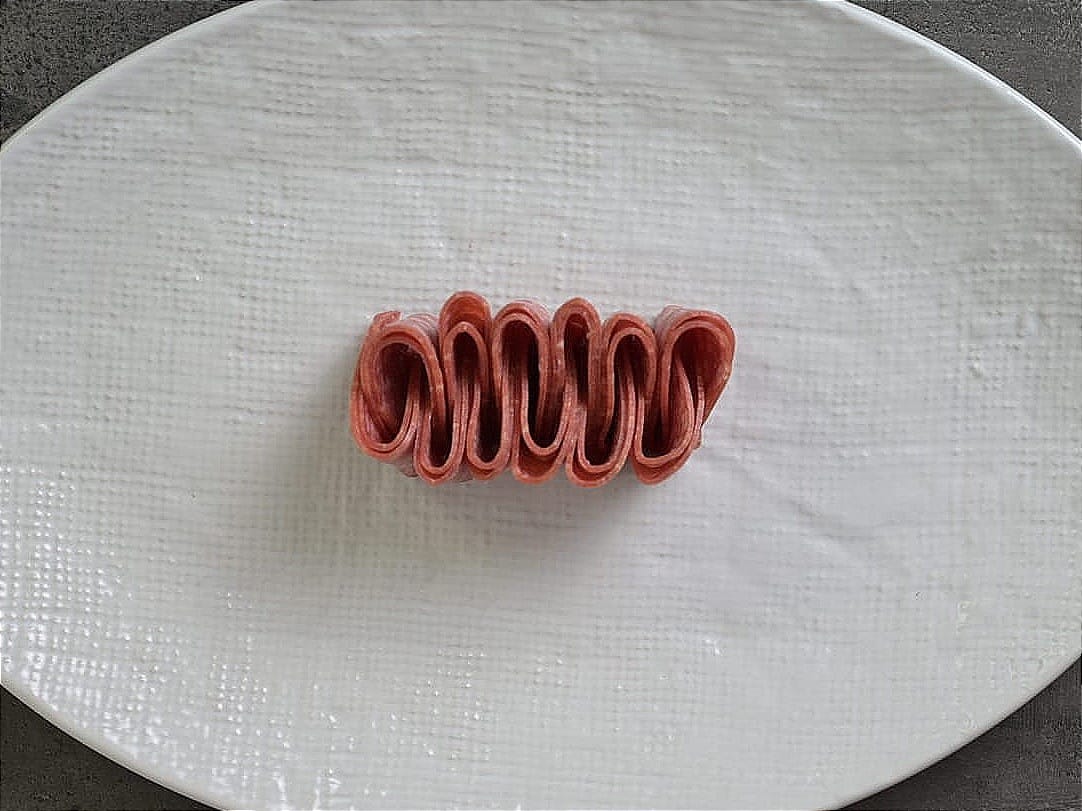
The finished concertina fold.
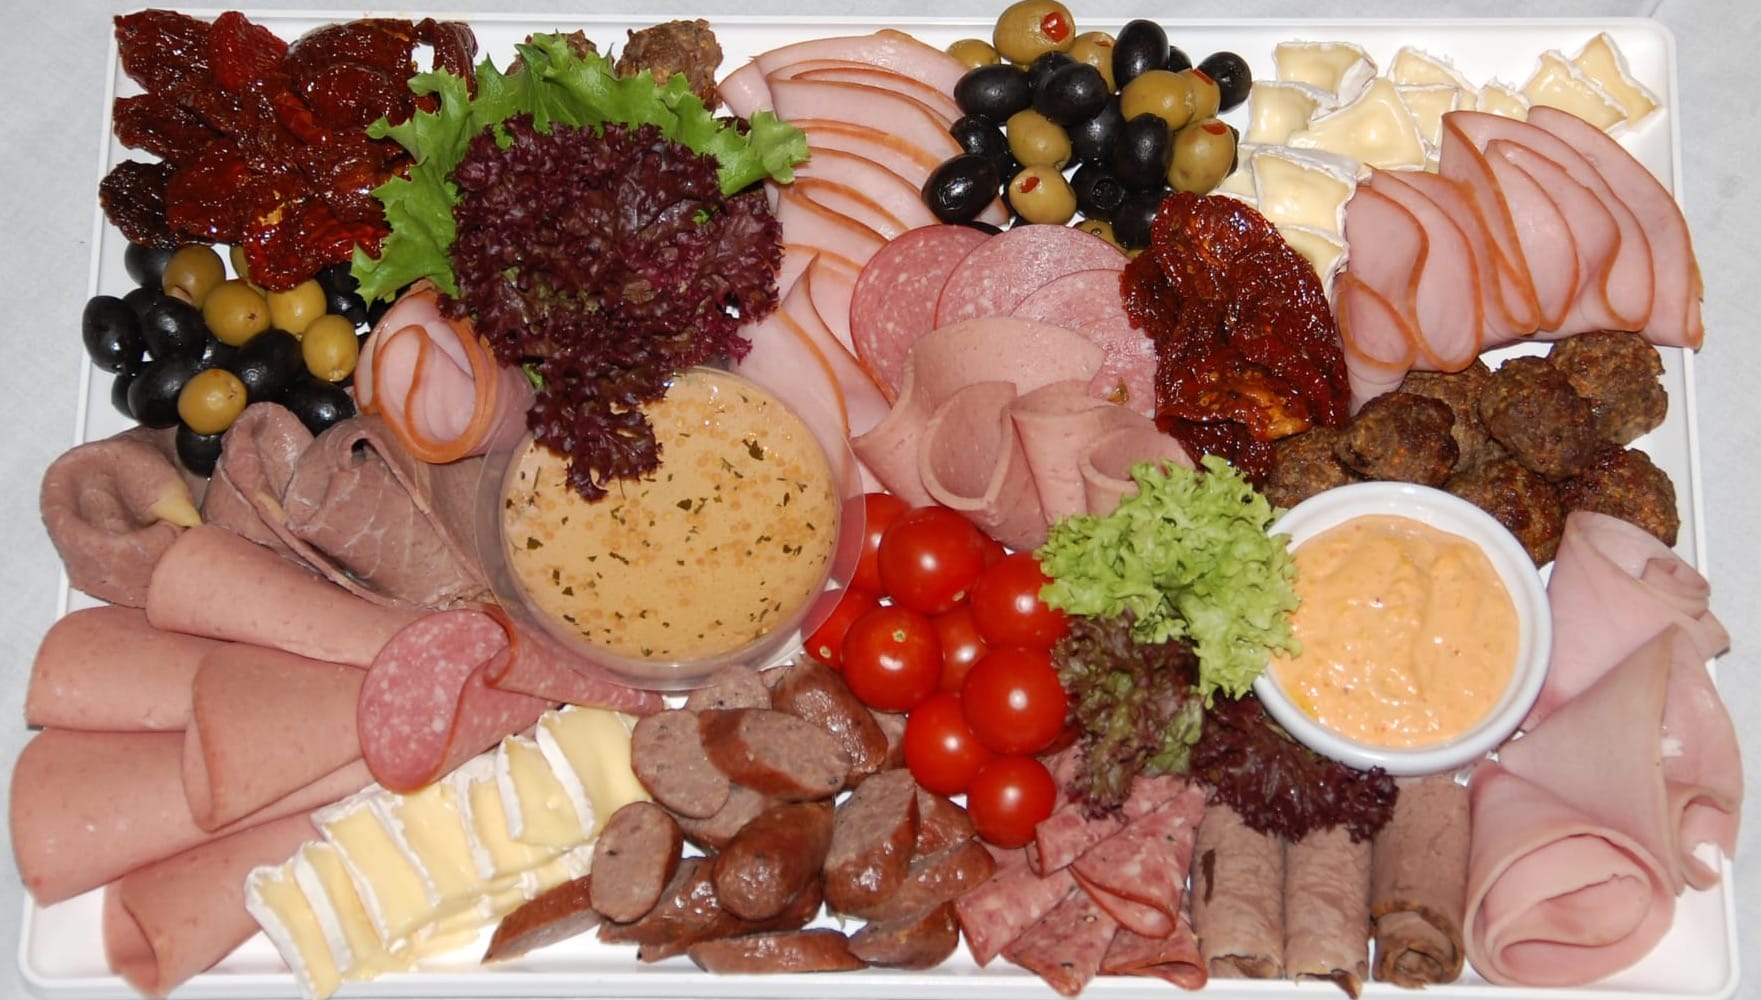
Here it is used on a charcuterie board. This looks fantastic on a meat platter or cheeseboard style platter too.
The Concertina Fold - A Variation
For smaller canapés, rather than platters you can use a simple backwards and forwards style concertina fold. Take a strip of meat and fold it backwards and forwards - sometimes you may need to secure these with a skewer.
The Ribbon Fold
This is great for long, very thinly sliced meat like prosciutto. Simply drape each slice into loose waves, like a ribbon, allowing natural folds to fall. Loosely draping it is the key to making this look the best it can.
You can also cut the strips smaller and use the same technique to make tiny ribbons or rosettes for a smaller appetiser or canapé.
The ribbon fold used on prosciutto.
Pro Tips for Picture-Perfect Meat Presentation
Folding meat for visual appeal is definitely an instant win, but here are a few more tips to keep in mind to really make a stand out platter:
- Alternate Colours and Textures: Mix darker coloured meats with lighter ones for contrast.
- Group in Odd Numbers: Clusters of 3 or 5 are more visually appealing than even groupings.
- Balance the Board: Don’t crowd all the same meat in one area. Spread it out so it can be accessed from different sides of the platter.
Meat folds used in filled rolls, on a platter and on open Danish sandwiches.
Final Thoughts
Folding meat isn’t just about looking fancy - it’s about creating a sensory experience before anyone even takes a bite. With a few simple techniques and a little creativity, your charcuterie boards can go from basic to breathtaking.
You can use these techniques for party platters, sandwiches, sandwich boards, charcuterie displays, dinner parties and even when making appetisers and canapés. By mixing a few folds - some simple, some decorative - you’ll strike the perfect balance between effort and impact.
With just a little practice, you’ll be able to turn basic deli meats into a show-stopping part of any platter!
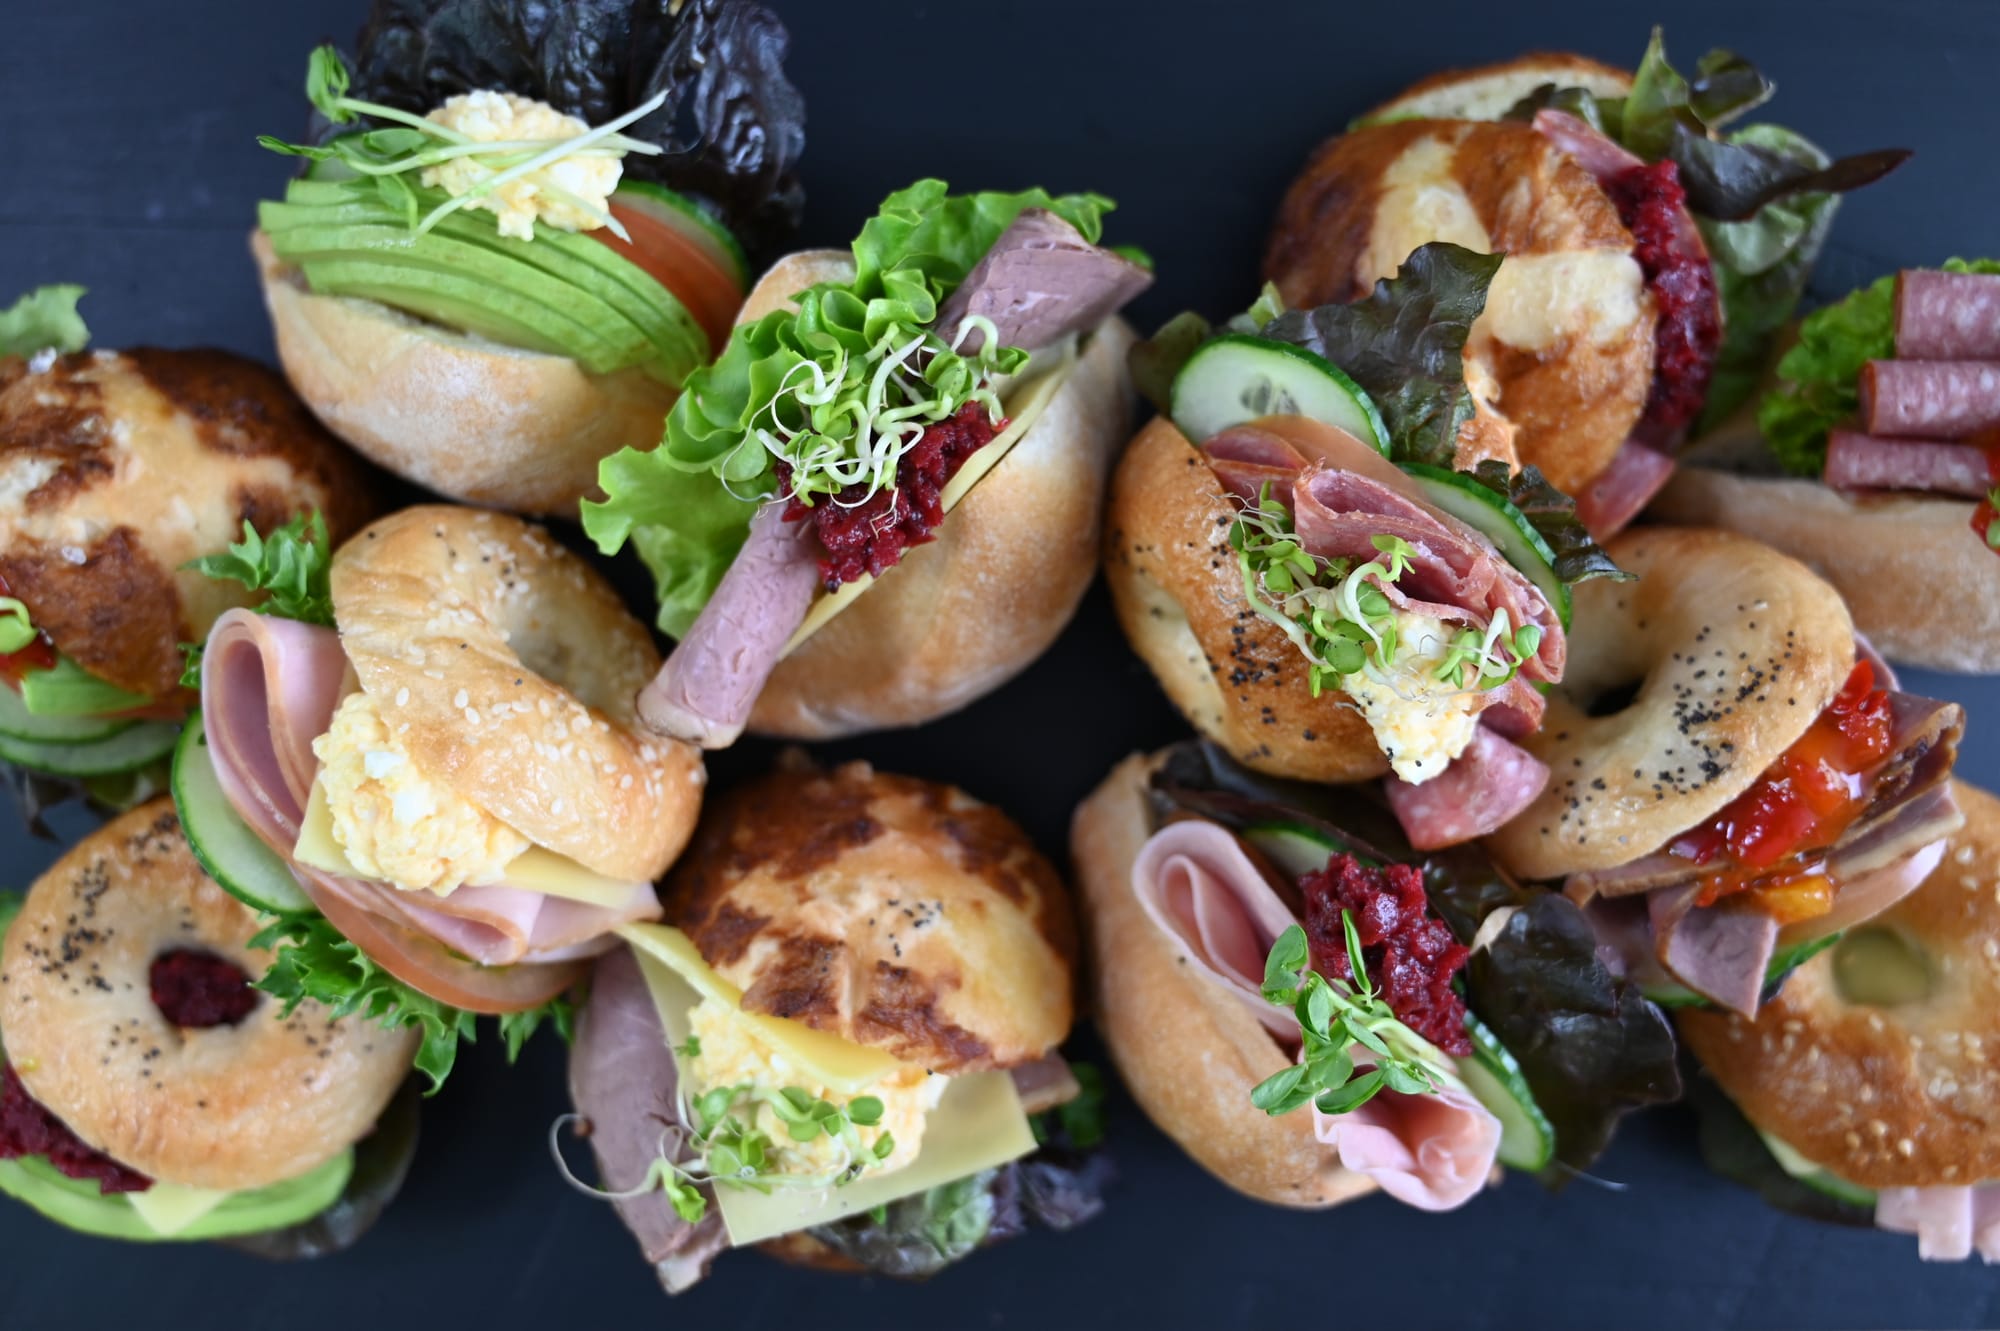
Different ways folded meat can add visual appeal to food.