
Did Someone Say Gourmet? - Issue #69
Hey there, Food Lovers!
Get ready to feast your eyes and tickle your taste buds because it's my favourite week of the month - New Video Week! We've just published our latest video featuring the most beautiful and scrumptious little sandwiches you've ever seen. These mini delights are not only a visual treat, but are also bursting with flavour, and the best part? You can whip them up in no time at all!
I had fun in my kitchen making some amazing mini freakshakes this week. They're one of those kitchen creations that are super easy to put together, they look like they've taken ages, and they appeal to anyone with a sweet tooth! Below you'll find all the details and a step-by-step guide to creating your own over-the-top shakes that will wow everyone.
While we’re talking about gourmet goodness - we'll also talk about burgers. Burgers are a universal favourite often enjoyed by so many of us. With an abundance of fresh ingredients, bright colours and multiple fillings they're the perfect canvas for brilliant food presentation. Read more below for tips on making your burgers look as good as they taste.
So, what are you waiting for? Dive into this week’s delicious content and let your culinary creativity soar!
In this issue:
- Fresh off the press - The Prettiest Little Sandwiches In The World?
- Inspiration from my kitchen - Mini Freakshakes
- In the spotlight - Burgers
Our last newsletter featured a recent high tea party with all sorts of delicious little goodies... You can read it here: https://www.easypeasy.co/newsletters/issue-68/
Fresh off the Press...(+ Recipes)
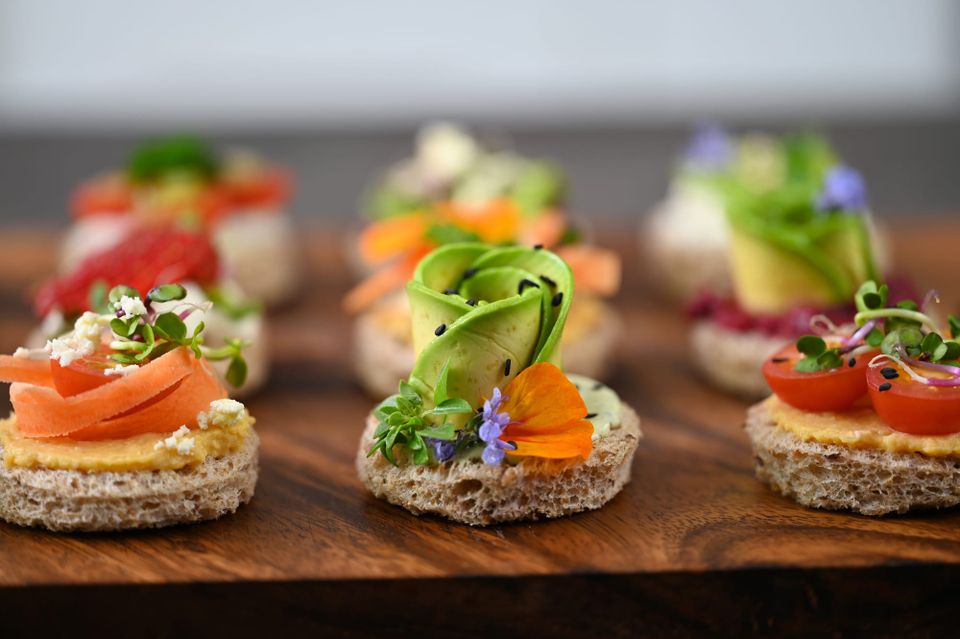
Our latest video - The prettiest little sandwiches in the world? - has just been published.
Have you ever wanted to put together a plate of beautiful, vibrantly coloured gourmet tea sandwiches but don't know where to start? In this video we'll guide you through the process so that you can effortlessly create your own amazing platter of beautiful sandwiches in no time at all.
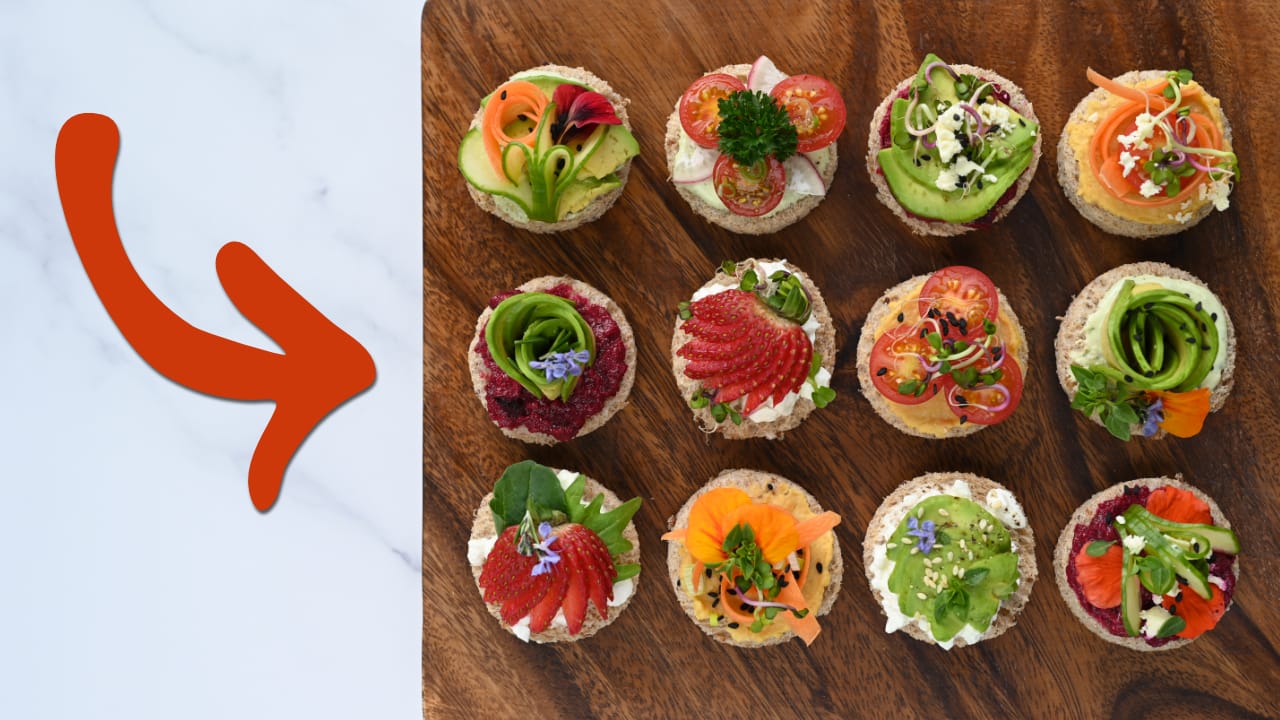
We'll discuss the importance of prepping your chosen ingredients to get the best of out them visually, and then we'll discuss the concepts of flavour and colour as we assemble 12 completely different sandwiches using the same assortment of ingredients.
You don't need a lot of ingredients or special skills, just follow this process and let your creativity flow as you assemble your sandwiches and I'm sure you can also finish with a platter of pretty sandwiches. I hope you have fun creating some of your own soon!
Gourmet Tea Sandwiches
Ingredient Suggestions:
- A loaf of bread - I used a dutch wholemeal loaf.
- Base layer spreads - I used a beetroot hummus, kumara/sweet potato hummus, spinach and yoghurt dip, and cottage cheese.
- Toppings - cherry tomatoes, radish, carrot, cucumber, strawberries, avocado, spring onion, leafy salad greens, sprouts.
- Garnishes - nasturtium flowers, rosemary flowers, fresh parsley, fresh globe basil leaves, black and white sesame seeds, feta cheese.
Preparation Suggestions:
- Prepare the topping ingredients:
- Cut the cherry tomatoes in half.
- Cut the radish into quarters, and thinly slice.
- Peel the carrot into ribbons to roll, twist or knot.
- Cut a chunk of cucumber in half. Carefully make 4 thin cuts almost all the way through and the 5th cut completely through. Then bend the 2nd and 4th slices to make a little fan.
- Peel, halve and thinly slice the avocado. Fan it out into a long thin strip and then twist it around to create a spiral shape. You can also use fanned slices as they are without twisting.
- Thinly slice the spring onion. If you have time, put the slices into a cup of iced water for about 24 hours to allow the rings to curl up.
- Cut the bread into the size you would like to use. Remember to keep all the slices as uniform as possible. I used a circle cutter.
Assembly Suggestions:
- Add a base layer of spread onto each circle of bread being careful to keep it all on the bread.
- Add a selection of toppings that go well together flavour wise and look good together. Remember to arrange the toppings to create a little height - if all the ingredients are flat it won't look very appealing.
- Add a garnish. This could be a sprinkle of seeds, a twig of fresh herbs, a sprinkle of feta etc. Don't forget to add a little seasoning too.
Inspiration From My Kitchen - Mini Freakshakes
Have you ever heard of a freakshake? They're usually so packed with sugary treats that they're enormous! But when my daughter decided she wanted freakshakes for dessert at her birthday party, I thought, why not mini ones? They're just as fun to make and a bit more manageable!
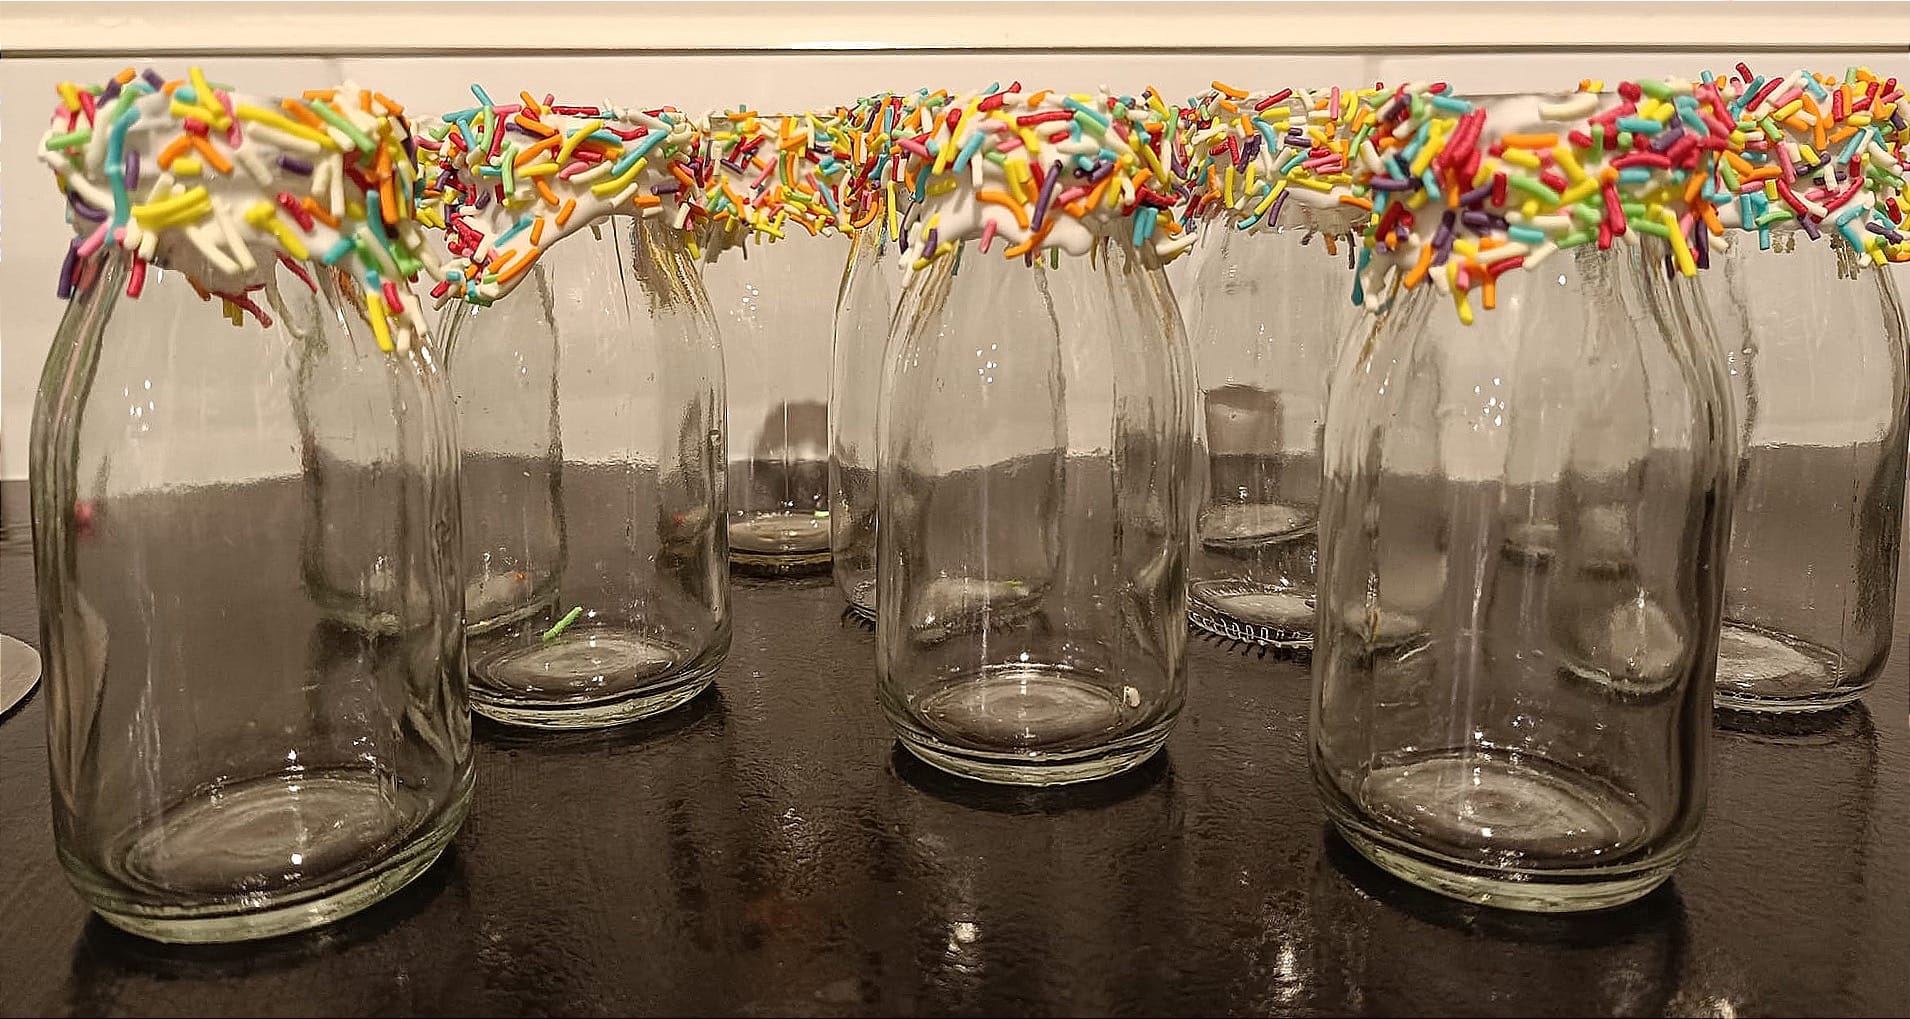
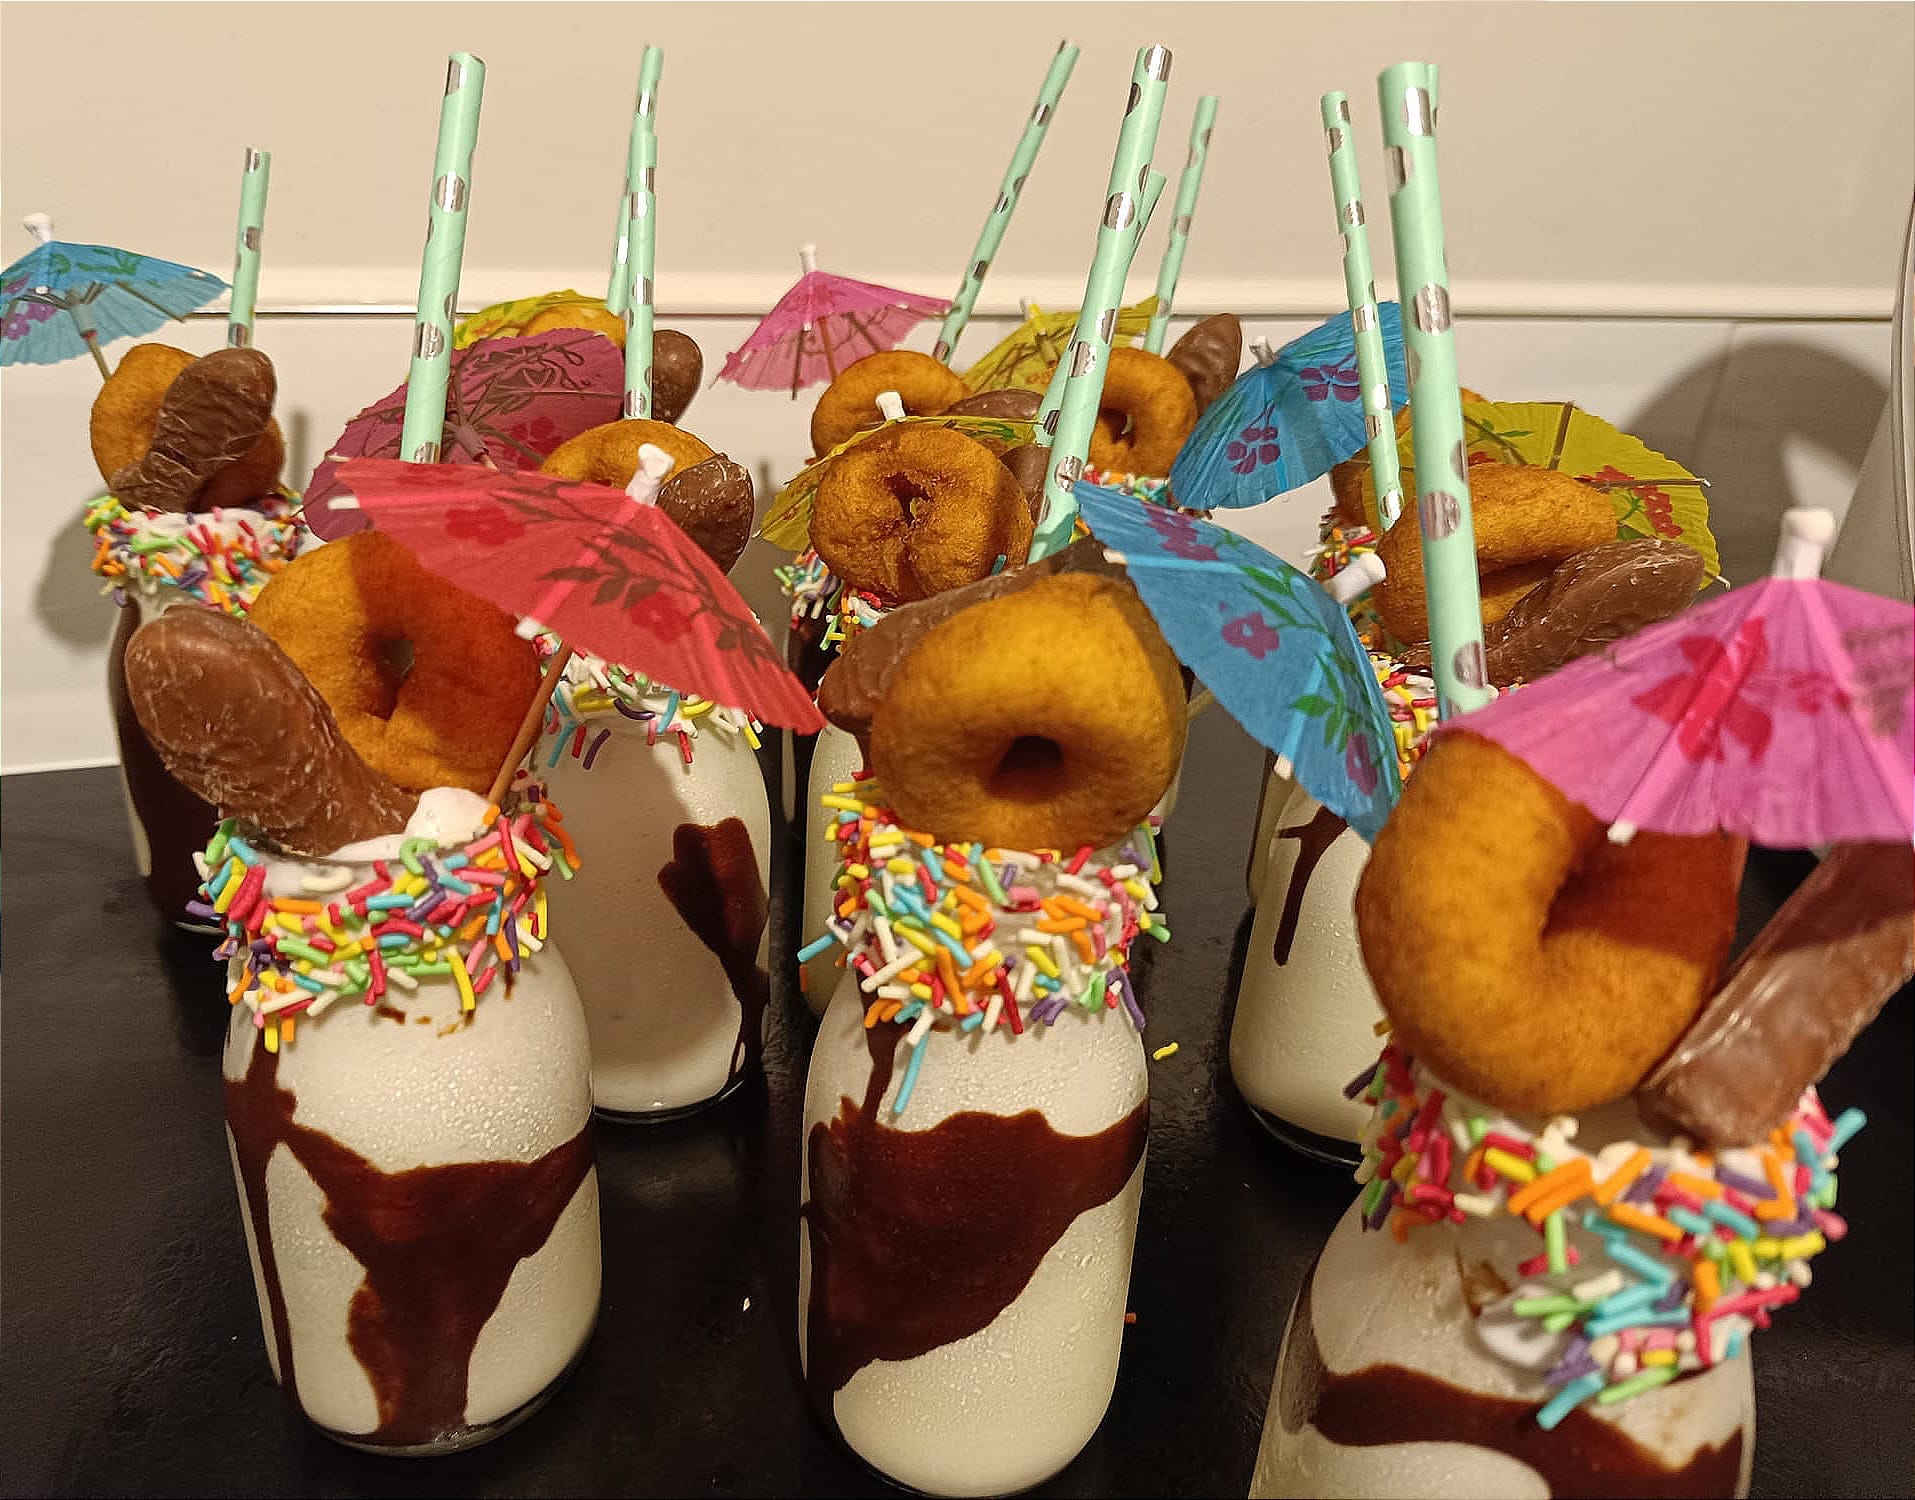
Making miniature freak shakes.
Here's what I did:
- I began with small milk bottles, first dipping the rims into melted white chocolate and then into a bowl of sprinkles. You could also use royal icing for dipping. As for the sprinkles you can get creative - jelly crystals, nuts, or cookie crumbs all work great. This step can be done well in advance.
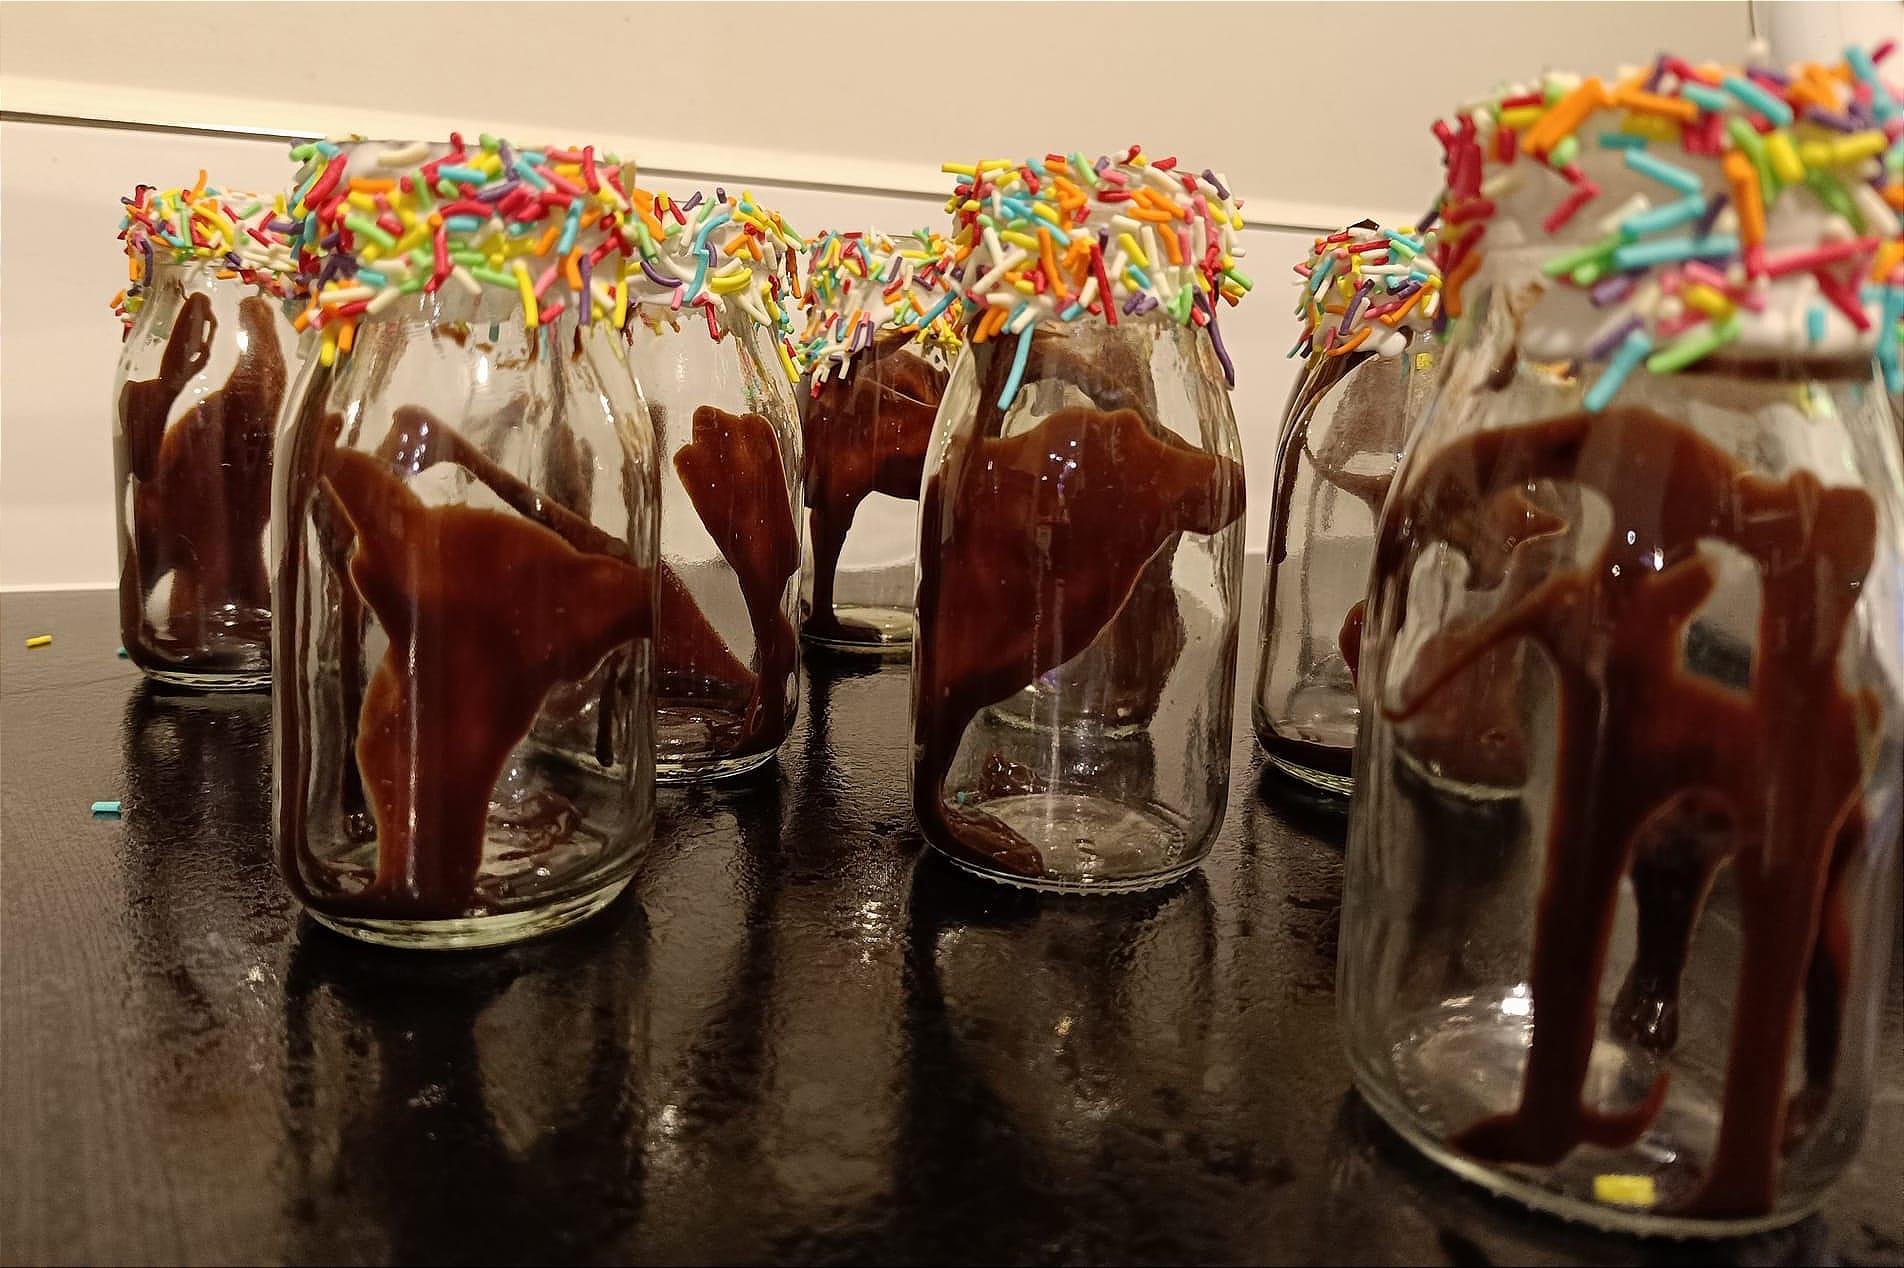
- Next, I swirled a little chocolate ganache inside the bottles. Using a piping bag made this super easy, but a squeeze bottle would work too.
- For the milkshake, I blended vanilla ice cream, a dollop of vanilla essence, and milk until it was smooth and pourable. The ratio I used was roughly 4 cups of ice cream to 1 cup of milk, but you can adjust the milk to get your desired consistency.
- The most exciting part is adding the toppings! I added a mini donut, a chocolate fish, colourful umbrellas (for a splash of fun without extra sugar!), and pretty straws. It wasn't over the top, but the kids thought it looked fantastic!
What I love about food presentation is how you can often create something stunning with very simple ingredients. It's all about how you put it together that makes a world of difference. So go ahead, get creative, and have fun with it! 😄
In The Spotlight - Burgers
A top-notch burger isn't just a treat for your taste buds, it should be a feast for your eyes too! With vibrant colours, varied textures, and exciting flavour combinations, there's always room for creativity.
Let's look at the picture below, I love the simplicity of a simple stacked burger. What makes it look appealing?
- Each layer is visible, showing off the bright array of colours and textures.
- The seeded bun, with a mix of black and white sesame seeds, not only looks fantastic but also adds a delightful crunch.
- The bright colours of the fresh ingredients peek out just enough to tantalise your appetite.
It's not just delicious; it's a work of art.


Burger presentation.
Now, let's look at the bacon and egg burger - what makes this presentation work?
- Skewering it with a knife is the latest trend, adding visual appeal and adding height to the dish.
- The bacon is folded rather than just lying flat - this also adds height but more importantly it adds visual appeal.
- Don't overlook that little sprig of rosemary on the board too - a simple yet elegant touch of green that enhances the overall presentation.
This isn't just a burger; it's a culinary masterpiece that promises to taste as incredible as it looks!
Now let's have a look at burger where the presentation wasn't so successful...

When I first saw it, I thought someone had decided to garnish the bun with spaghetti! On closer inspection, I realised it was a little pile of mung beans.
There's no doubt this burger meal tastes delicious, but the presentation doesn't do it any favours.
So, why didn't it work, and what could have been done to improve it? First off, I'd ditch the mung beans. If they're crucial for the flavour, maybe hide them inside the bun instead. The skewer topped with a cherry tomato is a nice garnish and adds height, but it needs more. A bright green garnish like lettuce, parsley, or even a baby pickle would have been perfect to liven up the look. Another idea could be to replace the skewer with a knife (as in the previous example) and slide the onion rings onto the knife too.
Can you picture how these changes would have enhanced the presentation of this burger? It's not something tricky or time consuming, it's just little tweaks that make a whole lot of difference.
I hope you have fun trying some simple tweaks to your food presentation 😄.
Happy cooking,
Taryn